Let readers reply to your blog posts using their default email app.
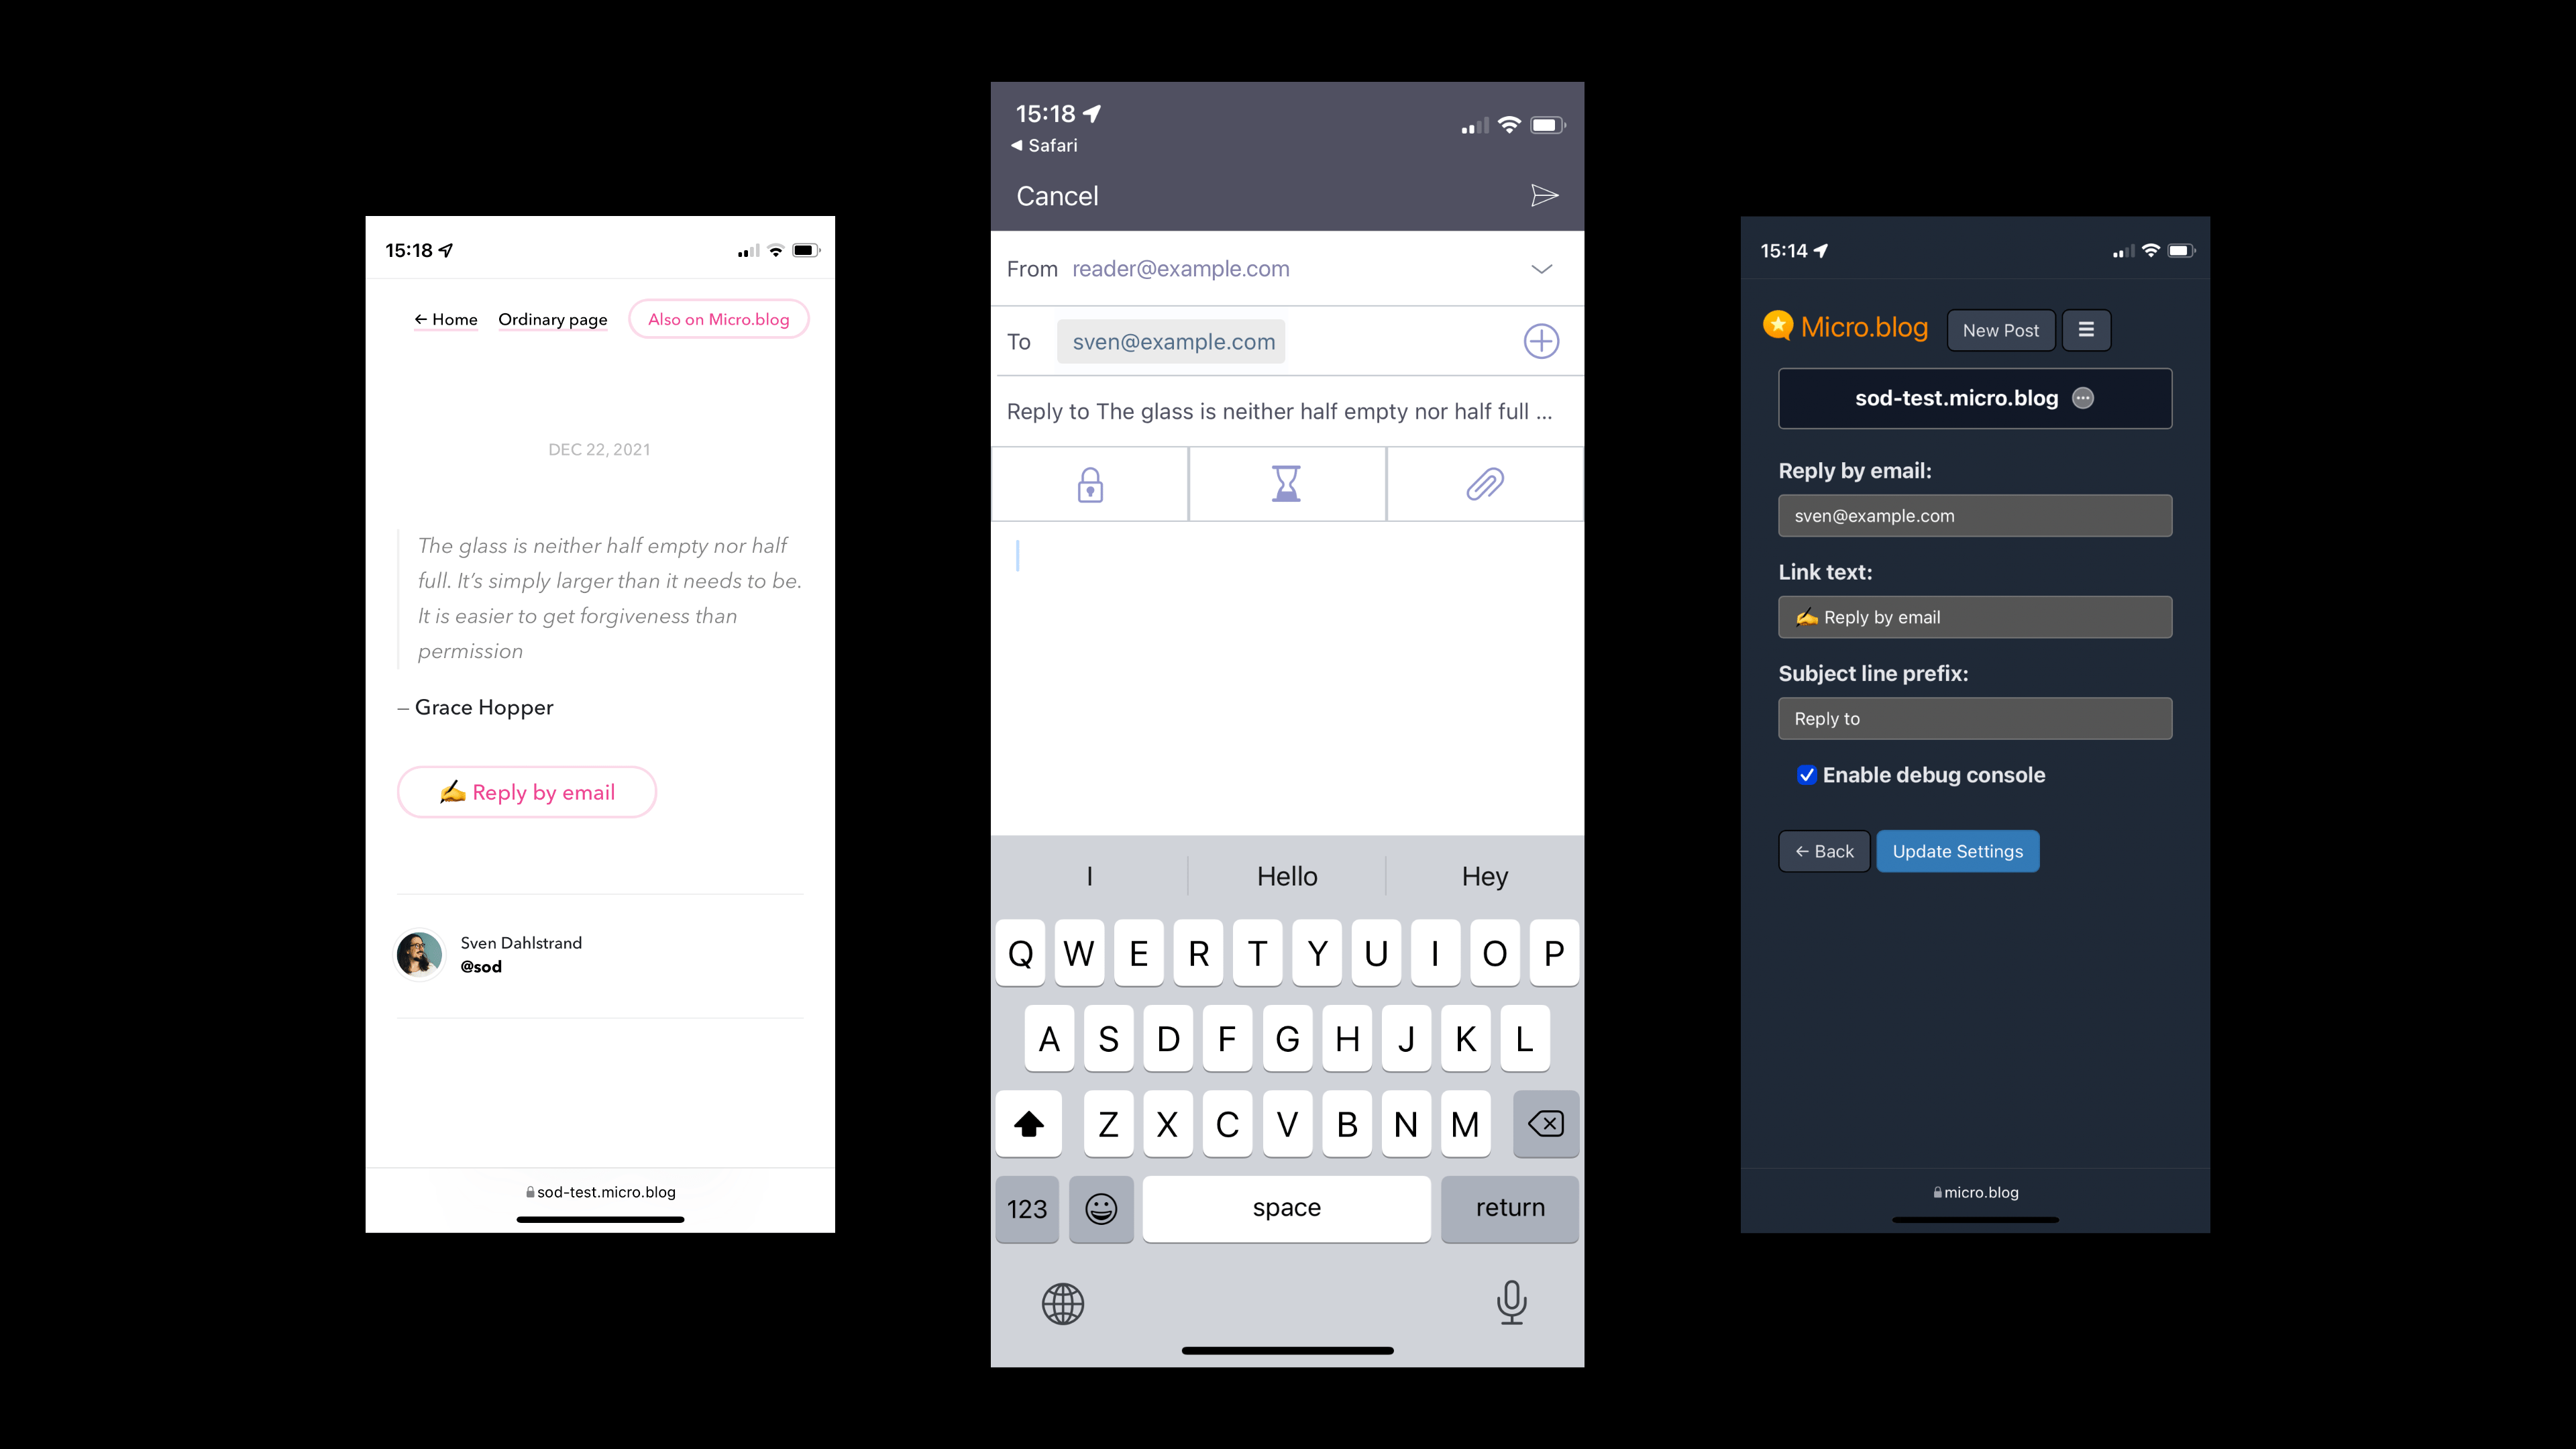
Your blog posts get a Reply by email link with this nifty plug-in. The reader's default email app opens in compose view when they tap that link; your email address and a subject line are already filled in.
To get updates on this plug-in, follow @sod on Micro.blog.
Hey! It's me, Sven. Reply by email and my other plug-ins are passion projects released to the world for free. That said, donations are always welcome if you get value from my work.
💸 Donate $10 or any amount you're comfortable with. Thanks! 🙏
- 🛠 Customizable via plug-in settings.
- ✍️ Change the link text to whatever you want. Go bananas! Use emojis!
- ⛳️ Flexible placement in your theme using a Hugo partial.
- 💌 Subject line is automatically set to the blog post title (or post excerpt, if no title is present).
- 🏷 Optionally prefix the subject line with Reply to or whatever you want.
- 🎁 Customize the look and feel using CSS.
Hello, fellow microblogger! 👋 Thanks for being here. This plug-in is available in the official directory, so the installation process is quick and easy.
- Find Reply by email in the plug-in directory.
- Choose the site you want to install the plug-in to.
- Press Install.
- Congratulations, the plug-in is now installed. On to configuration.
-
Go to Plug-ins and press ⚙️ Settings (next to the Reply by email plug-in).
-
Enter your address in Reply by email.
-
Make other changes as you see fit.
-
Press Update Settings and go to the next step.
Some themes, like Hitchens and Tiny, come with built-in support for this plug-in. If you're on such a theme, skip this step and continue to Make sure the Reply by email link show up.
If your current theme lacks built-in support, you need a custom theme. Maybe you already have one? If not, follow Manton's instructions here.
-
Follow this link or go to Design → Edit Custom Themes.
-
Click on your custom theme. (It's probably named Marfa Custom or something like that.)
-
Click on the template
layouts/post/single.html -
Add this partial call where you see fit:
{{ partial "reply-by-email.html" . }}. A good place is after the content (look for{{ .Content }}in the template). -
Press Update Template and pat yourself on the back.
-
Find a post on your blog and make sure you see the Reply by email link.
-
Click it, make sure it works like expected.
The Reply by email link is delivered to you with minimal markup and styles. Every Micro.blog theme is individual, and this bare-bones approach keeps it flexible. It's up to you to implement a custom look and feel using HTML and CSS. Here's a couple of examples for your inspiration.
There's an easy way to add a space between the Reply by email link and content around it. Just wrap the link in a paragraph. Add the partial call to the template in this way:
<p>{{ partial "reply-by-email.html" . }}</p>That should result in the same amount of breathing space text paragraphs have between them.
On the plug-in ⚙️ Settings page, you can customize the link text. The default Reply by email can be changed to anything you want. You can even use emoji and HTML!
If you install the Font Awesome plug-in you'll get plenty of additional icons to use. Do you want a fancy paper plane next to your text? Save your link text like this:
<i class="fa-regular fa-paper-plane"></i> Reply by emailIf you're comfortable with CSS, there are endless possibilities for styling. And if you're new to CSS, you can still do it! You can learn a lot from @Miraz's excellent tutorials. Start with What you need to know about CSS to customise your Micro.Blog blog.
The Reply by email link is just an a element with the class reply-by-email. I experimented with the CSS below to get a nice hover effect. It's not guaranteed to look good on your blog, though. 😉
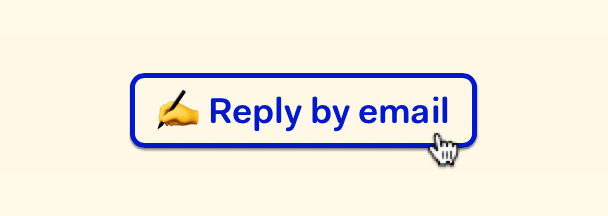
To add custom CSS to a Micro.blog, navigate to Design → Edit CSS.
.reply-by-email {
  border: solid 0.15rem black;
  border-radius: 0.4rem;
  color: black;
  display: inline-block;
  font-weight: bold;
  padding: 0.3rem 0.6rem 0 0.6rem;
  text-decoration: none;
}

.reply-by-email:hover {
  border-color: #011ac5;
  box-shadow: 0 1px 1px rgba(0, 0, 0, 0.5);
  color: #011ac5;
  text-decoration: none;
}Feel free to reach out to @sod on Micro.blog for additional help.