Tutorial walkthrough
This is a tutorial on how to get started with Solid.
This tutorial will cover the basics around Solid data pod and application usage.
All information in this document is based on Node Solid Server release 5.1.x. Things might be different in future releases, and in different Solid implementations.
This tutorial was inspired by https://github.com/solid/userguide.
You will need the following to follow this tutorial:
- Any modern Web browser
In this first step, we're going to register for a new Solid account, which includes a data pod and a WebID. While people are encouraged to self-host their account, there are a few public services available to host such an account, which are useful for quickly testing things.
For this tutorial, we are going to create an account at either https://inrupt.net/ or https://solid.community/. Feel free to choose either one of them.
Registration is quite straightforward. Just click the register button on the index page, and fill in the form.
You can leave the External WebID field empty. This field can be used if you already have a WebID, and you just want to create an new data pod, and link your existing WebID to it. This is out of scope for this tutorial.
After registering, you will obtain a data pod and a WebID.
-
Data pod location:
https://<username>.inrupt.netorhttps://<username>.solid.community -
WebID location:
https://<username>.inrupt.net/profile/card#meorhttps://<username>.solid.community/profile/card#me
These pages should looks something like this:
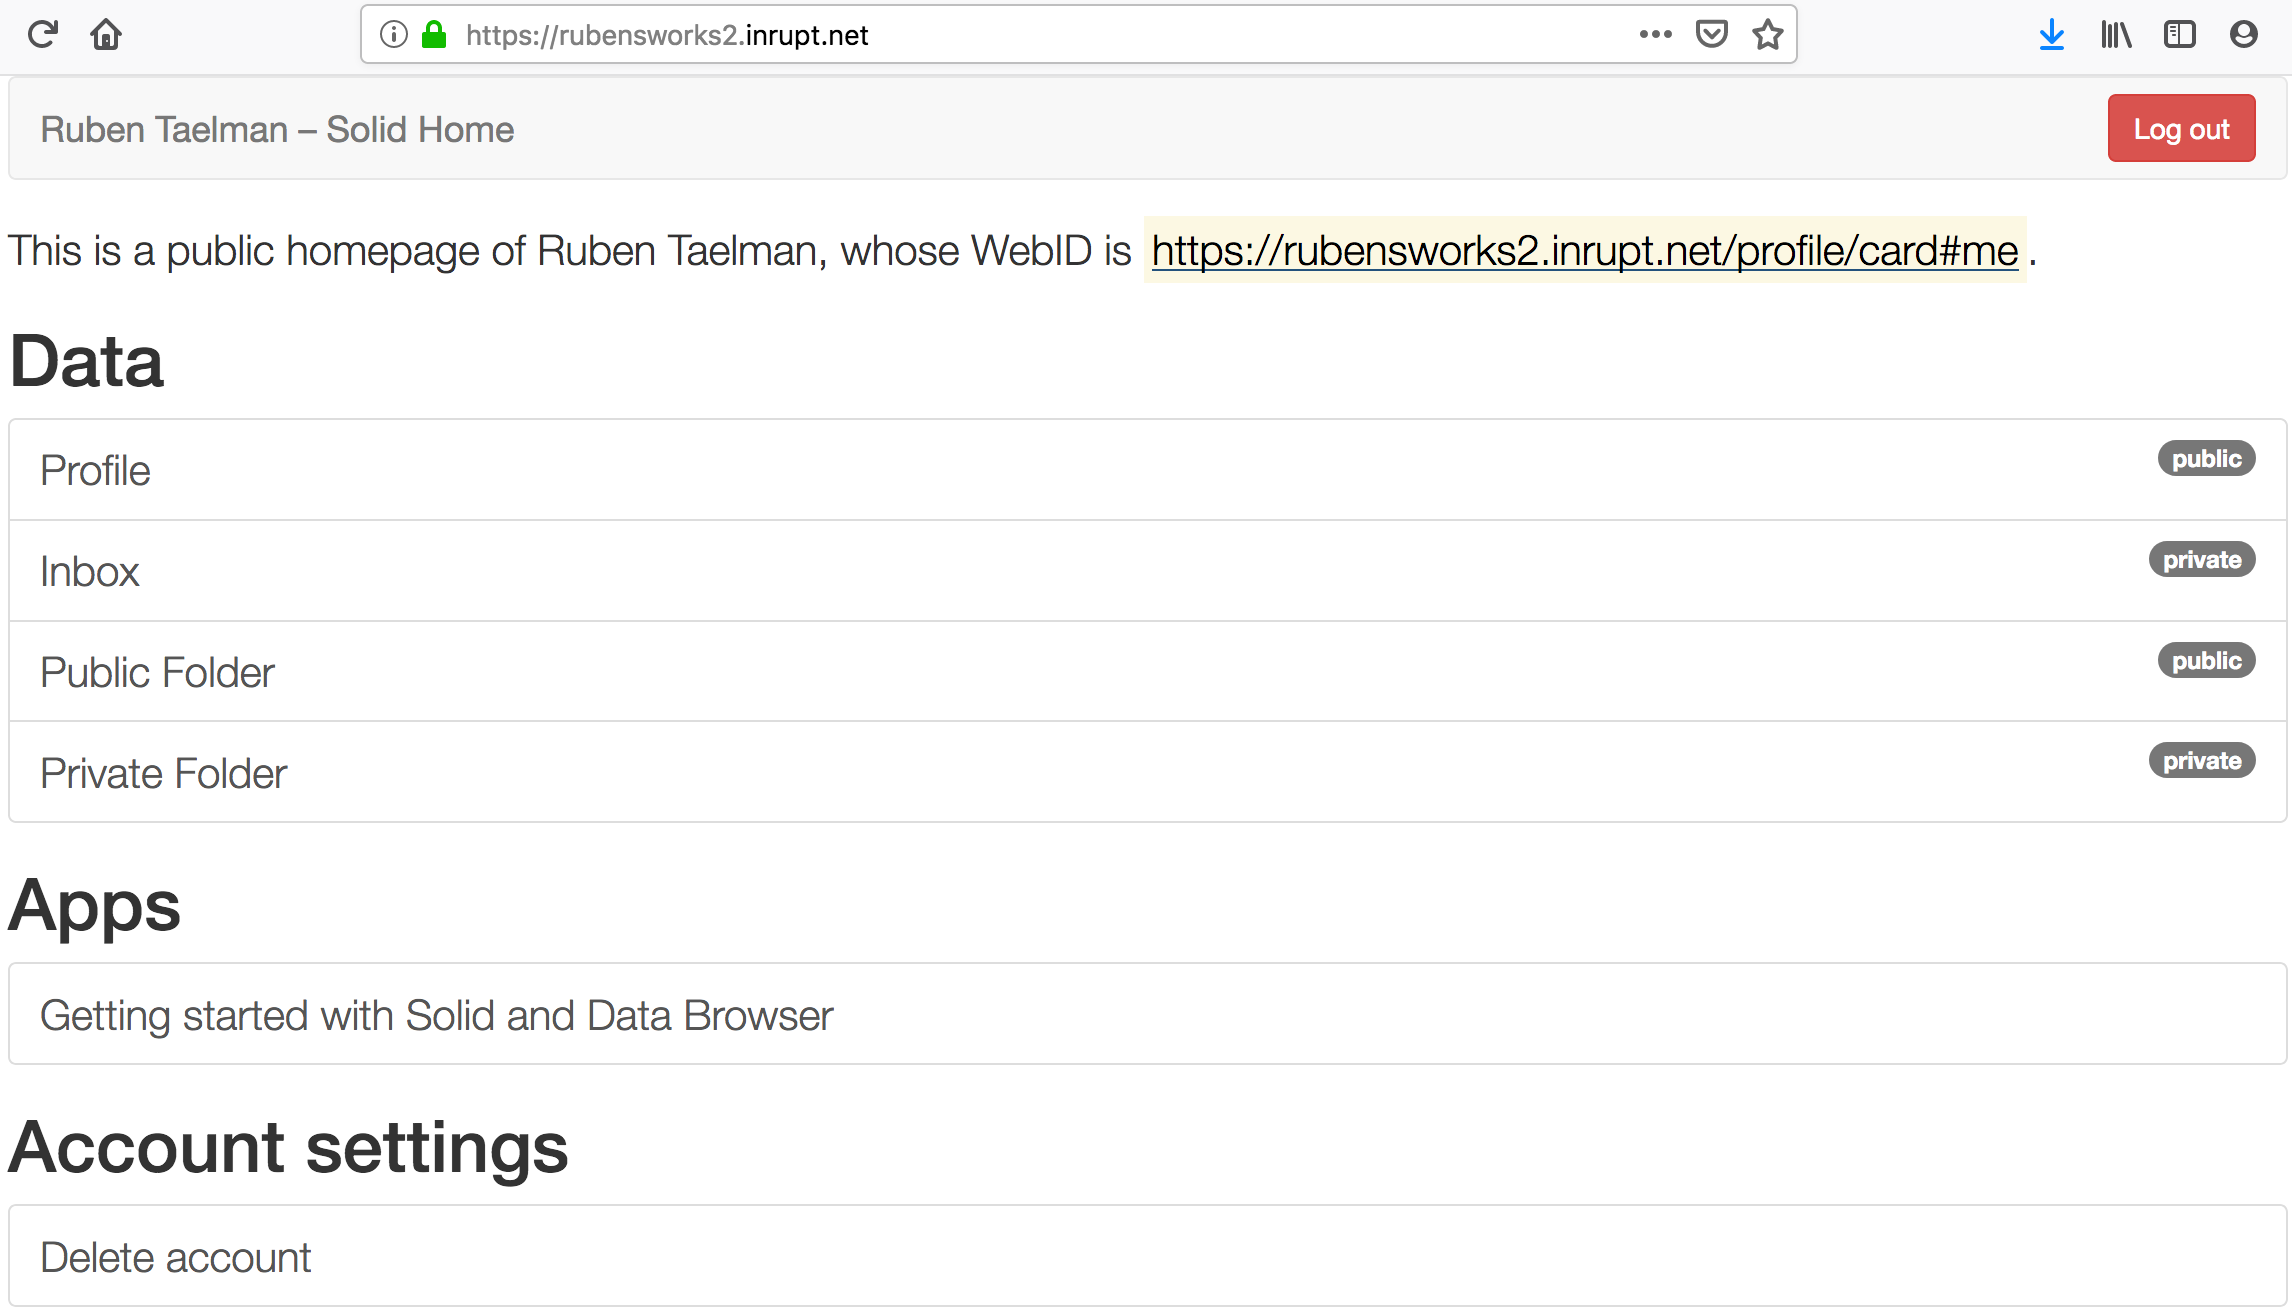
When visiting your data pod or WebID, you will see a Log in button. After clicking it, a popup will open that asks for an identity provider. This allows you to choose where your WebID is located. As the current host is our identity provider, it will be shown as default identity provider, as something like <username>.inrupt.net or <username>.solid.community. After selecting the identity provider, you will be redirected to that provider, which will promt you for the username and password that you just registered with. Once your details are entered successfully, you will be logged in.
Note that you can log in with your WebID on other people's pods and profiles as well. By default, you will only be permitted to modify things in your own pod, unless other people give explicit permissions to you. How this can be done will be explained later in this tutorial.
First and foremost, Solid servers offer Linked Data-aware storage, aimed at machines, so that this data can be used in applications. Node Solid Server goes a step further, and offers human-readable access to data in pods. It does this using mashlib, a client-side data mashup library that is compatible with Solid.
What Mashlib essentially does is, it exposes human-readable access to all files in a pod. It offers many convenience features, such as an online editor and a permissions editor.
Next to that, Mashlib is also a modular platform for plugging in specific panes, which are small applications that can be used on your data. By default, Node Solid Server loads all panes from the solid-panes repository. The most notable panes are:
- Profile: A WebID profile viewer and editor.
- Chat: A multi-user chat application.
- Contacts: A contacts book.
- Dokieli: Editor for scholarly documents.
- Scratchpad: A notebook.
- Meeting: An agenda.
Next, we are going to look at a few of these panes in more detail.
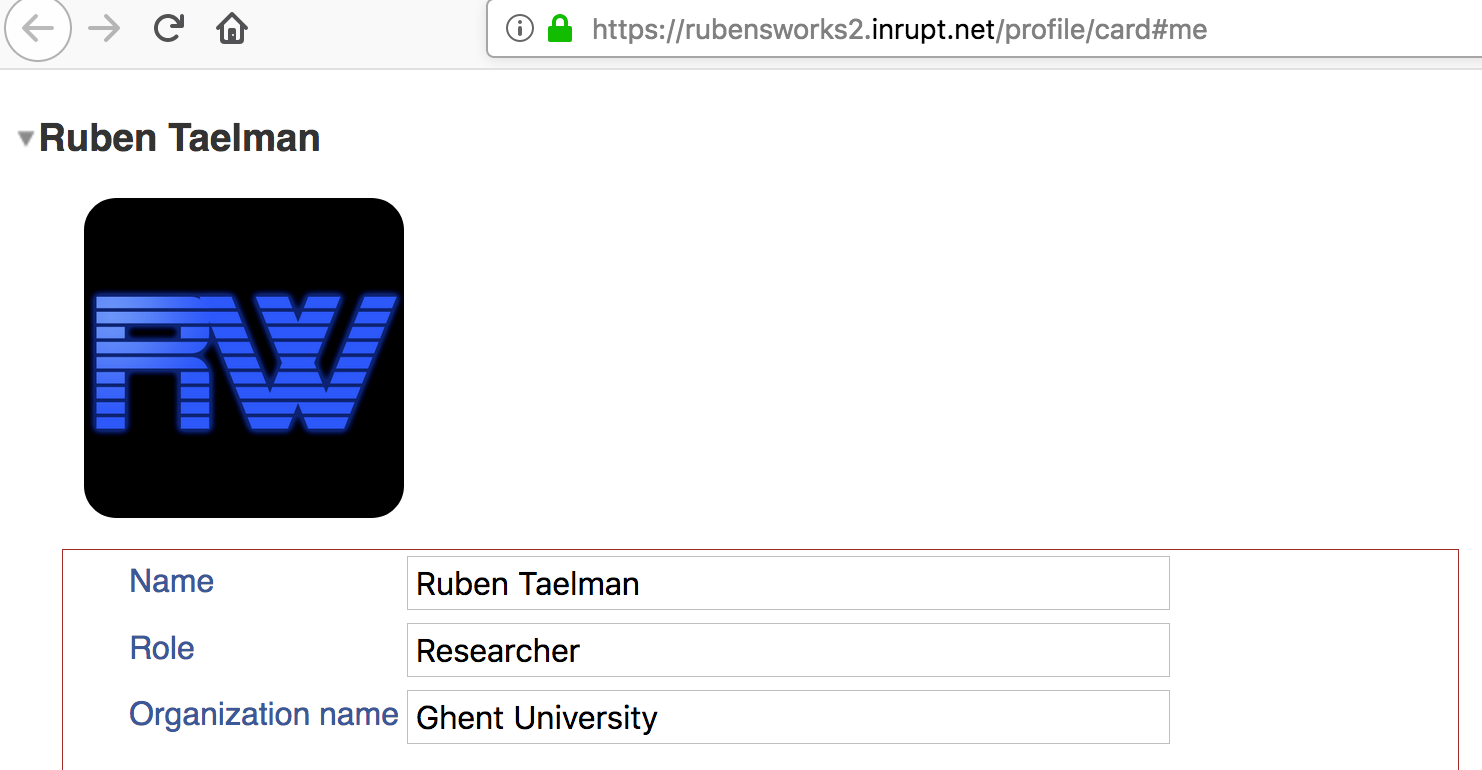
When visiting your profile (https://<username>.inrupt.net/profile/card#me or https://<username>.solid.community/profile/card#me), and after logging in, you will see a form to update your personal information.
Like most panes in mashlib, data is automatically saved when the form is updated, and things can be added through drag-and-drop. Furthermore, mashlib will add several panes to your profile, which can be opened by hovering over the top of your page. The most notable panes are the following:

- Profile: A profile viewer, and editor for basic information
- Friends: A friends editor.
- Source: A raw Turtle-based editor.
- About: A human-readable version of all RDF in your profile.
- Editor: A detailed profile editor.
- Apps: Managment for application permissions.
For example, try updating your basic information and your profile picture (by dragging an image in from your file system). And try adding some friends by dragging in WebID URLs.
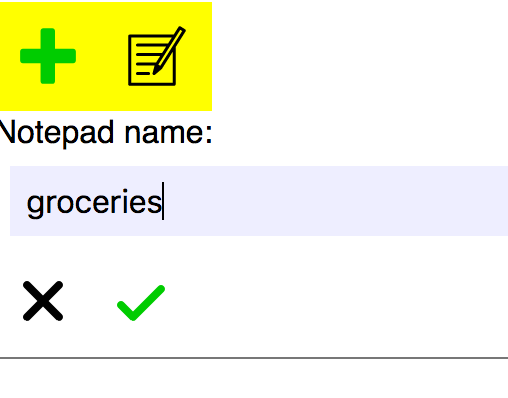
The notepad is a pane that allows you to quickly scribble down some notes, such as a groceries list. Based on Solid's sharing capabilities, you can allow other people to read and/or write to this note.
Let's try creating such a notepad for our groceries inside our public folder (https://<username>.inrupt.net/public or https://<username>.solid.community/public).
Now, you can add notes to this file. Lines will automatically be saved.
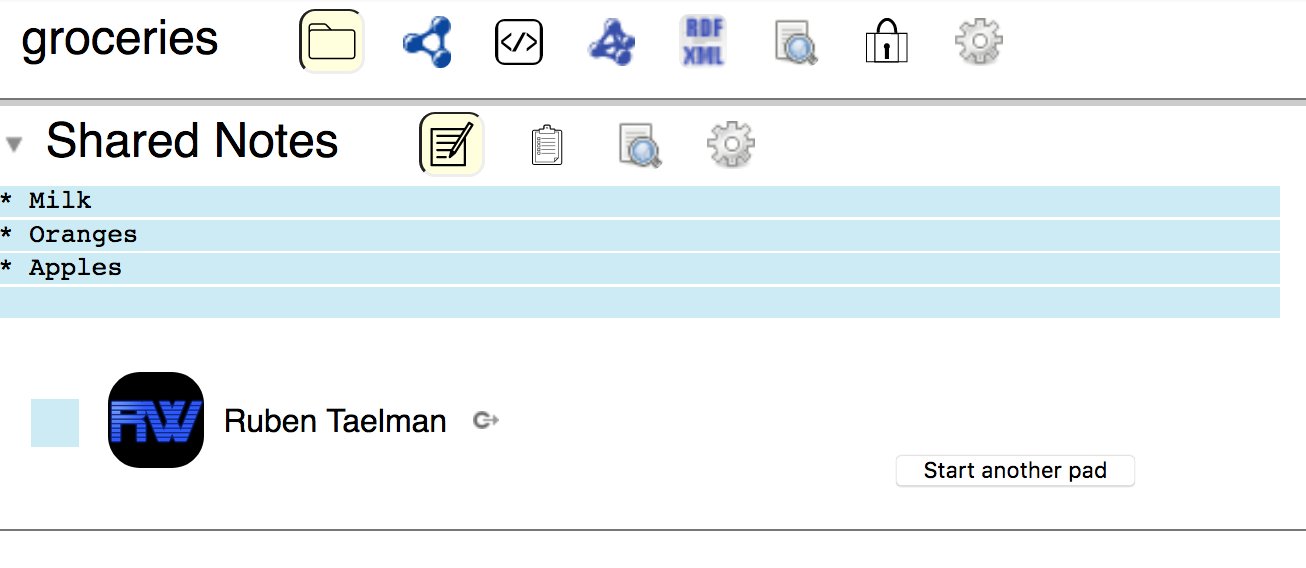
Since this file is part of your public folder, everyone will be able to read this file by default. Try this out visiting someone else's notepad, such as https://rubensworks2.inrupt.net/public/groceries/. You can edit these permissions to allow other people to edit this file, which will be explained later in this tutorial.
In this step, we are going to create a raw RDF file, and tweak its permissions a bit to allow anyone to append triples to this file.
We are going to create this file in our /public folder, which will allow everyone to read our file by default.
For this, navigate to your /public folder (https://<username>.inrupt.net/public or https://<username>.solid.community/public), click the green + symbol, followed by the </> symbol (indicates a raw file). You can give the file any name you want, we are going to use file.ttl.
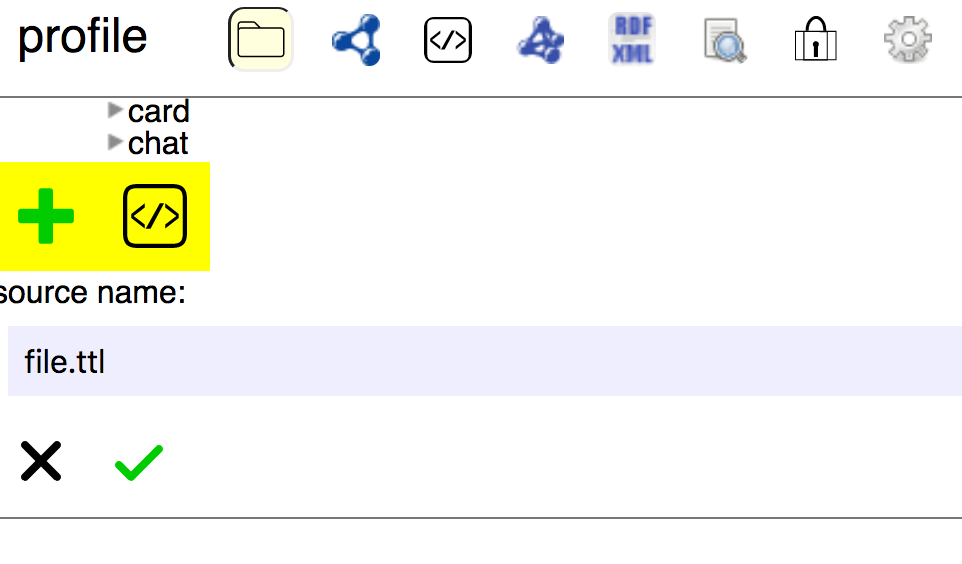
As the Node Solid Server is a Linked Data Platform, it will automatically recognize RDF files, and enable additional things with them, such as file validation and enchanced viewing.
For example, try editing the file (click the pencil icon) by entering an invalid Turtle string, such as .... When saving (click the checkmark symbol), you should see a syntax error.
Instead of invalid content, let's try to insert something more valuable, such as:
@base <http://example.org/> .
@prefix rdf: <http://www.w3.org/1999/02/22-rdf-syntax-ns#> .
@prefix rdfs: <http://www.w3.org/2000/01/rdf-schema#> .
@prefix foaf: <http://xmlns.com/foaf/0.1/> .
@prefix rel: <http://www.perceive.net/schemas/relationship/> .

<#green-goblin>
    rel:enemyOf <#spiderman> ;
    a foaf:Person ;    # in the context of the Marvel universe
    foaf:name "Green Goblin" .

<#spiderman>
    rel:enemyOf <#green-goblin> ;
    a foaf:Person ;
    foaf:name "Spiderman", "Человек-паук"@ru .
Note that other RDF serializations such as RDF/XML and JSON-LD are also supported.
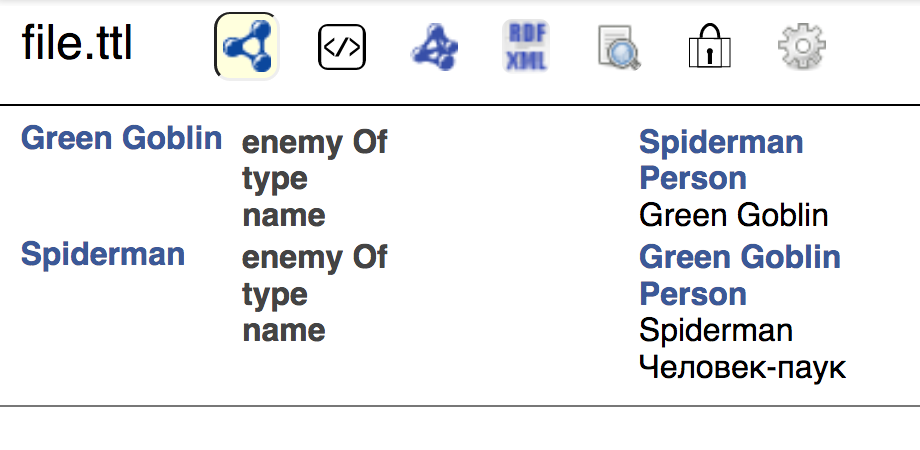
If you now refresh the page after updating the file with valid Turtle contents, you should see some additional panes.
The first pane will show you a human-readable version of the triples in our document, where all links are clickable.
Note that Node Solid Server supports content-negotiation on RDF files. As such, you can request this file in other RDF serializations by executing the following commands:
$ curl -H 'Accept: text/turtle' https://rubensworks2.inrupt.net/public/file.ttl
$ curl -H 'Accept: application/ld+json' https://rubensworks2.inrupt.net/public/file.ttlSince our file was created inside the /public folder, the permissions for this file are inheritted from this folder, which allows anyone to view this file, even when they are not logged in.
These permissions are handled using <filename>.acl (access control list) files, which follow the WAC specification. In summary, WAC allows agents (referred by WebID) to be linked to certain modes of access. At the time of writing, WAC supports the following modes:
- Read: HTTP
GETandHEADrequests. - Write: HTTP
PUT,POST,PATCHandDELETErequests. - Append: Append-only variant of Write.
- Control: Read and Write permissions to the
.aclfile itself.
For example, let's view the WAC file our public folder by appending .acl to our URL. (https://<username>.inrupt.net/public/.acl or https://<username>.solid.community/public/.acl)
In here, you can see that you have read, write, and control rights, and everyone else has read rights.
In most cases, you won't have to edit these .acl files manually.
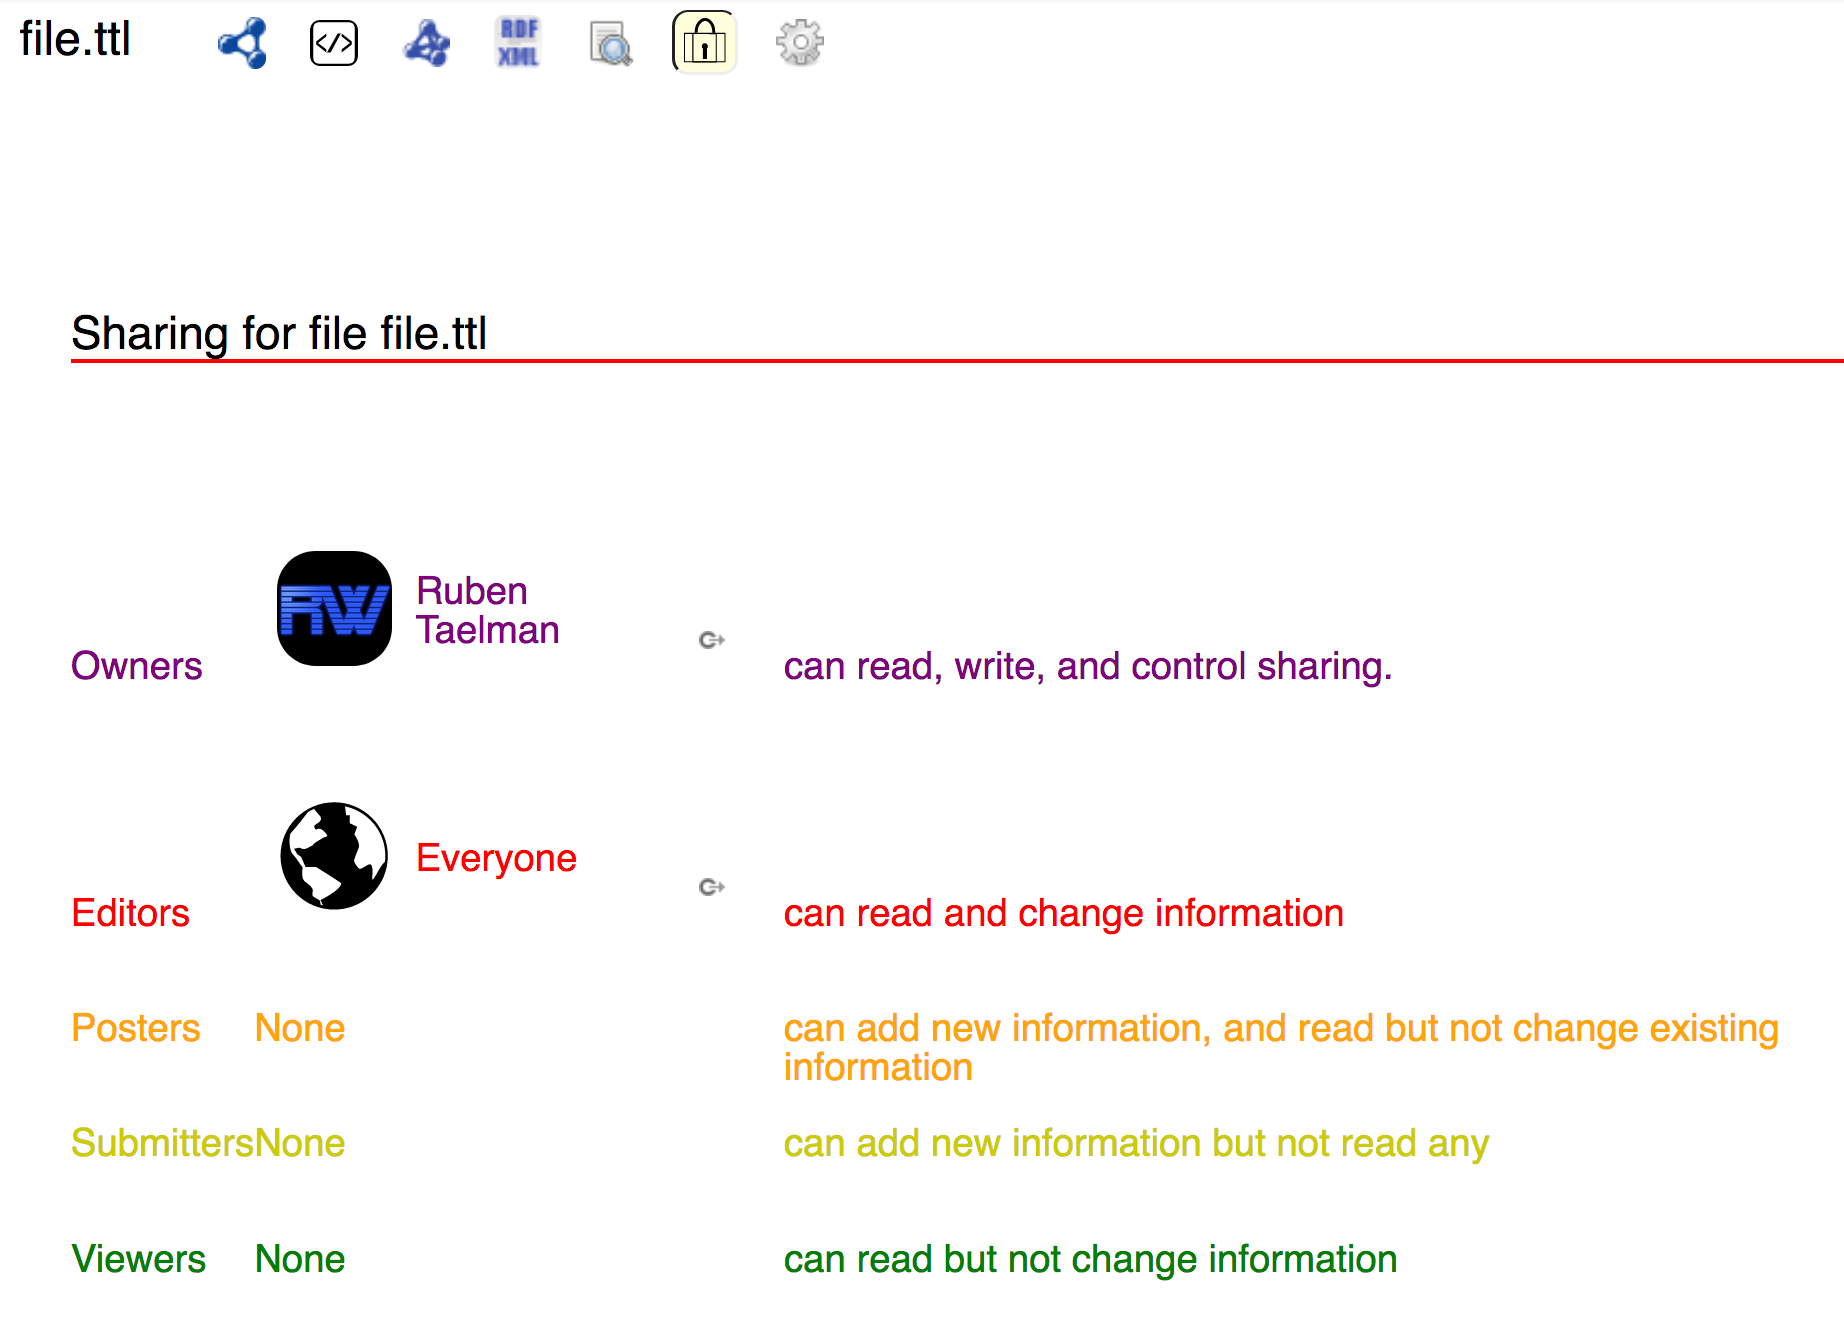
If we go back to our file (https://<username>.inrupt.net/public/file.ttl or https://<username>.solid.community/public/file.ttl), you will see a briefcase symbol that will open a sharing pane, which allows you to edit WAC files via a GUI.
By default, our file has no dedicated .acl file, and inherits permissions from the folder above.
When clicking on the Set specific sharing for this file button, an .acl file will be created with the default settings, and you will now be able to edit them.
Like most panes, this sharing pane uses a drag-and-drop interface. This allows you to drag WebIDs to other modes of access, or drag in URLs for other WebIDs. For now, try dragging Everyone to Editors to allow everyone to Read and Write by default. Depending on the use case, other modes of access may be more useful. For example, the Posters group may be more valuable for a chat application, while the Submitters group may be more useful for an e-mail-like inbox.
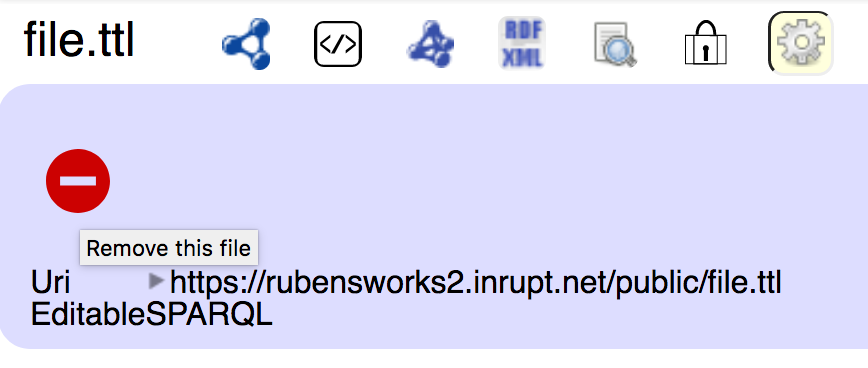
A recent update in Node Solid Server removed the deletion feature from the Web UI. Files can now only be changed through DELETE requests.
Finally, the settings pane allows you to delete files from the gui.
If you have the proper permissions (Write), you will be able to press red removal button.
After confirming, the file (and its optional .acl file) will be removed.
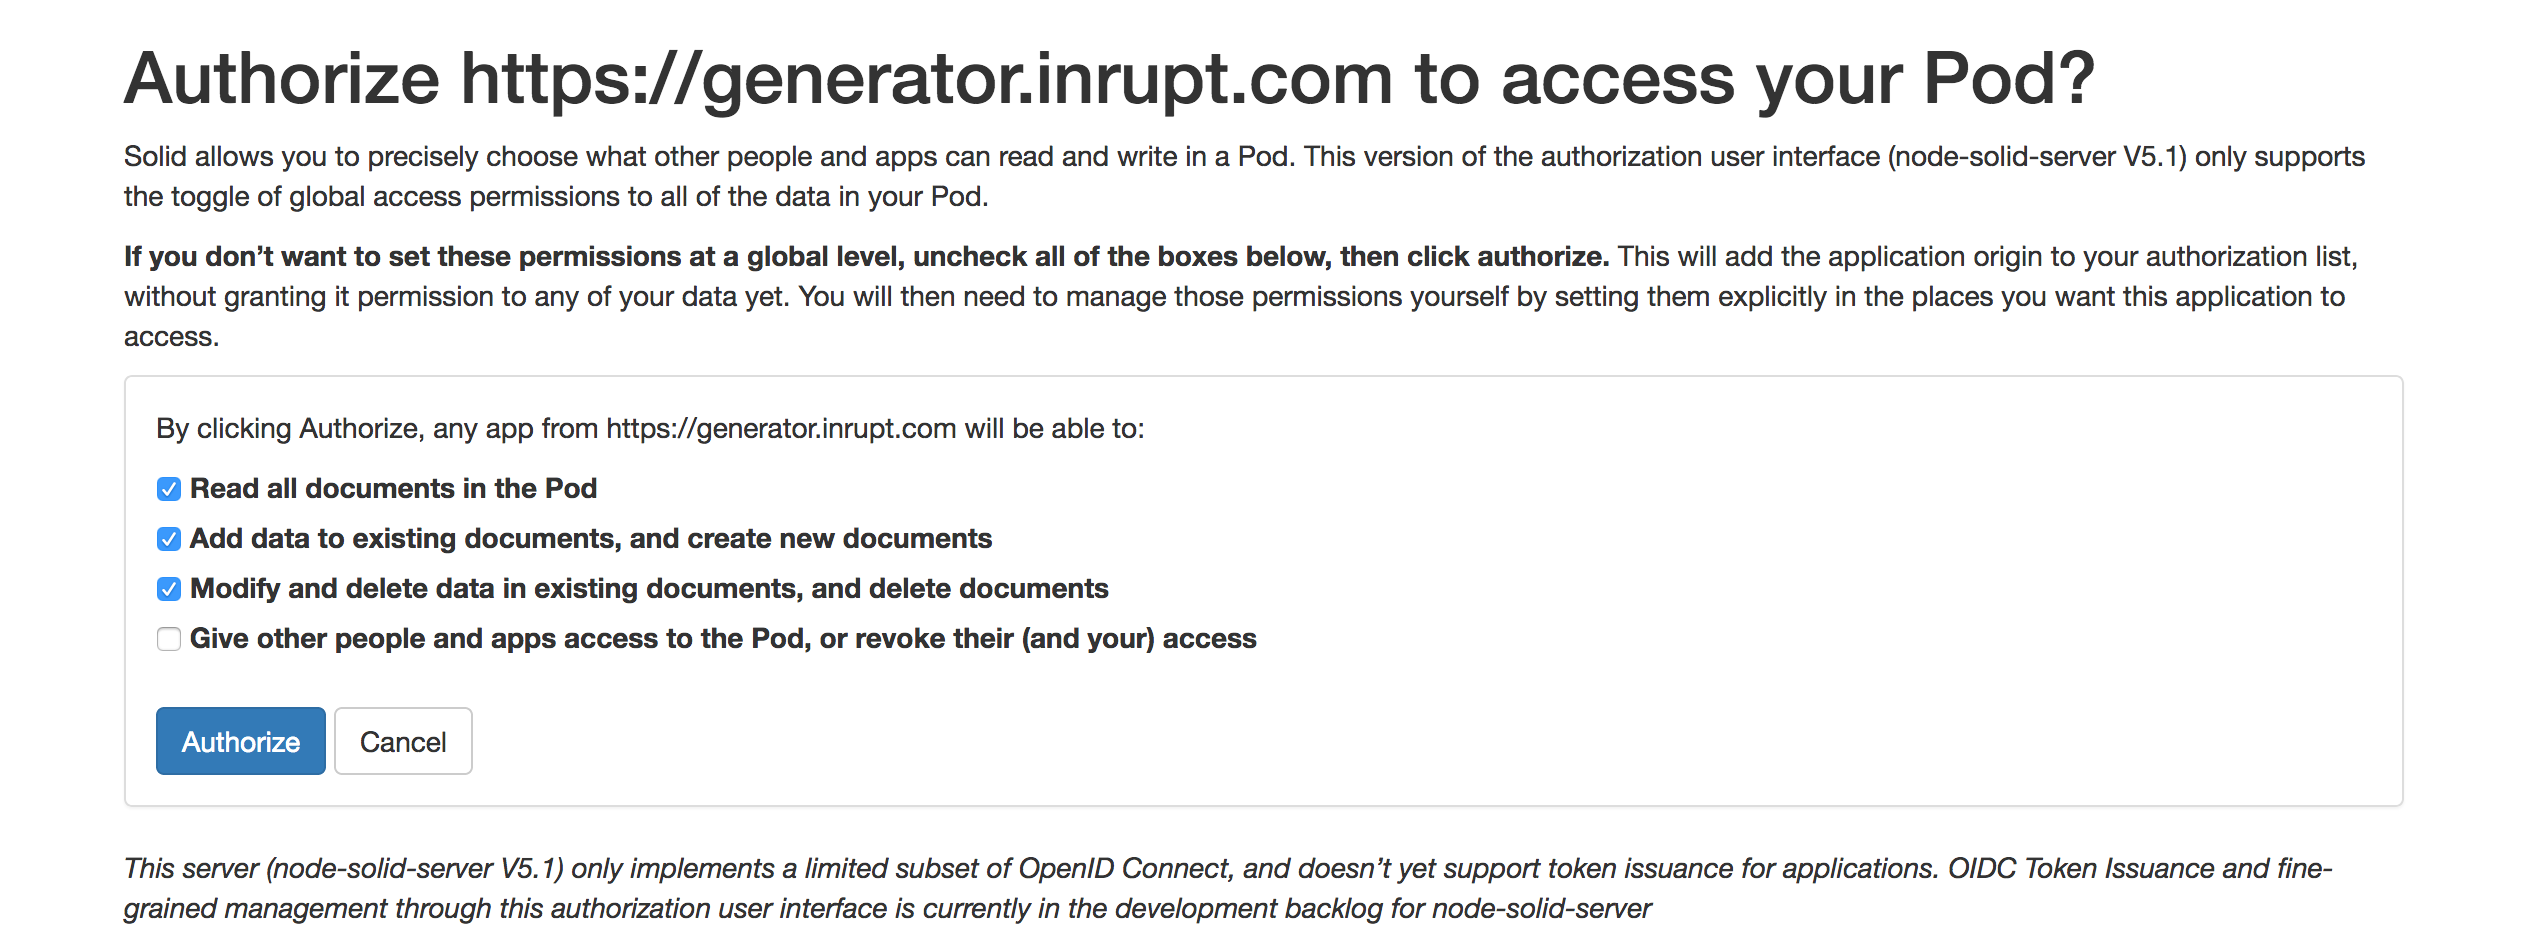
A recent addition to the WAC spec is the ability to give explicit permissions to applications you are using. By default, applications will never be able to do more than you can, but this feature allows you to specify more fine-grained permissions per application. These permissions can be changed or revoked at any time.
While this information is also contained in .acl files,
the Node Solid Server offers a more convenient GUI to manage this.
When you start using a new Solid application, your WebID provider will prompt you once with a permissions dialog like the following:
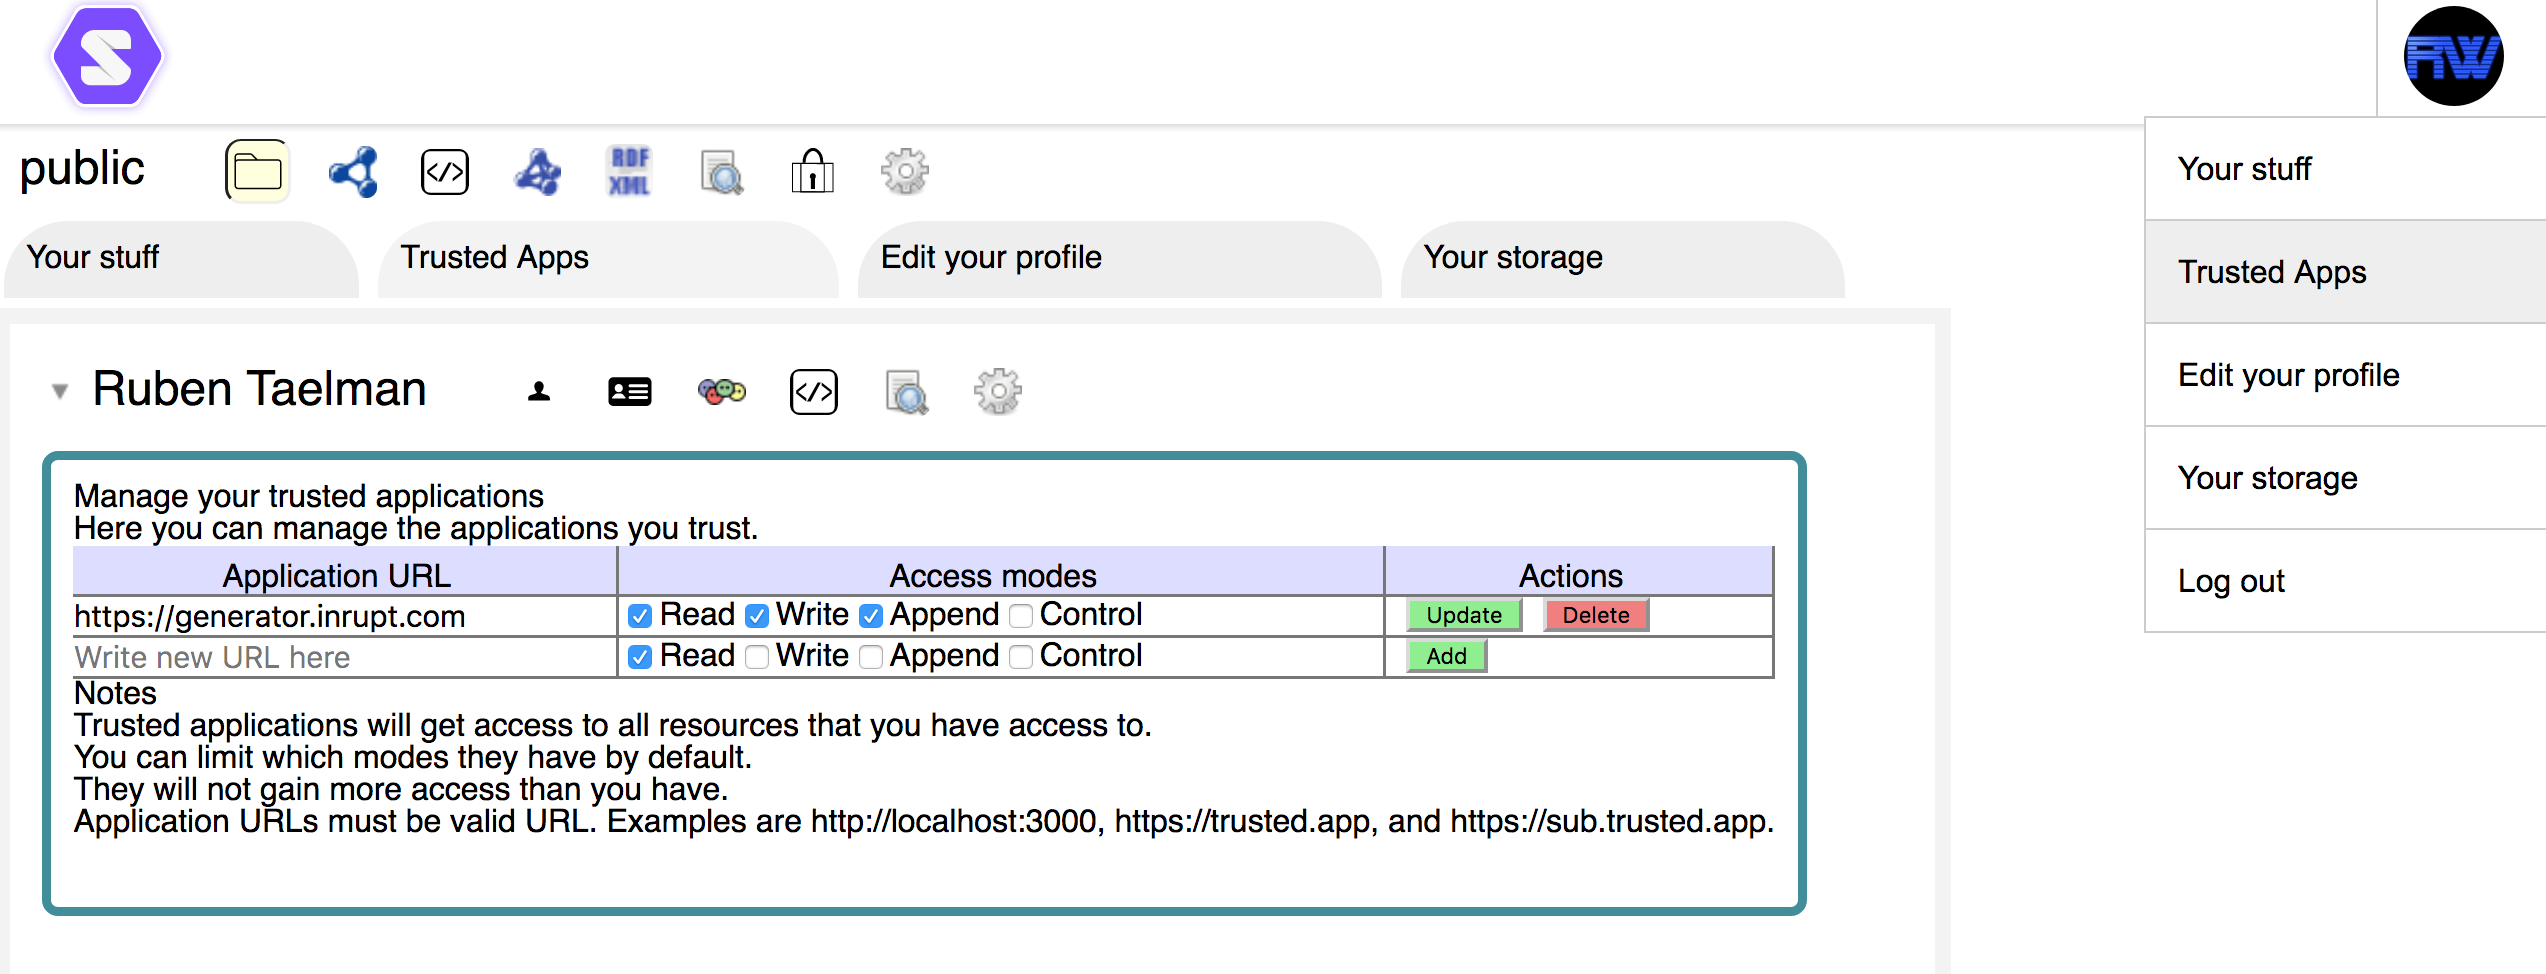
Afterwards, you can alter the permissions for all your apps from your data pod:
Below, you can several examples of Solid apps. All of them are open-source, and are good references for building Solid apps yourself.
https://otto-aa.github.io/solid-filemanager/ is a simple Web-based filemanager for you Solid data pod. It is a great example of the capabilities of Solid apps, where the data resides in your pod, and the application simply uses that data.
This application can be used to view public data, for accessing private data or editing/creating files you need to log in.
https://pheyvaer.github.io/solid-chess/ is a Solid-based multiplayer-enabled chess game. It allows you to invite your friends to a chess game, and play in real-time or non-real-time. It uses notifications and WebRTC to support the turns.
A list is being maintained of all Solid apps: https://github.com/solid/solid-apps