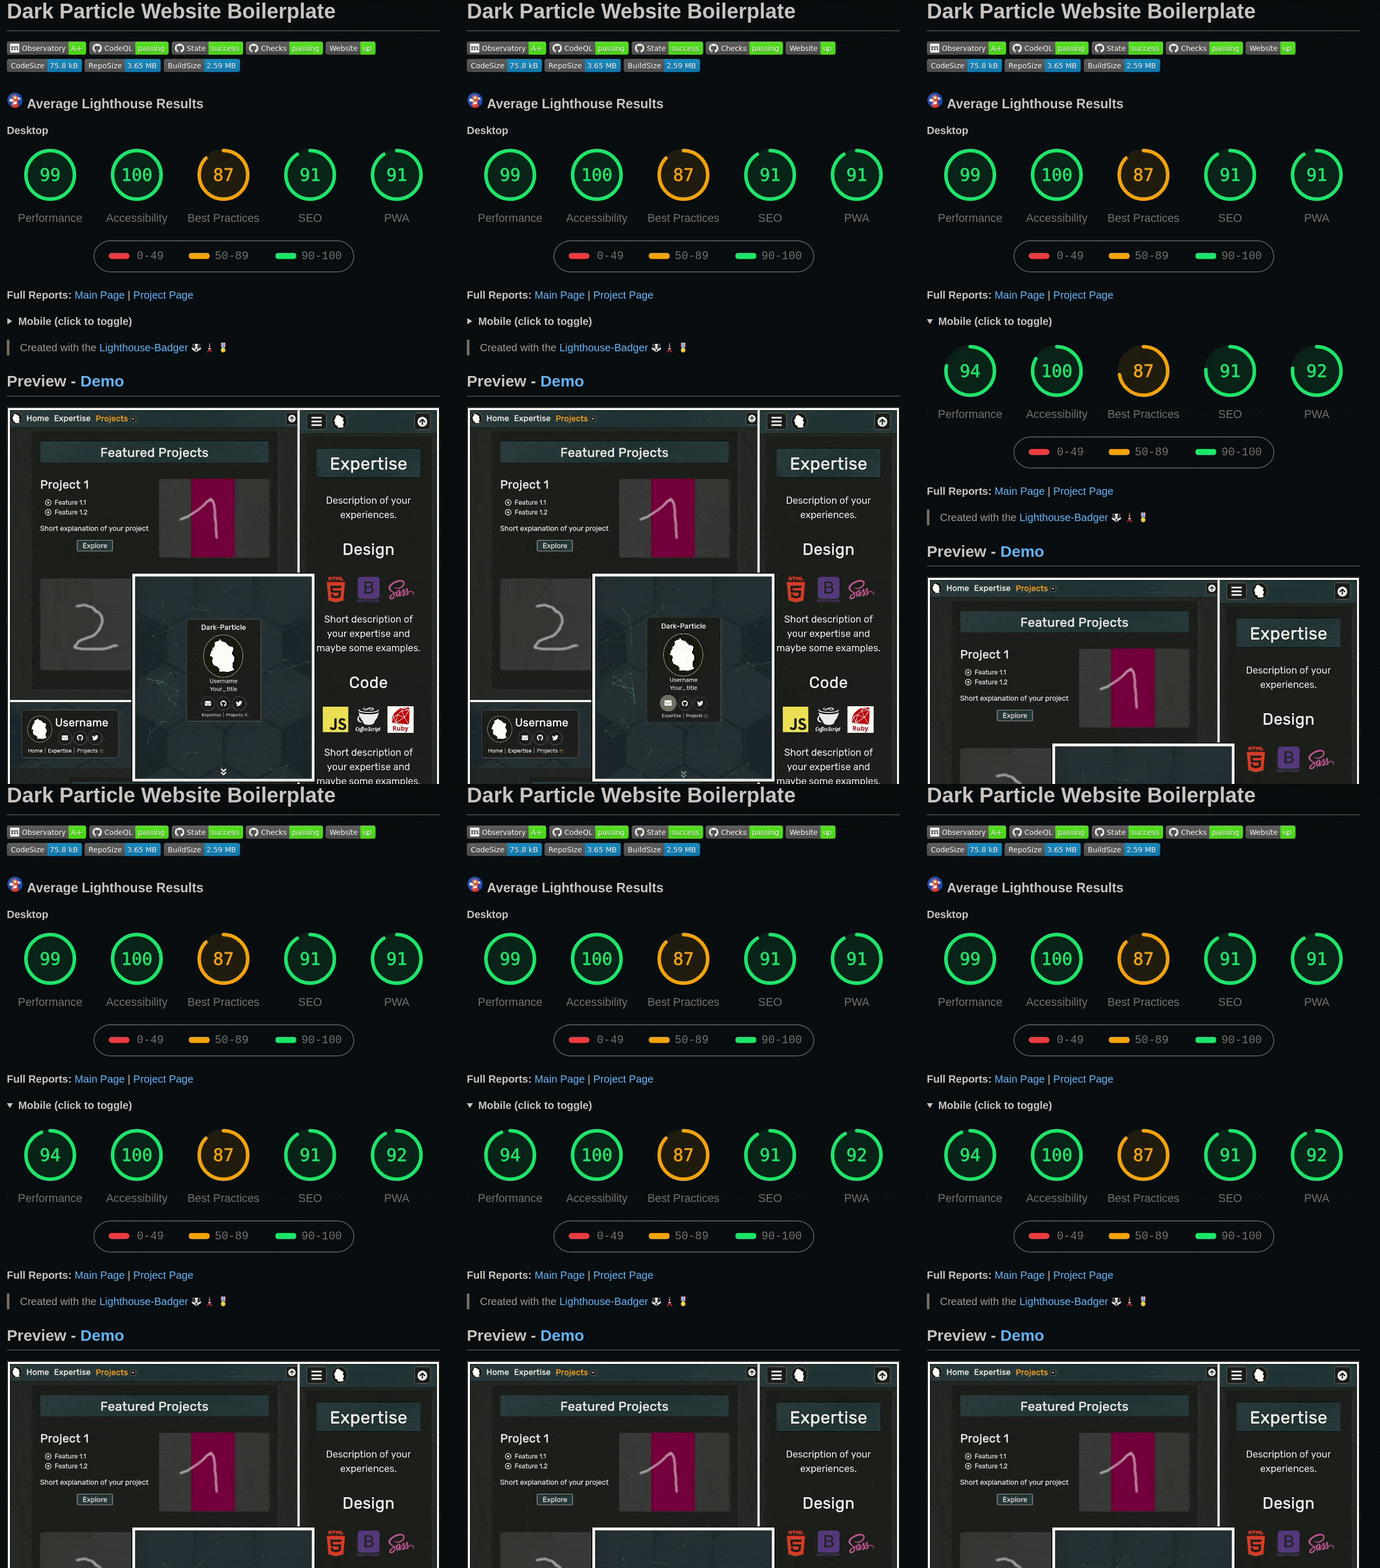
The Lighthouse-Badger GitHub action makes it easy to manually/automatically generate, add and update Lighthouse badges and reports from one/multiple input URL-group(s) to one/multiple target repo(s)/branch(es) in parallel.
Once you have it set up, you only need to add the links to the results once in your use case (e. g. Github readme, website,...). The Lighthouse-Badger will then automatically keep the results up to date for you. So sit back and let the Badger do the job 😉.
Warning: Don't embed your SVG badge files via URLs containing content hashes from GitHub. Otherwise, your badges will not automatically update in your use case [more info].
I, Sitdisch, created the Lighthouse-Badger because I needed a GitHub action that would automatically update my Lighthouse badges and reports on a regular basis and I haven't found a suitable solution.
The badge creation is based on the Lighthouse-Badges repository [License: MIT; Copyright: © 2018 Emanuele Mazzotta; Changes: made] and the pagespeed badge on the Readme-Pagespeed-Insights repository [License: Apache-2.0; Copyright: © 2021 Ankur Parihar; Changes: made]. Check out both. They are magnificent and maybe better suited for your use case than the Lighthouse-Badger.
Last but not least, everything is based on the extraordinary work of the contributors to the GoogleChrome/lighthouse repository [License: Apache-2.0] "Chapeau!".
P.S. the badger and military medal icon are from the googlefonts/noto-emoji repository [License: Apache-2.0].
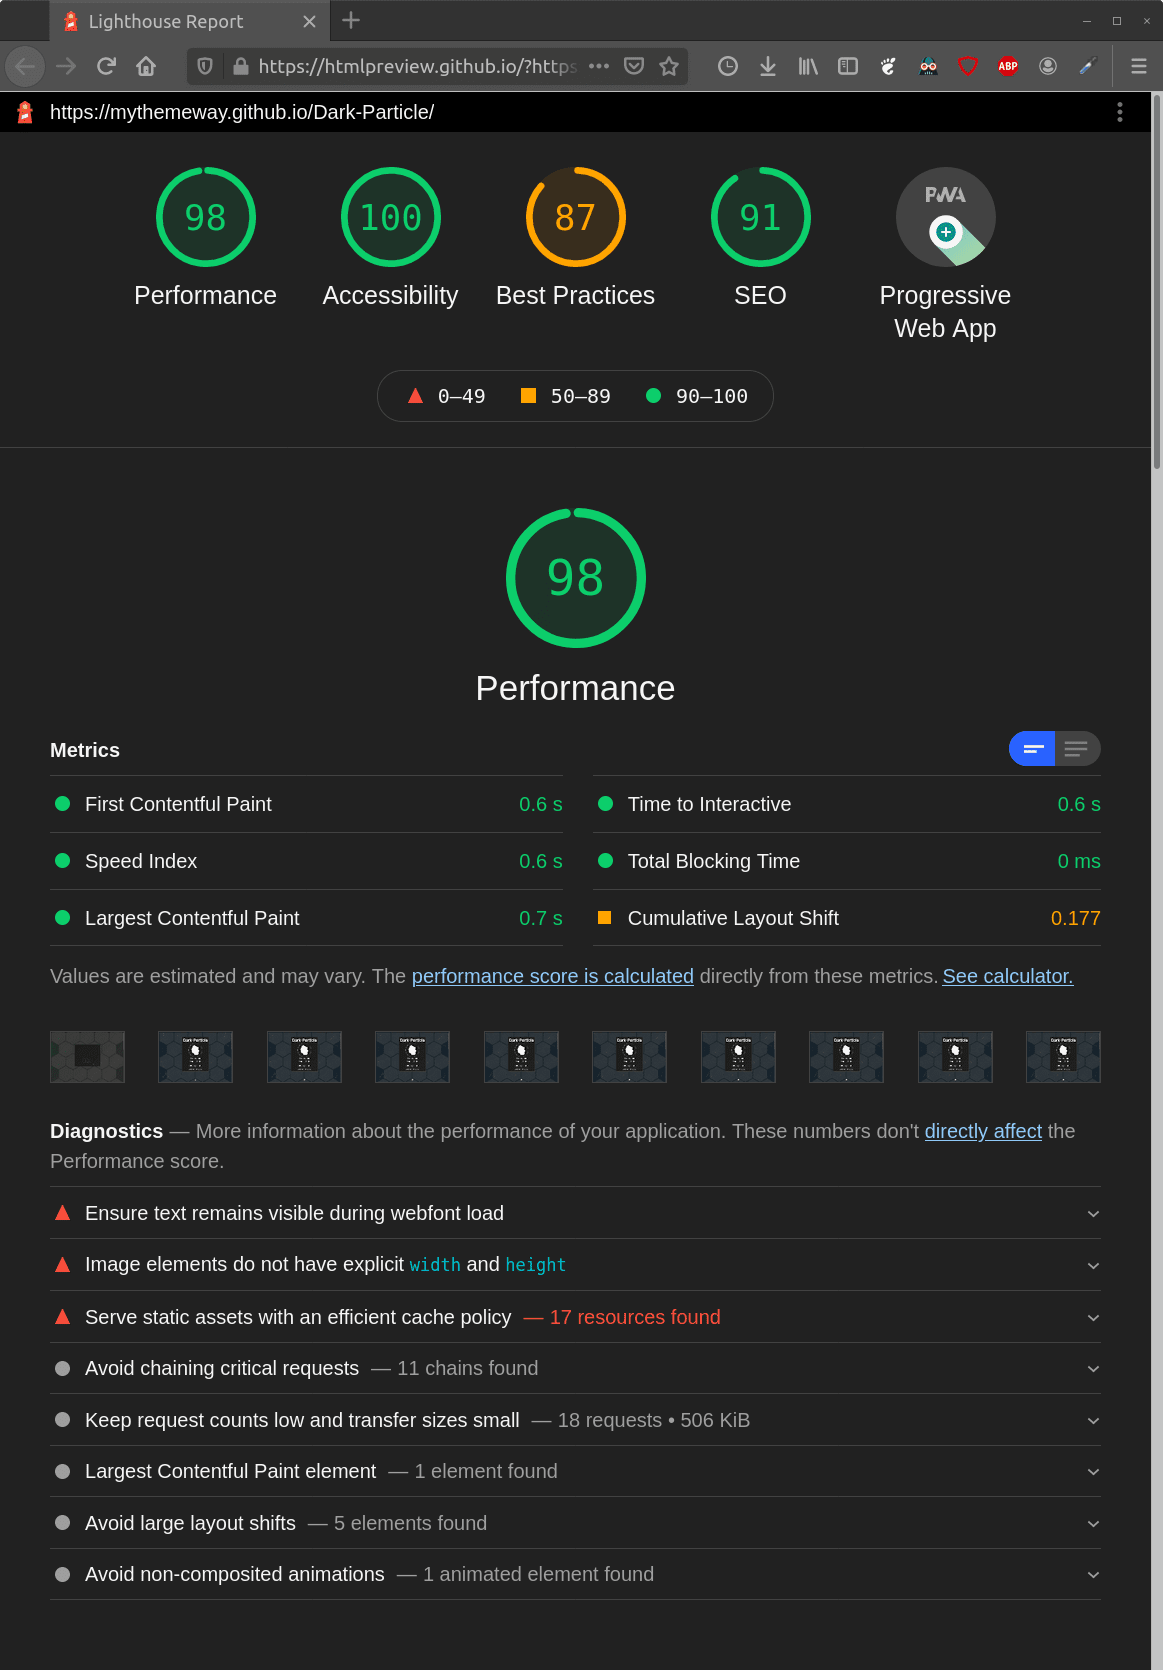
The awesome htmlpreview.github.com repository makes it easy to show up your Lighthouse reports instantly rendered. Just put this https://htmlpreview.github.io/? before the URL where you placed your Lighthouse report e. g. https://htmlpreview.github.io/?https://github.com/sitdisch/cloud/blob/master/lighthouse_results/dark_particle/desktop/mythemeway_github_io_dark_particle_.html
Examples: Main Page | Project Page
First, choose a workflow file:
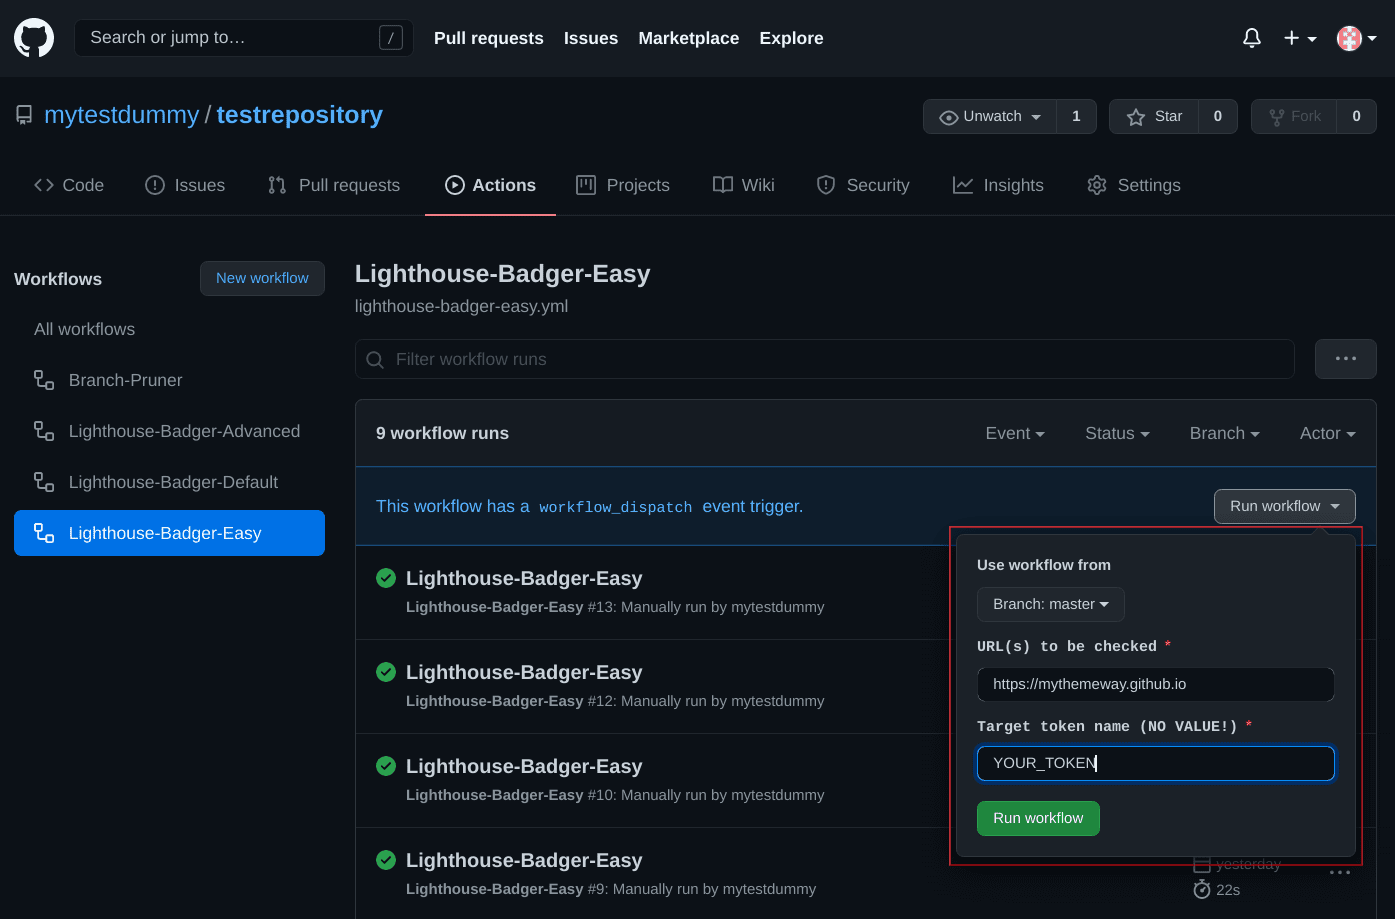
Generates, adds & updates manually/automatically Lighthouse badges & reports from one/multiple input URL(s) to the current repository & main branch with minimal settings.
Set it up (click to toggle)
1. add the lighthouse-badger-easy.yml workflow file to a repository
it has to be the target repository where you want to add the Lighthouse results (this is not the case with the other workflow files)
the path has to be
.github/workflows/lighthouse-badger-easy.yml
2. create a new encrypted repository secret
give the secret a name e. g.
LIGHTHOUSE_BADGER_TOKENthe value of the secret must be the value of the Personal Access Token (PAT) for the repository where you want to add the Lighthouse results
procedure for creating a PAT (fine-grained) or a PAT (classic)
select only the minimum scopes and permissions required
PAT (fine-grained): repository permissions
contents => access: read and write
metadata => access: read-only
PAT (classic): e. g. repo
CONSIDER: PAT expiration requires you to regenerate the PAT and set it as the secret's value again
add the secret to the same repository where you added this workflow file
3. adapt your lighthouse-badger-easy.yml file
3.1 for manual triggers
you don't have to adjust anything in the workflow file; just use it
3.2 for all other triggers
adapt this section:
############################################################## # DEFINE YOUR INPUTS AND TRIGGERS IN THE FOLLOWING ############################################################## # INPUTS as environmental variables (env) env: URLS: # URL(s) to be checked e.g. 'https://github.com/sitdisch https://github.com/mythemeway' TOKEN_NAME: # target token name e.g. 'LIGHTHOUSE_BADGER_TOKEN' # TRIGGERS on: # page_build: # schedule: # - cron: '55 23 * * 0'CONSIDER:
INPUTS:
you only have to define
URLSandTOKEN_NAME;
TOKEN_NAME: never enter the actual value of the personal access tokenTRIGGERS:
page_build: Lighthouse results are generated every time after the GitHub page is built
schedule:
e. g.
cron: '55 23 * * 0'executes the Lighthouse-Badger every Sunday at 23:55you can check your inputs here
hidden defaults (changeable with the other workflow files):
target repository & branch: Repository with this workflow file and main branch
outputs:
badges: pagespeed.svg
reports: yes
output-paths:
lighthouse_results/mobile
lighthouse_results/desktop
audit types:
mobile:
- parameters: '--throttling.cpuSlowdownMultiplier=2'
desktop:
- parameters: '--throttling.cpuSlowdownMultiplier=1'
other settings:
user who commit: github-actions[bot]
user e-mail address: 41898282+github-actions[bot]@users.noreply.github.com
commit message: Lighthouse-Badger[bot]: Results Added
That's it. Happy audits.
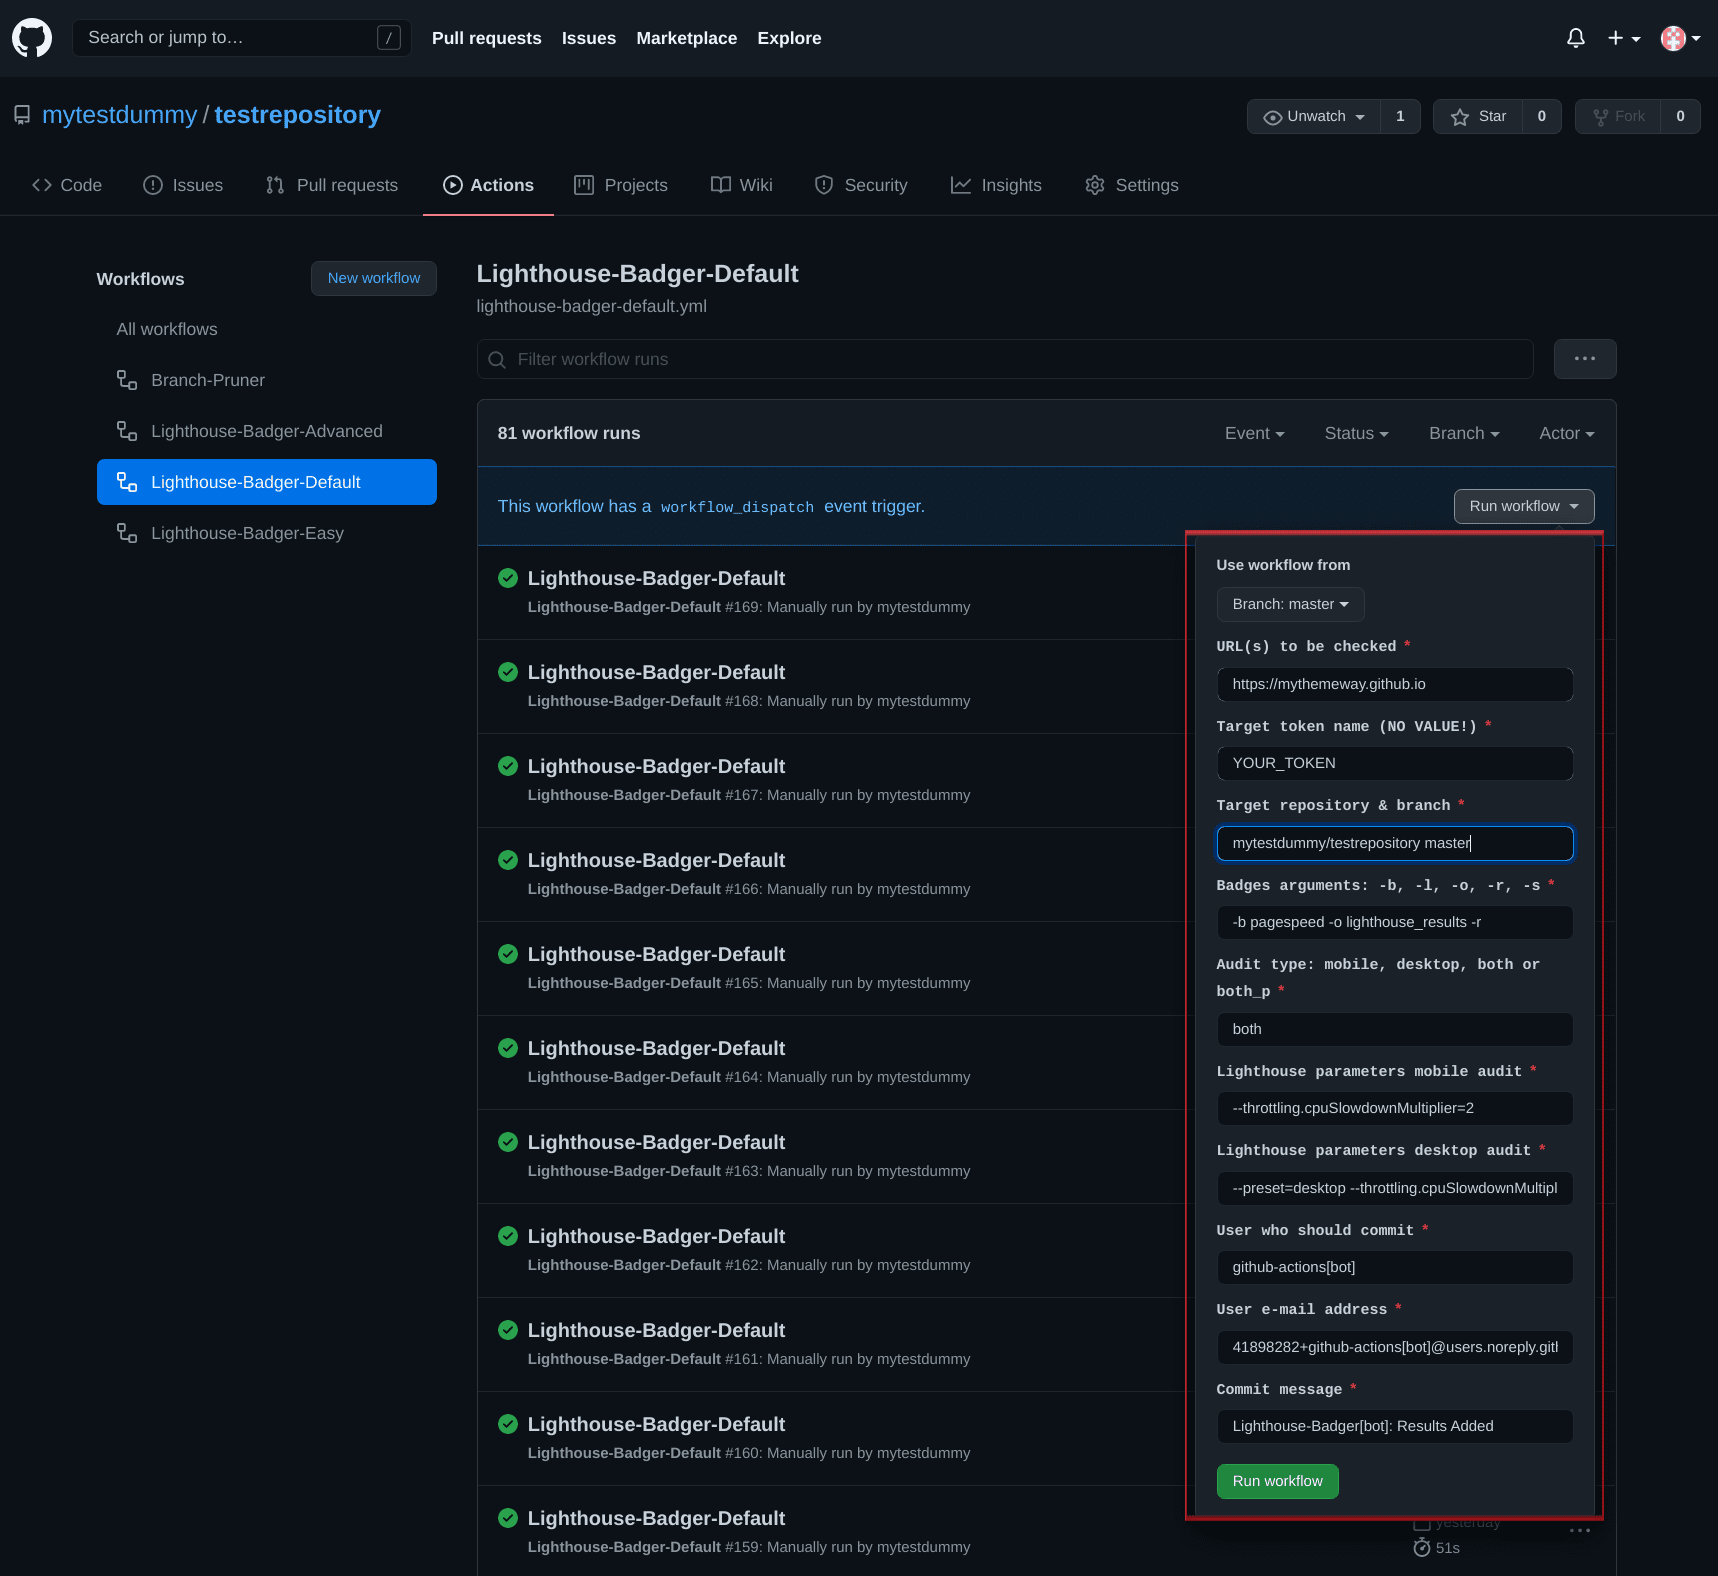
Generates, adds & updates manually/automatically Lighthouse badges & reports from one/multiple input URL(s) to a selected target repository & branch.
Set it up (click to toggle)
1. add the lighthouse-badger-default.yml workflow file to a repository
it doesn't have to be the repository where you want to add the Lighthouse results; e. g., you can simply fork the
myactionway/lighthouse-badger-workflowsrepository
- CONSIDER: with a forked repository, you need to confirm that you want to use a workflow before you can actually use it (repo menu > actions tab > push the button)
the path has to be
.github/workflows/lighthouse-badger-default.yml
2. create a new encrypted repository secret
give the secret a name e. g.
LIGHTHOUSE_BADGER_TOKENthe value of the secret must be the value of the Personal Access Token (PAT) for the repository where you want to add the Lighthouse results
procedure for creating a PAT (fine-grained) or a PAT (classic)
select only the minimum scopes and permissions required
PAT (fine-grained): repository permissions
contents => access: read and write
metadata => access: read-only
PAT (classic): e. g. repo
CONSIDER: PAT expiration requires you to regenerate the PAT and set it as the secret's value again
add the secret to the same repository where you added this workflow file
3. adapt your lighthouse-badger-default.yml file
3.1 for manual triggers
you don't have to adjust anything in the workflow file; just use it
3.2 for all other triggers
adapt this section:
############################################################## # DEFINE YOUR INPUTS AND TRIGGERS IN THE FOLLOWING ############################################################## # INPUTS as environmental variables (env) env: URLS: # URL(s) to be checked e.g. 'https://github.com/sitdisch https://github.com/mythemeway' TOKEN_NAME: # target token name e.g. 'LIGHTHOUSE_BADGER_TOKEN' REPO_BRANCH: # target repository & branch e.g. 'dummy/mytargetrepo main' BADGES_ARGS: # badge-style '-b {flat,...}', preceding-label '-l "Lighthouse "', output-path '-o lighthouse_results/dummy', save-report '-r', single-badge '-s' AUDIT_TYPE: # 'mobile', 'desktop', 'both' or 'both_p' MOBILE_LIGHTHOUSE_PARAMS: # Lighthouse parameters mobile audit DESKTOP_LIGHTHOUSE_PARAMS: # Lighthouse parameters desktop audit USER_NAME: # user who should commit e.g. 'dummy' USER_EMAIL: # e.g. '[email protected]' COMMIT_MESSAGE: # e.g. 'Lighthouse results added' # TRIGGERS on: # page_build: # schedule: # - cron: '55 23 * * 0'CONSIDER:
INPUTS:
you only have to define
URLSandTOKEN_NAME; if any other input is blank, one of these default values will be used insteadDEFAULT_REPO_BRANCH: '${{ github.repository }} main' # repo with this file and main branch DEFAULT_BADGES_ARGS: '-b pagespeed -o lighthouse_results -r' DEFAULT_AUDIT_TYPE: 'both' DEFAULT_MOBILE_LIGHTHOUSE_PARAMS: '--throttling.cpuSlowdownMultiplier=2' DEFAULT_DESKTOP_LIGHTHOUSE_PARAMS: '--preset=desktop --throttling.cpuSlowdownMultiplier=1' DEFAULT_USER_NAME: 'github-actions[bot]' DEFAULT_USER_EMAIL: '41898282+github-actions[bot]@users.noreply.github.com' DEFAULT_COMMIT_MESSAGE: 'Lighthouse-Badger[bot]: Results Added'
TOKEN_NAME: never enter the actual value of the personal access token
BADGES_ARGS:
more information about the optional arguments can be found here
in contrast to the Lighthouse-Badges repository
do not enter any URL(s) here
mobile or/and desktop is/are always added to your output-path
MOBILE/DESKTOP_LIGHTHOUSE_PARAMS:
- more information about the optional arguments can be found here
AUDIT_TYPE:
'both_p': desktop and mobile audits are carried out in parallel
- it's not recommended as it can skew the performance results [source] and it can also be slower than
'both'TRIGGERS:
page_build: Lighthouse results are generated every time after the GitHub page is built
schedule:
e. g.
cron: '55 23 * * 0'executes the Lighthouse-Badger every Sunday at 23:55you can check your inputs here
That's it. Happy audits.
Generates, adds & updates manually/automatically Lighthouse badges & reports from one/multiple input URL-group(s) to one/multiple target repo(s)/branch(es) in parallel.
Set it up (click to toggle)
1. add the lighthouse-badger-advanced.yml workflow file to a repository
it doesn't have to be a repository where you want to add Lighthouse results; e. g., you can simply fork the
myactionway/lighthouse-badger-workflowsrepository
- CONSIDER: with a forked repository, you need to confirm that you want to use a workflow before you can actually use it (repo menu > actions tab > push the button)
the path has to be
.github/workflows/lighthouse-badger-advanced.yml
2. create new encrypted repository secrets
give the secrets names e. g.
LIGHTHOUSE_BADGER_TOKEN_1andLIGHTHOUSE_BADGER_TOKEN_2the values of the secrets must be the values of the Personal Access Tokens (PAT) for the repositories where you want to add the Lighthouse results
procedure for creating a PAT (fine-grained) or a PAT (classic)
select only the minimum scopes and permissions required
PAT (fine-grained): repository permissions
contents => access: read and write
metadata => access: read-only
PAT (classic): e. g. repo
CONSIDER: PAT expiration requires you to regenerate the PAT and set it as the secret's value again
add the secrets to the same repository where you added this workflow file
3. adapt your lighthouse-badger-advanced.yml file
3.1 define your defaults
adapt this section:
############################################################## # DEFINE YOUR DEFAULTS (INPUTS & TRIGGERS) IN THE FOLLOWING ############################################################## # INPUTS as environmental variables (env) env: TOKEN_NAME: # target token name e.g. 'LIGHTHOUSE_BADGER_TOKEN_1' REPO_BRANCH: # target repository & branch e.g. 'dummy/mytargetrepo_1 main' AUDIT_TYPE: # 'mobile', 'desktop', 'both' or 'both_p' MOBILE_LIGHTHOUSE_PARAMS: # Lighthouse parameters mobile audit DESKTOP_LIGHTHOUSE_PARAMS: # Lighthouse parameters desktop audit USER_NAME: # user who should commit e.g. 'dummy' USER_EMAIL: # e.g. '[email protected]' COMMIT_MESSAGE: # e.g. 'Lighthouse results added' # TRIGGERS on: # page_build: # schedule: # - cron: '55 23 * * 0' workflow_dispatch:CONSIDER:
INPUTS:
TOKEN_NAME: never enter the actual value of the personal access tokenall inputs except
TOKEN_NAMEhave predefined values; you can, but you don't have to overwrite them# Predefined values REPO_BRANCH: '${{ github.repository }} main' # repo with this file and main branch AUDIT_TYPE: 'both' MOBILE_LIGHTHOUSE_PARAMS: '--throttling.cpuSlowdownMultiplier=2' DESKTOP_LIGHTHOUSE_PARAMS: '--preset=desktop --throttling.cpuSlowdownMultiplier=1' USER_NAME: 'github-actions[bot]' USER_EMAIL: '41898282+github-actions[bot]@users.noreply.github.com' COMMIT_MESSAGE: 'Lighthouse-Badger[bot]: Results Added'
MOBILE/DESKTOP_LIGHTHOUSE_PARAMS:
- more information about the optional arguments can be found here
AUDIT_TYPE:
'both_p': desktop and mobile audits are carried out in parallel
- it's not recommended as it can skew the performance results [source] and it can also be slower than
'both'TRIGGERS:
page_build: Lighthouse results are generated every time after the GitHub page is built
schedule:
e. g.
cron: '55 23 * * 0'executes the Lighthouse-Badger every Sunday at 23:55you can check your inputs here
workflow_dispatch:
no predefined inputs; the
envdefined in this workflow file are used instead when this trigger is triggeredprocedure for manually running a workflow using the GitHub CLI
procedure for manually running a workflow using the REST API
3.2 define your settings for the different input URL-Groups
adapt this section:
############################################################## # FIRST URL-GROUP | DEFINE YOUR ENV IN THE FOLLOWING ############################################################## - NAME: 'URL-GROUP 1' URLS: 'https://github.com/sitdisch https://github.com/mythemeway' BADGES_ARGS: '-b pagespeed -o lighthouse_results/first_group -r' # TOKEN_NAME: # REPO_BRANCH: # AUDIT_TYPE: # MOBILE_LIGHTHOUSE_PARAMS: # DESKTOP_LIGHTHOUSE-PARAMS: # USER_NAME: # USER_EMAIL: # COMMIT_MESSAGE: # e.g. 'Lighthouse-Badger[bot]: Results Added | First URL-Group' ############################################################## # SECOND URL-GROUP | DEFINE YOUR ENV IN THE FOLLOWING ############################################################## - NAME: 'URL-GROUP 2' URLS: 'https://mythemeway.github.io/Dark-Particle/ https://mythemeway.github.io/Dark-Particle/projects/2020/10/31/project-1.html' BADGES_ARGS: '-b flat -o lighthouse_results/second_group -r' # TOKEN_NAME: # e.g. 'LIGHTHOUSE_BADGER_TOKEN_2' # REPO_BRANCH: # e.g. 'dummy/mytargetrepo_2 main' # AUDIT_TYPE: # MOBILE_LIGHTHOUSE_PARAMS: # DESKTOP_LIGHTHOUSE_PARAMS: # USER_NAME: # USER_EMAIL: # COMMIT_MESSAGE: # e.g. 'Lighthouse-Badger[bot]: Results Added | Second URL-Group' ############################################################## # THIRD URL-GROUP | FEEL FREE TO ADD MORE URL-GROUPS...CONSIDER:
you just have to define
NAME,URLSandBADGES_ARGSfor each group; if you do not define any of the other inputs, your predefined defaults will be used instead
BADGES_ARGS:
more information about the optional arguments can be found here
set different output-paths for different groups
in contrast to the Lighthouse-Badges repository
do not enter any URL(s) here
mobile or/and desktop is/are always added to your output-path
TOKEN_NAME: never enter the actual value of the personal access tokenonly a maximum of 256 URL-Groups per workflow run is possible [GitHub restriction]
That's it. Happy audits.
Warning: If you use your own workflow file, it is highly recommended to set a time limit for the job execution (GitHub's default: 6 hours); default in the proposed workflow files
timeout-minutes: 8
Your SVG badge file was not automatically updated in your use case:
You embedded your SVG badge file via a URL containing a content hash from GitHub.
e. g.
https://raw.githubusercontent.com/sitdisch/lighthouse-badges/94ff556d0d5a451a56839813e6322da811fce9f6/assets/img/scores/pagespeed.svghas the content hash94ff556d0d5a451a56839813e6322da811fce9f6A badge embedded via such a URL will never be updated.
You get such a URL when you hover over a SVG file in your GitHub repository +
Right Mouse Click+Copy Image LinkInstead, use a URL that includes the branch name where your badge is stored on GitHub.
e. g.
https://raw.githubusercontent.com/sitdisch/lighthouse-badges/master/assets/img/scores/pagespeed.svghere only the content hash
94ff556d0d5a451a56839813e6322da811fce9f6is replaced by the branch namemasterA badge embedded via such a URL can be updated automatically.
"Error: fatal: could not read Username for 'https://github.com': terminal prompts disabled":
your personal access token may has expired and you need to set a new one as the value of the encrypted repository secret; that means back to the setup section
more information about this GitHub action checkout issue can be found e. g. here
"remote: Permission to ... denied to ... fatal: unable to access 'https://github.com/...': The requested URL returned error: 403":
- your personal access token used does not have the minimum scopes/permissions required to add the Lighthouse results to your target repository
No scores are displayed in the pagespeed.svg file:
- They are there, if not,
NAis inserted. Try opening the SVG with a browser and the scores will pop up, I promise.
You get a failed job because it exceeded the maximum execution time:
increase
timeout-minutesin your workflow file (default in the proposed workflow files = 8min)if that doesn't help, maybe it is a lighthouse issue
You get a failed job because not all remote commits were fetched during parallel computing:
- increase
max_push_attemptsin your workflow file (default = 5)
The repository size is growing continuously due to the automatic updating of the badges:
- The Branch-Pruner
can help. E. g. put your Lighthouse results on a separate branch and automatically prune that branch with the Pruner, as you like. That way, you have the repo size under control and also the ability to see the latest history of your badges and reports without the really old stuff.
The workflow logs do not provide enough detail to diagnose why a workflow, job, or step is not working as expected:
- enable addition debug logging
You are experiencing strange behavior from GitHub actions:
- maybe it's a general incident [status check]
Your workflow trigger schedule doesn't fire:
in my experience, a workflow file with this trigger must be placed in the default branch
in this chat Brightran said: "... The workaround is to push something to trigger them. ..." and Hless said: "... It appears to me that it takes while before schedules actions run at all in a new repo". In my experience, they are right.
The use of protected brand names, trade names, utility models and brand logos on this website does not constitute an infringement of copyright; rather, it serves as an illustrative note. Even if this is not marked as such at the respective points, the corresponding legal provisions always apply.
The brand names and logos used are the property of their respective owners and are subject to their copyright provisions.
This offer is in no way related to the legal entities of the protected brand names and logos used.
This README contains links to external third-party websites. The README operator has no influence on the content of these sites. Therefore, he cannot assume any liability. Instead, the respective provider is always responsible for the content.
The linked pages were checked for possible legal violations at the time of linking and illegal content wasn't discernible. A permanent control of the linked pages is unreasonable without concrete evidence of an infringement. However, if the README operator becomes aware of such a violation, he will act immediately.
Simple Icons [License: CC0 1.0]
Shields.io [License: CC0 1.0]


