The idea behind a Web application is simple. Users open a browser and write the page URL they want into the address line, for instance https://www.cs.helsinki.fi/u/mluukkai/. The first part of the URL, in this case www.cs.helsinki.fi is usually the DNS name, which helps us to identify the IP address of the server of the www-page. The browser sends a page request to the web server using the GET-method of the HTTP protocol. If the address is correct, the user who sent the page request has the right to the resources defined in the URL path (for instance u/mluukkai), the server returns to the browser a status code 200 and the page content in HTML format. The browser renders the page for the user. If the page does not exist, the server returns a status code 404 to the browser, which tells of a mistake.
The page returned by the server can be static, that is "manually" written down into a HTML file which is located on the server. Also, it can be dynamic: for instance, it can be generated while the request is made, based on the data in the server database. For instance, the course list at the courses page is read in the database and the html code rendering the page is created again every time we access the page, based on the list of the courses available in the database at that time.
Sometimes, the direction of information changes on the www-page and data is sent from the browser to the server. Typically, this happens when the page contains a form where the user can enter information that will be sent to the server. The HTTP protocol provides a POST method for sending information (the HTTP GET method can be used to send information, too).
For instance, clicking the magnifying glass ("Haku") in the top right corner of the courses page, we can open a form which allows users to send data to the Web server. When the users presses on "hae" (search), the browser sends a POST-method request (containing the string the user has written on the form) to the server http://www.cs.helsinki.fi. Most commonly, the server answers to form based POST requests by returning a new HTML file, which the browser then renders for the user. (In fact, POST requests are not usually answered by returning an HTML page, but we are redirected to another page which contains the HTML code which has to be rendered, see http://en.wikipedia.org/wiki/Post/Redirect/Get, we'll speak more on the topic in the second week.)
In addition to the address, the data (that is, the message body) and the status codes, HTTP requests also contain the headers data (see http://en.wikipedia.org/wiki/List_of_HTTP_header_fields). They help to make requests and their answers more specific, for instance by defining what kind of data the browser is ready to receive.
With the words Web Server Programming, we refer to how the Web server creates the Web pages to show to the browser and handles the data the user enters with the help of a form.
Nowadays, Web pages are not just simple HTML. HTML is used to represent the page structure and contents. The page design is usually affected by using files like CSS, see http://en.wikipedia.org/wiki/Cascading_Style_Sheets. Recently, there's been a trend to provide the www-page with more and more code is executed in the browser, which is made in Javascript. It's a matter of opinion what would be best handled by the browser and what by the server.
For instance, suppose the www-page contains a form to log in into the website. It's clear that password and user name have to be checked on the server. On the other hand, we can allow the browser Javascript to check whether the user name box is empty when they try to log in. In such situations it is useless to bother the server at all, because the log in would never succeed.
The latest trends have been pushing towards Web applications which mimic normal desktop applications as much as possible. A good example is Google Drive, which "imitates" Word/OpenOffice functionality as accurately as possible. In such applications, the largest part of the application logic is realised in the browser. In any case, we always need some functionality executed in the server, otherwise information can not be shared by users who use the application in different places.
When we retrieve data from the server in modern applications, the server does not necessary return ready-made HTML-pages. On the contrary, it returns raw data (usually in json format); these data will be handled by the Javascript code that is executed in the browser and then displayed on the page. In this way, only the required part of the website will update.
In this course, we focus almost completely on implementing the functionality on the Web-application server side. In weeks 6 and 7, we take a look at a couple of examples of functionality which is implemented with Javascript as well as at application design through CSS files.
The course Full Stack Web Development on the other hand focuses mainly on browser side functionality.
All the exercises of the course are contained in this material. Except for the following exercise, all the others have to be returned using github. In addition to returning them through github, we keep track of the homework by marking the exercises in the course exercise tracking system. We'll speak more about this at the end of the page. Let's start with the first exercise.
The browsers' Web developer tools are extremely useful when we implement the functionality on the browser. The most friendly browser to Web developers is Chrome, and we assume here that you are using Chrome. Other browsers also have similar functionality.
Open Chrome developer tool by pressing Shift, Control and i (or F12). You also have access to the developer tools through the Tools menu. Open the Network tab. The tab shows the HTTP requests which are sent by the browser and the server's answers.
Copy-paste https://studies.cs.helsinki.fi/exampleapp/notes into your browser address line and press enter. You see the GET-request triggered by the loading of the page. Open it (click the request) and inspect what is sent with a request. Have a special look at the headers and the response part. The developer tools show request headers and response headers separately.
The request returned HTML code which is shown in the response tab. The code contains references to files like CSS, Javascript, as well as pictures. While rendering the page, the browser retrieves each of these with their own GET-request.
Keep open the same networking tab. Clear the developer tools tab by pressing on the symbol which looks like a no entry sign, on the left. Write something in the text field on the page and press "Save". The text field is created as a HTML form. The form information is sent through the POST-method of the HTTP-protocol.
Inspect the POST request's contents (on the top of the list). From the Payload tab you can find Form data, that is, the data sent along wiht the request. You'll see that the request was answered with a status code 302, which means that the server redirects the browser, that is the browser was asked to go to the address defined in the response headers. The answer to the POST-request does not contain any HTML code which the browser could render for the user. Right after the POST request, the browser does automatically a GET request for the address contained in the Location header of the POST reponse headers. Only the page which is returned in answer to the request caused by this redirection is rendered for the users.
Spend some time inspecting the HTTP protocol communication caused by the requests to other pages.
In this course, we use Ruby on Rails application framework to implement Web applications.
Rails applications comply with the MVC model (or WebMVC, which is slightly different from the original MVC). The idea behind this model is that the application data and logic (Model), the visual composition (View) and the functions coordination (Controller) are separated into clearly defined parts. Almost all modern Web frameworks follow the MVC principle.
Let's take a look at what happens when users go to a Web page which was implemented with Rails, suppose the URL be https://ratebeer22.fly.dev/breweries, that is the sample application page which we are going to make during our course. The page lists all the breweries which our sample application knows.

-
Once users write the URL into the browser address line, the browser makes an HTTP GET-request to the server ratebeer22.fly.dev
-
Often a web server software is run on the server (for instance, Apache, Nginx) This software operates as a proxy server and guides requests to the Rails application registered at that address. The application finds out what application controller is registered to take care of the GET calls for the resources of the breweries. This phase is called internal routing of the Rails application, which means that we are looking for "a way to handle the request". It is also possible to bypass the proxy server. In this case the Rails application itself is the first to receive the request. However, a proxy server is often used as a "light layer" to e.g. enhance performance and distribute request to multiple servers.
-
When it finds out the right controller (in our example the controller which takes care of the breweries) and the method handling its requests, the application calls the method. The method is given as parameter the data which had possibly been attached to the HTTP request. The controller takes care of the actions concerning the operation. The executions of these actions usually requires method calls to some models, which contain the application data and logic.
-
In our example, the controller asks from the model class which takes care of the breweries to load the list of all breweries from the database.
-
Once it has retrieved the list of all breweries, the controller asks the brewery list view to render itself.
-
The view renders itself, that is, the controller gets an HTML page listing all the beers.
-
The controller returns the HTML page to the Web server
-
The Web server returns the generated HTML page and its headers to the browser
In the MVC model, the so-called models are usually objects and their state is saved to the database. The database is usually handled in an abstract way, meaning that rarely there is the need to write SQL language and database configurations at the level of the program code. The details are handled by the Object Relational Mapping (ORM) library. The ORM used in Rails is called ActiveRecord, which works a bit differently than EclipseLink and Hibernate, which are based on the JPA standard and might be better know to Java users.
Rails is strongly based on the convention over configuration principle, which means that Rails aims at minimizing the need of configuration by defining a group of conventions for file names and their hierarchic location, among the other things. We will see soon what the CoC principle means for the application developer, in practice. In fact, Rails does allow us to break the conventions, but in such a case, the developer has to configure things by hand, to some extent.
Creating applications on Rails naturally requires some kind of Ruby knowledge. Ruby is a dynamic-type object language which also enables functional programming. In other words, Ruby's code is never compiled. On the contrary, the interpreter executes the code command after command. Because there is no compiler, syntax mistakes appear only when the code is being executed, which is in contrast with languages which have to be transpiled. Modern developer environments help us a little, providing us with some kind of "syntax proofreading" on the go, but the developer environment help is not nearly as good as it is in Java, for instance.
Do/go through the following
If you have the time and energy, you can also have a look at
Web development with Rails requires familiarity with working from the command line. If your routine is lacking, consider refreshing up your skills at this point.
The course structure is slightly different from the course standard of the department. In the course, we only make one application, the same application will be worked on in both the course material and the exercises. It's not possible to read the course material alone; while you go through the material, you have to develop your application alongside, otherwise it will be impossible to pass the exercises.
The course is split into seven "weeks". However, the course has only one deadline.
Each week is turned in separately in the course submission system. After submitting a week you get access to that week's example answer. The following week you can continue from where you left at or take the example answer as your starting point.
A part of the exercises are in practice compulsory, skipping them will prevent you from advancing on the week. Others are optional, and they regard the implementation of non-critical features. Because we expect to find a part of these features the following week, you'd better start from the sample answer or copy paste the useful parts from it, if you haven't done all the exercises of the week.
Guidelines to set up rails at https://github.com/mluukkai/WebPalvelinohjelmointi2023/blob/main/web/railsin_asentaminen-english.md
In the course, we create a service for beer aficionados. They should be able to scan the breweries, the beers, the beer types, as well as to evaluate the beers they have tasted (that is, to give a vote to beers according to their personal taste). After week 7, the application should look more or less like the following: https://ratebeer22.fly.dev/
Rails provides various generators for application developers (see http://guides.rubyonrails.org/generators.html), and they make it easy to generate template files that contain some ready-made functionalities.
We create a new Rails application with the generator new. Go to the suitable directory and create an application called ratebeer using the following command in the command line:
rails new ratebeer
This generates the ratebeer directory which will contain our application.
Attention: once you continue with the course, it will be convenient that you make a git repository of the created directory. This means that you should not place the application inside any other git repository!
Go to the directory with cd ratebeer.
Use the command tree to find out what the new generator brought about. Mind that the tree command is not installed by default in OSX. You can install it with homebrew using the command brew install tree.
You see an abridged structure below:
.
|-- Gemfile
|-- Rakefile
|-- app
|   |-- assets
|   |-- controllers
|   |   |-- application_controller.rb
|   |   `-- concerns
|   |-- helpers
|   |   `-- application_helper.rb
|   |-- mailers
|   |-- models
|   |   `-- concerns
|   `-- views
|       `-- layouts
|           `-- application.html.erb
|-- bin
|-- config
|   |-- routes.rb
|-- db
|-- lib
|-- log
|-- public
|-- test
38 directories, 39 files
The most important directory is app which contains the application code. Under the config directory you find data concerning the application configuration, among which routes.rb, which defines how the application handles the different HTTP requests. The database configurations have to be located in the directory db. Gemfile defines the libraries used by the application. With time, we'll get to know the application directory better.
The directory structure is an important part of Rails' Convention over Configuration principle. Each component (for instance, the controller which takes care of the breweries) has a strictly defined location, so that Rails can find the component without the help of the application developer, who does not need to explain in what directory and file the component is located.
Start the application with the following command
rails server
You can also use the short form rails s
The command starts a Puma HTTP server (see https://github.com/puma/puma) by default, which begins to execute the Rails application in the directory. The application runs in the local computer (that is, in localhost) in the port 3000.
Try to check that the application starts by browsing the following address http://localhost:3000.
ATTENTION: While you read the document, the idea is that you execute in your application the same actions we do in our sample application. A part of the things we implement are designed as homework – as it is with the following point. A part of the instructions is compulsory anyway, so that you may proceed with the material.
We save our course application in the Github repository.
The command rails new should by default have created a git repository out the new application directory. If not, go to the newly created directory and run
git init.Create a repository in Github for the application and join it with the repository of your application directory as remote repository.
You find (Finnish) git and Github guidelines at https://tkt-lapio.github.io/ and https://ohjelmistotekniikka-hy.github.io/python/viikko1
At the end of this document you find guidelines to make the final submission
Let's start with building our application. We want to start with breweries, that is:
- we create a database table for breweries
- we implement the functionality to list all the breweries
- we implement the functionality to add a new brewery
- While doing this, we additionally gain the functionality to modify and delete breweries
Conventionally, in Rails (almost) every 'thing' we save should have their own model class, controller class, as well as a set of files that make the view.
We create all this using the Rails' ready-made scaffold generator. Every brewery has a name (string) and foundation year (integer). Let's give the following command from the command line (making sure you are in the folder which contains the application):
rails generate scaffold brewery name:string year:integer
A number of files are generated. The most important are:
- app/models/brewery.rb
- app/controllers/breweries_controller.rb
- app/views/breweries/index.html.erb
- app/views/breweries/show.html.erb
- There should be few other files in the views directory in addition to these
Rails scaffold generator creates templates for all required files, naming and placing them according to Rails conventions.
We created the code with the generator rails g scaffold brewery name:string year:integer. In the generator we stated the thing we wanted to create – that is, the brewery database table and its features singularly (brewery). According to Rails name conventions, this generates:
- a database table called breweries
- a controller called BreweriesController (the file breweries_controller.rb)
- the model, that is to say, the class Brewery which represents the brewery (file brewery.rb)
At the beginning it might be a bit confusing to understand when we use singular and when plural, how files are named and where they are located at. Conventions will gradually become more familiar and start to look more logical.
If the application is not running already, let's start it again using the command rails s. Attention: rarely do you need to restart your application in Rails. For instance, you don't need to restart it after modifying and adding code.
According to Rails conventions, all the beers are displayed at the address breweries. Let's go to this page, then:
localhost:3000/breweries
This will however cause an error:
Migrations are pending; run 'bin/rake db:migrate RAILS_ENV=development' to resolve this issue.The cause is that the database migration which takes care of creating a database recording the breweries is left unrun.
Scaffold execution creates a file with a peculiar name
db/migrate/20150116173907_create_breweries.rb
This is the so called migration file, which contains instructions to create the breweries database table. We can create the database table by executing the migration and giving the command rake db:migrate:
➜  ratebeer  rake db:migrate
== 20150111131426 CreateBreweries: migrating ==================================
-- create_table(:breweries)
   -> 0.0011s
== 20150111131426 CreateBreweries: migrated (0.0012s) =========================
The database table which records the breweries is created now, and the application should be working.
Refresh the page which shows the breweries http://localhost:3000/breweries and add three breweries to the database using the existing page.
As we can see, Rails scaffold produced quite a lot of ready-made functionality. The functionality which was produced with scaffold is a good way to get started quickly. Scaffolds are no silver bullet, however. The bigger part of the ready-made functionality we created with scaffolds will be replaced code we'll write on our own. During the course and starting from week 2, we'll create functionaly completely by hand, which means that the scaffolds' automatically generated code will become familiar.
Attention: you can delete the files created with a Rails generator by using the command destroy:
rails destroy scaffold brewery
If you have already executed the migration, and you notice that the code created by the generator has to be destroyed, it's extremely important to cancel the migration with the command
rake db:rollback
One of the most important instruments for a Rails application developer is the Rails console. The console is an interactive command interpreter, and is also connected to the application database.
Make sure you are in the application folder and open the console with the command
rails c
Do all the following commands by yourself as well (commands are the strings after '>'):
irb(main):001:0> Brewery.all
   (4.2ms)  SELECT sqlite_version(*)
  Brewery Load (2.7ms)  SELECT "breweries".* FROM "breweries"
=>
[#<Brewery:0x00007f4b628be9a8
  id: 1,
  name: "Weihenstephan",
  year: 1040,
  created_at: Mon, 08 Aug 2022 14:39:47.235924000 UTC +00:00,
  updated_at: Mon, 08 Aug 2022 14:39:47.235924000 UTC +00:00>,
 #<Brewery:0x00007f4b62775d80
  id: 2,
  name: "Schlenkerla",
  year: 1682,
  created_at: Mon, 08 Aug 2022 14:40:11.159471000 UTC +00:00,
  updated_at: Mon, 08 Aug 2022 14:40:11.159471000 UTC +00:00>,
 #<Brewery:0x00007f4b62775b00
  id: 3,
  name: "Sinebrychoff",
  year: 1879,
  created_at: Mon, 08 Aug 2022 14:40:35.385354000 UTC +00:00,
  updated_at: Mon, 08 Aug 2022 14:40:35.385354000 UTC +00:00>]
irb(main):002:0> Brewery.count
irb(main):002:0> Brewery.count
   (0.2ms)  SELECT COUNT(*) FROM "breweries"
=> 3
irb(main):003:0> Brewery
=> Brewery(id: integer, name: string, year: integer, created_at: datetime, updated_at: datetime)
irb(main):004:0>
The command Brewery.all shows all the breweries in the database. The console shows first the SQL request which was caused by the database operation and then all the brewery objects retrieved from the database. The command Brewery.count shows the amount of breweries in the database.
We create a connection to the breweries database table through the class Brewery. Rails scaffold generator created the class code.
If you have a look at what the class (that is, the file app/models/brewery.rb) looks like, you'll see that it contains very little code:
class Brewery < ApplicationRecord
end
However, as you saw from the previous console session, the class does have the methods all and count. The class receives these two and a great amount of other methods from the class it inherited which is called ApplicationRecord. ApplicationRecord itself inherits its functionalities from class ActiveRecord.
To tell it in the words of Rails guide (http://guides.rubyonrails.org/active_record_basics.html):
Active Record is the M in MVC - the model - which is the layer of the system responsible for representing business data and logic. Active Record facilitates the creation and use of business objects whose data requires persistent storage to a database. It is an implementation of the Active Record pattern (https://en.wikipedia.org/wiki/Active_record_pattern) which itself is a description of an Object Relational Mapping system.
In short, the idea behind ActiveRecord is that each database table (for instance, breweries) is connected to their own class (Brewery) in the code. The class provides methods as class methods, which are used to handle the database. When we retrieve a row of data from the database (the information of one brewery), a class instance of it is created (that is, a Brewery object).
ActiveRecord classes have a double role, with the help of class methods (which are called in Ruby through the class name like Brewery.all) we handle most database operations, e.g., database requests. Rows saved in the database are mapped as instances of ActiveRecord classes.
Let's continue with our experiments on console. Let us create a new brewery:
Brewery.new(name:"Stadin Panimo", year:1997)
As you see, Rails constructors are called in a different way than in e.g. Java. Notice that you don't have to use the brackets in constructor or method calls. The previous call could have been written
Brewery.new name:"Stadin Panimo", year:1997
List all the breweries and check their amount using the methods Brewery.all and Brewery.count. Note that even though we created a new object it did not go into our database.
We save objects into our database in the following way:
b = Brewery.new name:"Stadin Panimo", year:1997
b.save
The object was created and saved into a variable b, then we called the object method save.
Save is an object method inherited from ActiveRecord, which saves our object in the database – as you might have guessed. Notice that you don't need (and you can not) define the variable type, because Ruby is a dynamically typed language!
You can also create and save an object directly by using the class method create instead of new:
Brewery.create name:"Weihenstephan", year:1040
When the object is created with the command new, we notice that the object contains fields whose value has not been defined:
irb(main):007 > b = Brewery.new(name: "Stadin Panimo", year: 1997)
 => #<Brewery id: nil, name: "Stadin Panimo", year: 1997, created_at: nil, updated_at: nil>
After we have saved the object, these fields also receive their values:
irb(main):008 > b.save
irb(main):009 > b
 => #<Brewery id: 4, name: "Stadin Panimo", year: 1997, created_at: "2022-08-09 13:21:37", updated_at: "2022-08-09 13:21:37">
As you might have guessed, object variables – or object fields – correspond to the columns of our database table. When an object is saved into the database, the database automatically generates a primary key for the object – the ID – as well as a couple of timestamps. The ID is unique for the brewery that has just been created.
Check the situation now at the web page. The created breweries should be available on the page now.
The calls of the methods new and create look a bit particular
Brewery.new name:"Stadin Panimo", year:1997
In this case we have made use of Ruby's liberal approach to brackets. Using brackets, the call would look like the following:
Brewery.new( name:"Stadin Panimo", year:1997 )
The parameter has also got a particular format. It's an associative array indexed with symbols, that is to say, hash, see https://github.com/mluukkai/WebPalvelinohjelmointi2023/blob/main/web/rubyn_perusteita.md#hash-ja-symbolit
As you can see from the link above, hashes are defined with curly brackets, like
{ name:"Stadin Panimo", year:1997 }
In fact, the method call could be written
Brewery.new( { name:"Stadin Panimo", year:1997 } )
The method parameter hash does not require curly brackets in all the cases, and are often left out. If the method has various parameters, curly brackets are sometimes required.
Attention: Ruby also has an optional syntax to define hashes, with it the previous command would be
Brewery.new :name => "Stadin Panimo", :year => 1997
If you want to create structures or train to use Rails from console by hand, without long-term changes in the database, you can run your console in the sandbox form with the command:
rails console --sandbox or shorter rails c -s
ActiveRecord provides us with various options to make database searches programmatically, without writing SQL, see http://guides.rubyonrails.org/active_record_querying.html
Here are some examples, try them all from the console:
Brewery.find 1       # returns an object whose ID is 1

b = Brewery.find 2   # returns an object whose ID is 2 and stores it into variable b
b.year               # the value of the field year of the object saved in variable b
b.name               # the value of the field name of the object saved in variable b

Brewery.find_by name:"Koff"   # returns an object whose name is Koff

Brewery.where name:"Koff" # returns a table with all the breweries whose name Koff

Brewery.where year:1900..2000  # returns a table with the breweries esteblished between the years 1900-2000

Brewery.where "year<1900"      # returns a table with the breweries esteblished before 1900

b = Brewery.where name:"Koff"
b.year                # the operation does not work because the method where returns a table which contains Koff

t = Brewery.where name:"Koff"
t.first.year          # t.first is same as t[0], the first element in the table
More about Ruby tables at https://github.com/mluukkai/WebPalvelinohjelmointi2023/blob/main/web/rubyn_perusteita.md#taulukko
Note that we left the brackets out of all the method calls: Brewery.find 1 means the same as Brewery.find(1)
The values returned by the previous method calls can be referenced with an underscore (the sign _). While you work with your console, this means that if you forgot to store the outcome of a method call into a variable, you can retrieve that value using an underscore:
irb(main):013 > Brewery.where "year<1900"we forgot to save outcome into a variable... we'll use an underscore
irb(main):014 > old = _
irb(main):015 > old.count
 => 3
irb(main):016:0> old.first
=>
#<Brewery:0x00007f4b622e1008
 id: 1,
 name: "Weihenstephan",
 year: 1040,
 created_at: Mon, 08 Aug 2022 14:39:47.235924000 UTC +00:00,
 updated_at: Mon, 08 Aug 2022 14:39:47.235924000 UTC +00:00>
irb(main):017 >Read http://guides.rubyonrails.org/active_record_basics.html#crud-reading-and-writing-data
Do all the following with a Rails console:
- Create a brewery which is called "Kumpulan panimo", which was establish in the year 2012
- Retrieve the brewery from the database using the method
find_by, searching against brewery names- Change the founding year of the brewery to 2018
- Retrieve the brewery with
find_byagain and make sure the change of founding year happened properly- Also make sure, that the value of the brewery field
updated_athas changed, check that it is different from thecreated atvalue- Delete the brewery
- Make sure the brewery was deleted
Let us take a look at the brewery code once more:
class Brewery < ApplicationRecord
end
As you see, we have access to all the fields of our brewery objects with the "dot notation" and we can set them new values in the same way:
b = Brewery.first         # retrieves the first added object from the database
b.created_at              # shows the creation timestamp
b.name = "Sinebrychoff"   # changes the field value, attention: the change saved to the database only when you save the object!
Some Rails magic is behind all this. In fact, Rails creates automatically set and get methods for all the fields of the database tables of the objects, so that the methods names are exactly the same as the database columns.
In our console, when we say b.created_at we really execute the created_at method which was automatically created in Brewery and which returns the value of the field with the same name. Similarly, the command b.name = "Sinebrychoff" causes the execution of the name= method which changes the value of the name field which was automatically added to Brewery.
Let us expand our application to include beers. Every beer is associated with one brewery, and one brewery is naturally associated with many beers. After our expansion, the class design of our application domain (that is to say, of the persistent objects in the database which contain business logic) will look the following:

Let us create a model, a controller and ready-made views for the beers using Rails' scaffold generator (the command is given in the command line):
rails g scaffold Beer name:string style:string brewery_id:integer
in order to update the database, let us execute the database migration by giving a command in the command line
rails db:migrate
The following things have been created
- the database table beers which records beers
- the class Beer which is used to map the database has been created into the file app/models/beer.rb
- the controller BeersController which takes care of the beers has been created into the file app/controllers/beers_controller.rb
- view files have been created in the directory app/views/beers/
We created string type fields name and style for the beers. We also created an integer field, brewery_id, which is supposed to act as foreign key to connect a beer with the brewery.
In case it's needed, you can check the fields by writing the class name which corresponds to the database table into the console:
irb(main):035:0> Beer
=> Beer(id: integer, name: string, style: string, brewery_id: integer, created_at: datetime, updated_at: datetime)
If you haven't yet retrieved beers from the database, the previous command might not work. First try for example Beer.count after which just Beer works as well.
As you can see, every beer also has the fields which are added automatically to all ActiveRecord objects, such as id, created_at and updated_at.
Let us create by hand a couple beers and let us link them to a brewery with the help of the brewery_id (attention: if your console was open already, you might have to give the command reload! to the console, which loads the beer program code so that the console may use it):
irb(main):043 > koff = Brewery.first
irb(main):044 > Beer.create name: "iso 3", style: "Lager", brewery_id: koff.id
 => #<Beer id: 1, name: "iso 3", style: "Lager", brewery_id: 8, created_at: "2022-08-09 13:54:09", updated_at: "2022-08-09 13:54:09">
irb(main):045 > Beer.create name: "Karhu", style: "Lager", brewery_id: koff.id
 => #<Beer id: 2, name: "Karhu", style: "Lager", brewery_id: 8, created_at: "2022-08-09 13:54:20", updated_at: "2022-08-09 13:54:20">
irb(main):046 >
The beers iso 3 and Karhu we created are linked to the brewery Koff. On database level the beers and the brewery have been now connected. However, the connection does not work at the code level, yet.
In order to make it work, we have to modify the models in the following way:
class Beer < ApplicationRecord
  belongs_to :brewery
end

class Brewery < ApplicationRecord
  has_many :beers
end
which means that a beer is connected to one brewery and one brewery has various beers. Pay attention to the singular and plural!
Let us go back to our console. If the console was open when you modified the code, use the command reload! to load the new version of the code so that the console can use it.
We want to try first how to tap into the brewery's beers:
irb(main):047 > koff = Brewery.find_by name: "Koff"
irb(main):048 > koff.beers.count
 => 2
irb(main):049> koff.beers
  Beer Load (2.0ms)  SELECT "beers".* FROM "beers" WHERE "beers"."brewery_id" = ?  [["brewery_id", 1]]
=>
[#<Beer:0x00007efe39e64ec8
  id: 1,
  name: "Iso 3",
  style: "Lager",
  brewery_id: 1,
  created_at: Mon, 08 Aug 2022 17:13:09.108046000 UTC +00:00,
  updated_at: Mon, 08 Aug 2022 17:13:09.108046000 UTC +00:00>,
 #<Beer:0x00007efe39e41180
  id: 2,
  name: "Karhu",
  style: "Lager",
  brewery_id: 1,
  created_at: Mon, 08 Aug 2022 17:13:09.139694000 UTC +00:00,
  updated_at: Mon, 08 Aug 2022 17:13:09.139694000 UTC +00:00>]
Brewery objects now have the method beers, which returns the Beer objects associated with the brewery. Rails generated this method automatically when it saw the line has_many :beers in the class Brewery.
You can access individual beers of a brewery in the following ways:
irb(main):050 > koff = Brewery.find_by name: "Koff"
irb(main):051 > koff.beers.first
 => #<Beer id: 1, name: "iso 3", style: "Lager", brewery_id: 8, created_at: "2022-08-09 13:54:09", updated_at: "2022-08-09 13:54:09">
irb(main):052 > koff.beers.last
 => #<Beer id: 2, name: "Karhu", style: "Lager", brewery_id: 8, created_at: "2022-08-09 13:54:20", updated_at: "2022-08-09 13:54:20">
irb(main):053 > koff.beers[1]
 => #<Beer id: 2, name: "Karhu", style: "Lager", brewery_id: 8, created_at: "2022-08-09 13:54:20", updated_at: "2022-08-09 13:54:20">
You can iterate through a collection of beers belonging to a brewery for example with the each iterator.
irb(main):055 > koff.beers.each { |beer| puts beer.name }
iso 3
Karhu
At code level, it is also easy to access the brewery connected to a beer:
irb(main):056 > bisse = Beer.first
 => #<Beer id: 1, name: "iso 3", style: "Lager", brewery_id: 8, created_at: "2022-08-09 13:54:09", updated_at: "2022-08-09 13:54:09">
irb(main):057 > bisse.brewery
 => #<Brewery id: 8, name: "Koff", year: 1897, created_at: "2022-08-09 13:51:26", updated_at: "2022-08-09 13:51:26">
irb(main):058 >
The line belongs_to :brewery which was added to the Beer class adds the method brewery to beers, returning the brewery object which is connected in the database to that beer.
When you develop a program, it might be useful to generate "hard coded" data into the database. The right place for such data is the file db/seeds.rb
Copy the following contents into the seeds.rb file of your application:
b1 = Brewery.create name: "Koff", year: 1897
b2 = Brewery.create name: "Malmgard", year: 2001
b3 = Brewery.create name: "Weihenstephaner", year: 1040

b1.beers.create name: "Iso 3", style: "Lager"
b1.beers.create name: "Karhu", style: "Lager"
b1.beers.create name: "Tuplahumala", style: "Lager"
b2.beers.create name: "Huvila Pale Ale", style: "Pale Ale"
b2.beers.create name: "X Porter", style: "Porter"
b3.beers.create name: "Hefeweizen", style: "Weizen"
b3.beers.create name: "Helles", style: "Lager"
let's remove all previous data from the database with:
rails db:reset
The command automatically "seeds" the database, meaning that in addition to deleting the old data, it does also executes the contents of the file seeds.rb
It is recommended to reboot both the application and the Rals console after seeding
ATTENTION: You might not need the data defined in seeds.rb at all in your application. Data defined in seeds.rb might be needed when eg. launching the application requires some ready defined objects. In this case the existence of seed makes things easier for a new application developer. They can easily launch the application on their own computer without needing to first hand-create the required objects.
Let us inspect the new data by hand from the console:
irb(main):003:0> koff = Brewery.first
  Brewery Load (2.9ms)  SELECT "breweries".* FROM "breweries" ORDER BY "breweries"."id" ASC LIMIT ?  [["LIMIT", 1]]
=>
#<Brewery:0x00007efe3abb1ea0
...
irb(main):004:0> koff.beers
  Beer Load (3.2ms)  SELECT "beers".* FROM "beers" WHERE "beers"."brewery_id" = ?  [["brewery_id", 1]]
=>
[#<Beer:0x00007efe3ab2d1a0
  id: 1,
  name: "Iso 3",
  style: "Lager",
  brewery_id: 1,
  created_at: Mon, 08 Aug 2022 17:13:09.108046000 UTC +00:00,
  updated_at: Mon, 08 Aug 2022 17:13:09.108046000 UTC +00:00>,
 #<Beer:0x00007efe3ab2d010
  id: 2,
  name: "Karhu",
  style: "Lager",
  brewery_id: 1,
  created_at: Mon, 08 Aug 2022 17:13:09.139694000 UTC +00:00,
  updated_at: Mon, 08 Aug 2022 17:13:09.139694000 UTC +00:00>,
 #<Beer:0x00007efe3ab2ce80
  id: 3,
  name: "Tuplahumala",
  style: "Lager",
  brewery_id: 1,
  created_at: Mon, 08 Aug 2022 17:13:09.171706000 UTC +00:00,
  updated_at: Mon, 08 Aug 2022 17:13:09.171706000 UTC +00:00>]
irb(main):005:0>
Let us create a new beer object. This time we use the new method, so that the object is not yet stored in the database:
irb(main):005:0> b = Beer.new name: "Lite", style: "Lager"
=> #<Beer:0x00007efe396c2aa8 id: nil, name: "Lite", style: "Lager", brewery_id: nil, created_at: nil, updated_at: nil>
irb(main):006:0>
The beer is not in the database yet, and it is not connected to any brewery, either:
irb(main):006:0> b.brewery
=> nil
You can connect a beer to a brewery in couple of other ways too. We can set up the brewery field value by hand:
irb(main):008:0> b.brewery = koff
=>
#<Brewery:0x00007efe3abb1ea0
...
irb(main):009:0> b
=> #<Beer:0x00007efe396c2aa8 id: nil, name: "Lite", style: "Lager", brewery_id: 1, created_at: nil, updated_at: nil>
As we see, the brewery ID becomes the brewery_id foreign key of the beer. The beer is not in the database, yet, so the brewery does not know that the beer which was created belongs to it:
irb(main):064:0> koff.reload
irb(main):065:0> koff.beers.include? b
 => false
Attention: just in case, we first called the database method reload, otherwise the object status would not have been updated, and also its beer list would have mirrored the time when the object was loaded.
We can get the beer stored with the already familiar command save. After this, the brewery will also know that the beer belongs to it (once again, we have to reload the database first):
irb(main):066:0> b.save
 => true
irb(main):067:0> koff.reload
irb(main):068:0> koff.beers.include? b
 => true
A more practical way of connecting a beer to a brewery's set of beers is by using the << operator:
irb(main):069:0> b = Beer.new name: "IVB", style: "Lager"
 => #<Beer id: nil, name: "IVB", style: "Lager", brewery_id: nil, created_at: nil, updated_at: nil>
irb(main):070:0 > koff.beers << b
   (0.1ms)  begin transaction
  Beer Create (0.3ms)  INSERT INTO "beers" ("name", "style", "brewery_id", "created_at", "updated_at") VALUES (?, ?, ?, ?, ?)  [["name", "IVB"], ["style", "Lager"], ["brewery_id", 1], ["created_at", "2018-09-01 16:46:01.643854"], ["updated_at", "2018-09-01 16:46:01.643854"]]
Even though we don't explicitly use the method save here, the beer is saved into the database thanks to the operator <<.
The third way is what we did in the seeds.rb file, where the create method is called straight for the beer collection of the brewery:
irb(main):071:0> koff.beers.create name: "Extra Light Triple Brewed", style: "Lager"Work by hand on the console and implement the following:
- Create the brewery Hartwall and three beers for it using all three ways demonstrated above.
- However, we realise that Harwall has to be deleted because of its bad quality. Before deleting it, write down the Hartwall object ID
- After deleting Hartwall, the database will keep on storing beer objects which belong to the brewery you have already deleted
- Retrieve the orphan beers with the command
Beer.where suitableparameterhere- Destroy the beers which were retrieved with the operation. You find information on how to go through a list at https://github.com/mluukkai/WebPalvelinohjelmointi2023/blob/main/web/rubyn_perusteita.md#taulukko
Let us analyze the ready-made controller of the brewery at app/controller/breweries_controller.rb
The controller has been named according to Rails conventions in the plural form. According to Rails conventions, there are six methods in the controller. Let us inspect the index method first, which takes care of displaying all the breweries:
class BreweriesController < ApplicationController
  # ...

  def index
    @breweries = Brewery.all
  end

  # ...
end
The method contains only one command
@breweries = Brewery.all
this means that the method sets the list of all breweries to a variable called @breweries which forwards the brewery list to the view. After this, the index method renders the HTML page which was defined in the view template app/views/breweries/index.html.erb. The method does never point to the view template or contain a command to render it. Once again, it's about Rails' Convention Over Configuration principle: if we don't specify anything, the view template index.html.erb is rendered at the end of the index method.
We could also write down explicitly the rendering command:
def index
  @breweries = Brewery.all
  render :index   # renders the view template index.html.erb from the directory view/breweries
end
The view templates (erb files) are made in HTML with embedded Ruby code.
Let us have a look at the view template which has been ready-generated, the file app/views/breweries/index.html.erb
<p style="color: green"><%= notice %></p>

<h1>Breweries</h1>

<div id="breweries">
  <% @breweries.each do |brewery| %>
    <%= render brewery %>
    <p><%= link_to "Show this brewery", brewery %></p>
  <% end %>
</div>

<%= link_to "New brewery", new_brewery_path %>
The view template creates a list in which each brewery contained by the variable @breweries is its own row.
The Ruby code embedded into the view template is placed between the <% %> symbols. In turn, <%= %> makes so that the value of the Ruby command is printed on the screen.
We'll soon get a bit more familiar with how tables are generated. First, let us add the information about the total number of breweries to our page (the erb template). Add the following line at some point in the page, for instance right after the header contained by the h1 tags
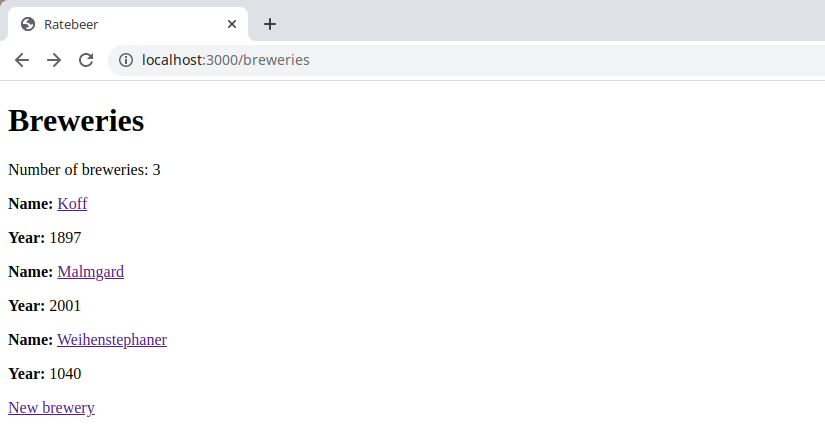
<p>Number of breweries: <%= @breweries.count %></p>Go to the page which lists the breweries with your browser and make sure the operation has worked out.
Let us go back to the code which lists the breweries and let us take a closer look. Every brewery is printed on their own line using Ruby's each iterator:
  <% @breweries.each do |brewery| %>
    <%= render brewery %>
    <p>
      <%= link_to "Show this brewery", brewery %>
    </p>
  <% end %>
We go through the brewery list which is stored in the variable @breweries with the help of the each iterator. (More information about each at https://github.com/mluukkai/WebPalvelinohjelmointi2023/blob/main/web/rubyn_perusteita.md#each).
Rails creates the rows by using the render method which it invokes for each brewery.
<%= render brewery %>The render method makes use of partial tempalates.
Rails has automatically generated a partial (template) file for an individual brewery at app/views/breweries/_brewery.html.erb.
The partial is as follows:
<div id="<%= dom_id brewery %>">
  <p>
    <strong>Name:</strong>
    <%= brewery.name %>
  </p>

  <p>
    <strong>Year:</strong>
    <%= brewery.year %>
  </p>

</div>
For each individual brewery the rows contained by the div tags are created and placed in to a list. The first row contains the name of the brewery and the second its founding year.
Partial template files are named with a starting underscore ( _ ) so that they can be easily recognized.
The definition and use of a partial uses a bit of Rails magic. A partial is called like this:
  <% @breweries.each do |brewery| %>
    <%= render brewery %>
    ...
  <% end %>
The render method gets the brewery object saved in the variable brewery as a parameter. From the type of the object Rails can deduce that it should use the partial defined in file _brewery.html.erb.
In the partial, a brewery object is referred to with the variable brewery:
<div id="<%= dom_id brewery %>">
  <p>
    <strong>Name:</strong>
    <%= brewery.name %>
  </p>

  ...

</div>
On the third row of the brewery details is a link to the page displaying that brewery's information. The Ruby code that generates the link is <%= link_to "Show this brewery", brewery %>.
Actually, the above one is a short form of the following:
<%= link_to "Show this brewery", brewery_path(brewery.id) %>
which generates HTML code which looks like the one below (the number below depends on the value of the ID field of the object in the table line):
<a href="/breweries/1">Show this brewery</a>
i.e. a link to the address "breweries/1". The first parameter of the command link_to is the name of the a-tag and the second is the link address.
The address itself is created in this longer form with the helper method brewery_path(brewery.id)which returns the path to the page of the brewery with the ID brewery.id. The same thing is accomplished by the object itself, in our example the variable brewery, as a parameter to the method link_to.
We could also "hardcode" a command which generates a link using the form <%= link_to 'Show', "breweries/#{brewery.id}" %>, but hardcoding is not usually a smart thing to do, and in this case even less.
What does "breweries/#{brewery.id}" mean? The string starts with a reference to all breweries ("breweries"), followed by a variable that contains the id of a specific brewery. The variable is set using the #{} notation. This notation allows us to embed variables into strings.
change the name of the brewery so that it can be clicked on (do this on the partial file) and delete the show field and its link from the table
After the exercise, the pages showing the breweries of your application should look like the one below
Let us inspect how individual breweries are shown. The url to the brewery page is like "breweries/3", where the number is the brewery ID. The show method of the breweries controller lets us access the brewery page:
class BreweriesController < ApplicationController
  before_action :set_brewery, only: %i[ show, edit, update, destroy ]

  # other methods...

  def show
  end

end
The method does not contain any code! We notice however that at the beginning of the class definition there is the line
before_action :set_brewery, only: [:show, :edit, :update, :destroy]
This means that before we execute any of the listed methods (show, edit, update ja destroy) the method set_brewery is executed . The definition of the method is at the end of the class:
class BreweriesController < ApplicationController
  before_action :set_brewery, only: %i[ show, edit, update, destroy ]

  # ...

  def show
  end

  # ...

  private
    def set_brewery
      @brewery = Brewery.find(params[:id])
    end

end
So before executing the method show, we execute the command
@brewery = Brewery.find(params[:id])this refers to the variable params, which contains the information concerning the HTTP calls which are executed. The variable params is an associative table, or in other words, hash. The value of the :id key (that is to say, params[:id]), communicates the ID of the brewery to inspect, in this case, that is the part which follows the slash in the page path breweries/xx.
We retrieve the brewery with the well-known command Brewery.find and we store it into the variable @brewery.
At the end, the method show renders the view template show.html.erb. The view template is generated again automatically based on Rails conventions: the show method of the brewery controller is executed, and towards the end, the view views/breweries/show.html.erb is rendered unless something else is defined in the code.
If we write out the same explicitly, the code to be executed together with the show method will look like the following:
    @brewery = Brewery.find(params[:id])
    render :show
The code of the view template views/breweries/show.html.erb is the following:
<p style="color: green"><%= notice %></p>

<%= render @brewery %>

<div>
  <%= link_to "Edit this brewery", edit_brewery_path(@brewery) %> |
  <%= link_to "Back to breweries", breweries_path %>

  <%= button_to "Destroy this brewery", @brewery, method: :delete %>
</div>
The part with the notice ID at the beginning of the page is for displaying the messages concerning brewery creation or editing. We'll speak more about the topic later on.
The page uses the same partial for brewery as the page listing all the breweries does. Thanks to earlier changes, the title of page is now a clickable link to itself.
Some notes on partials: the partial showing a brewery's details is as follows:
<div id="<%= dom_id brewery %>">
  <p>
    <strong>Name:</strong>
    <%= brewery.name %>
  </p>

  <p>
    <strong>Year:</strong>
    <%= brewery.year %>
  </p>

</div>
The brewery given as a parameter to the partial is stored in the variable brewery. The partial is then called like this:
<%= render @brewery %>The partial could be given more parameters but here we only give one. Because the type of the parameter is Brewery, the partial _brewery.html.erb is rendered. Additionally, the partial will be given a parameter through a variable named brewery. The variable relaying the parameter is automatically named based on the name of the partial.
We will be soon modifying the individual brewery view but as we don't want the changes to affect the all breweries view (which uses the same partial) let's now stop using the partial on the all breweries view. Change the contents of app/views/breweries/index.html.erb to following:
<p style="color: green"><%= notice %></p>

<h1>Breweries</h1>

<p>Number of breweries: <%= @breweries.count %></p>

<div id="breweries">
  <% @breweries.each do |brewery| %>
    <div id="<%= dom_id brewery %>">
      <p>
        <%= link_to brewery.name, brewery %>
      </p>

      <p>
        <strong>Year:</strong>
        <%= brewery.year %>
      </p>

    </div>
  <% end %>
</div>

<%= link_to "New brewery", new_brewery_path %>
Now the code from the partial _brewery.html.erb is copy-pasted directly to the all breweries' template.
Add information about the number of beers belonging to each brewery, with
@brewery.beers.count.Edit the ready-made page so that the brewery name becomes a header level h2 and the year is in cursive like "Established in 1897". To do this, you need to stop using the partial rendering and do rendering without it.
Changes described here and in the next exercise are meant be done in the partial taking care of displaying individual breweries _brewery.html.erb
Let us continue with our editing.
Add a list of the brewery's beers on the brewery page. First, add the following
<%= @brewery.beers.to_a %>and see what happens.Next, list only the beer names using an each iterator:
<p>
 <% brewery.beers.each do |beer| %>
   <%= beer.name %>
 <% end %>
</p>
Change the beer names so that users can click on them; use the method
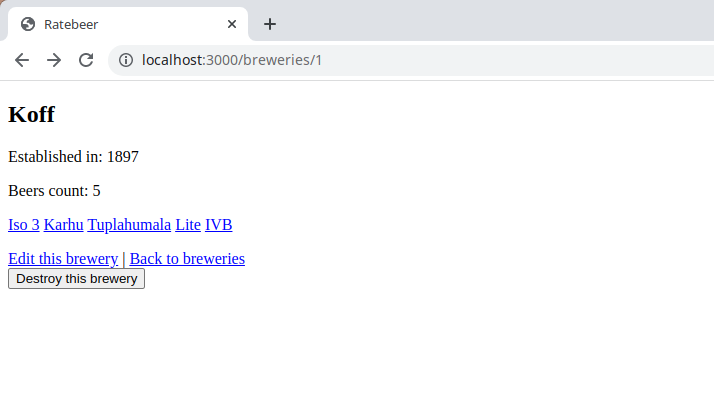
link_toto implement this
After the exercise, you page should look like the following
Let us improve a bit more the navigation of our application.
In all the brewery pages, add a link to all the beers page. Similarly add a link to all breweries page, in the all beers page. As an example, you can insert the link to the beers page with the command
link_to 'list of beers', beers_path
Let us try to get going the list with all the beers, finally.
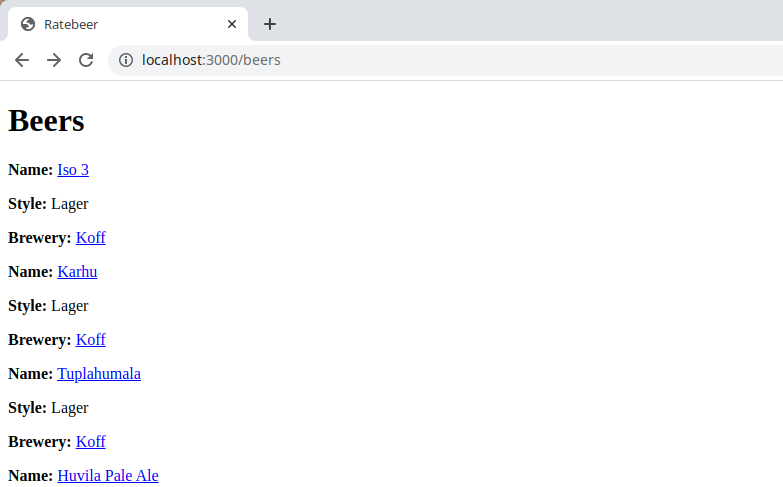
At this point, the brewery ID of the beers is shown on the page with all the beers
Change the page so that beers show the brewery name, not the ID. Also, users should be directed to the brewery page if they click on the name
Modify the beer name too, so that users can click on it, and delete the show link
Attention: if you encounter problems, you'd better read the following section!
The result should look like the following:
You might encounter the following error exception
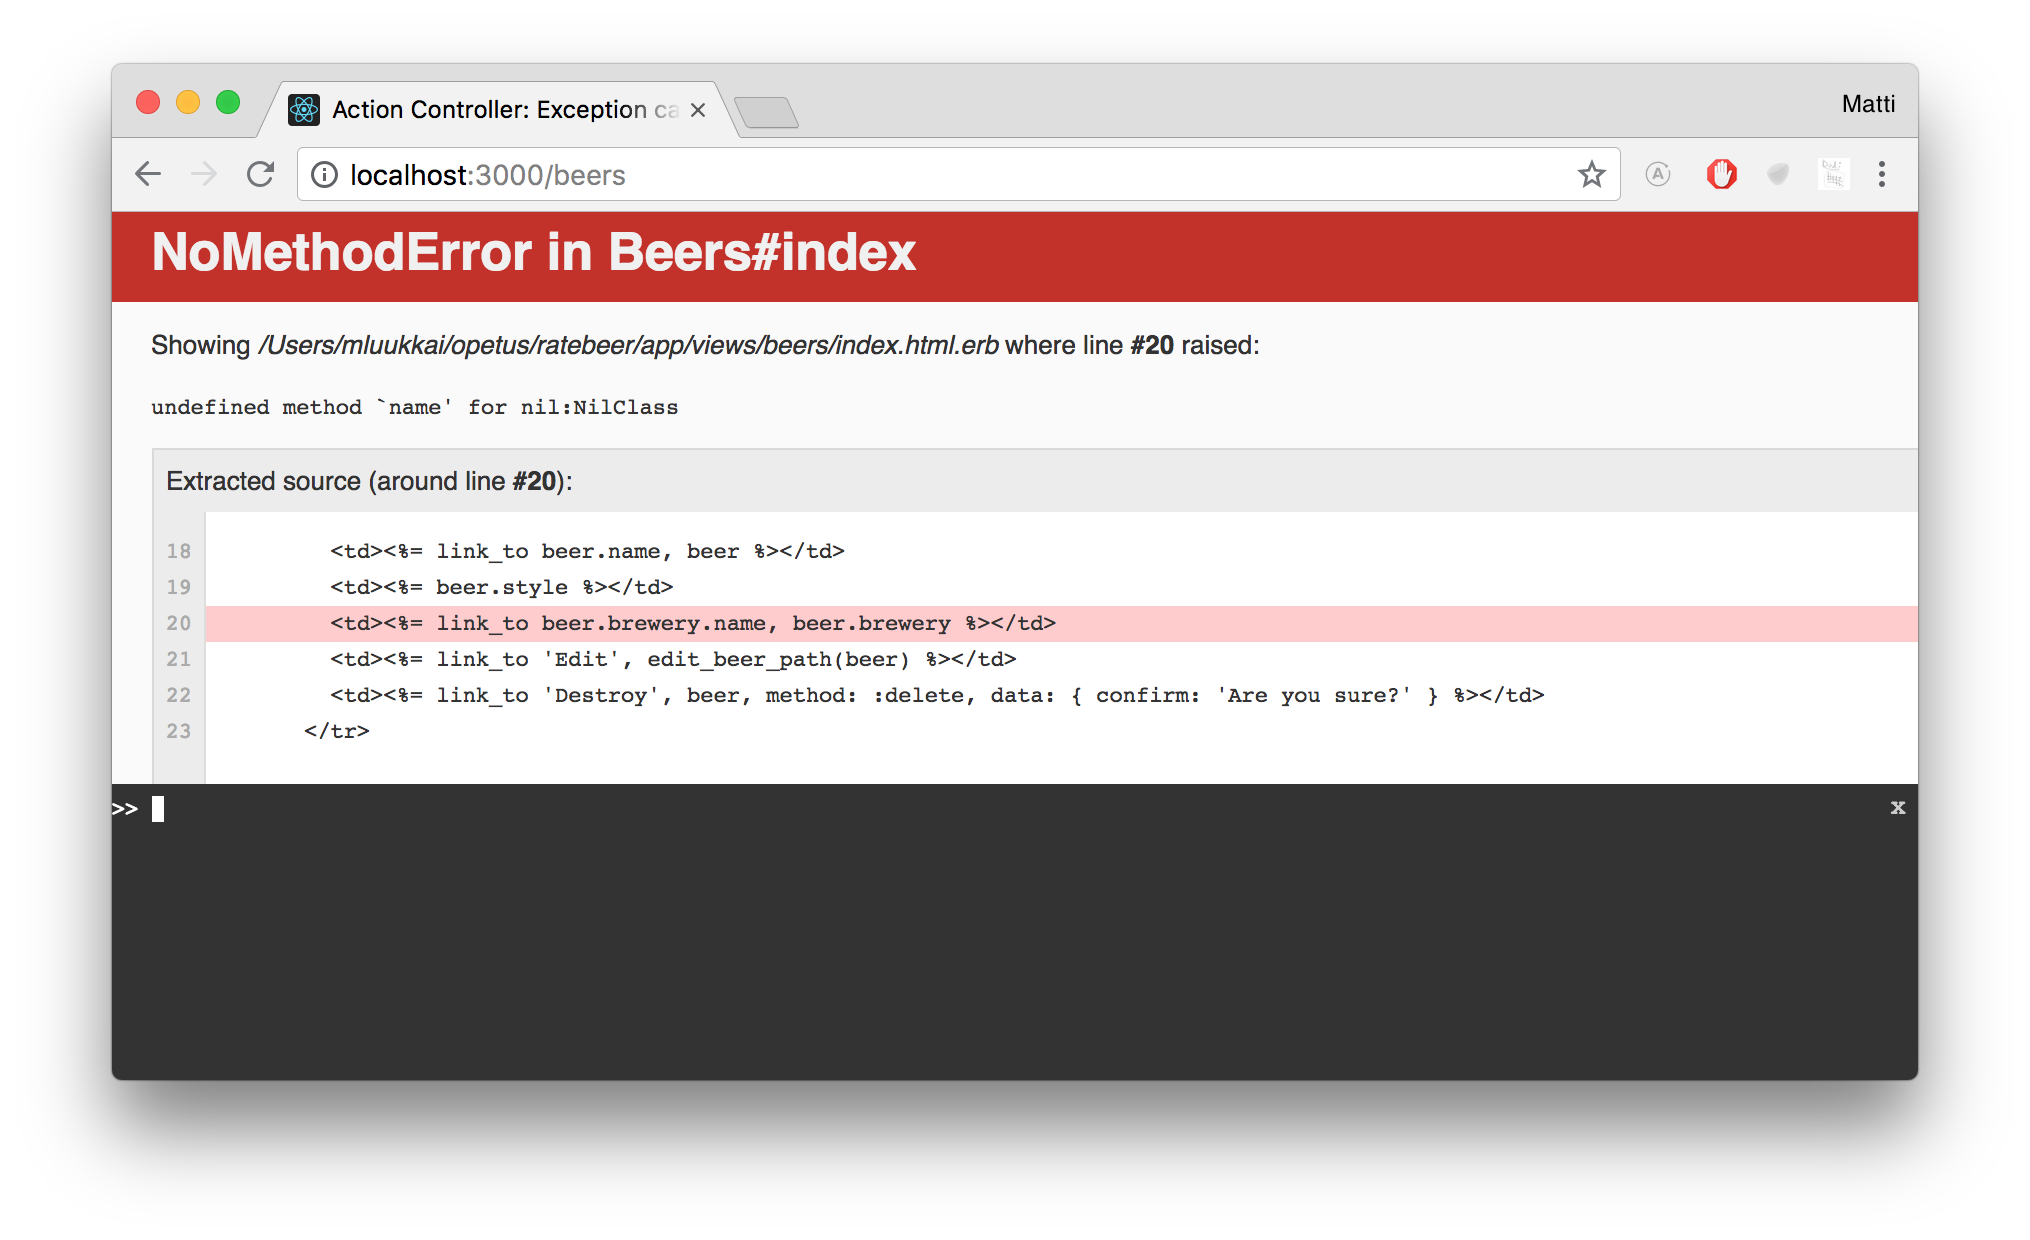
The problem is actually the classic nullpointer exception, or a nilpointer exception – as it is called in Ruby. Rails points out that you have tried to call the method 'name' for nil (which is an object in Ruby!), and that method does not exist. The reason is most probably that your database contains beers which were not assigned a brewery or where their brewery has been deleted.
You can delete the beers which cause troubles by hand or with the help of your console. Using the console, you can retrieve orphan beers with the command:
orphan_beers = Beer.all.select{ |b| b.brewery.nil? }
then you can delete them with the help of an each iterator
orphan_beers.each{ |orphan| orphan.delete }
because we only call one method for each iterated object, the previous command can be implemented in the following way too, where the syntax is quite particular:
orphan_beers.each(&:delete)
We have created database tables in our application for breweries and beers, as well as the controllers and views to handle them. Let us review again Rails name conventions, it might take a while for the beginner to get used to them.
We created the brewery and its controllers and views with Rails' scaffold generator in the following way:
rails g scaffold Brewery name:string year:integer
This produced:
- the database table
breweries - the controller
BreweriesController, placed in the directory app/controllers/ - the model
Brewery, placed in the directory app/models/ - a set of views in the directory app/views/breweries
- the migration file which takes care of shaping the database, in the directory /db/migrate
According to Rails conventions, the URL for the page of all breweries is breweries. Accordingly, the URLs for the pages of the singular breweries follow the pattern breweries/3, where the number is the brewery ID.
You don't need to write down the URLs in the view templates, because Rails provides us with path_helper methods (see http://guides.rubyonrails.org/routing.html#path-and-url-helpers), which will help you to generate the URLs.
The method breweries_path generates the URL of all breweries (or only the latter part of the URL, in fact). The URL of a singular brewery can be generated with the method brewery_path(id), where the parameter is the ID of the brewery it links to.
The various helpers are often used with the method link_to. Link_to generates a link to the HTML page, that is an a-tag.
You can generate a link to the page of a brewery in the following way:
<%= link_to "link to brewery #{brewery.name}", brewery_path(brewery.id) %>The first parameter is the text of the link, and the second is the address.
When creating a link for a singular object page,a shorter form is often used:
<%= link_to "link to brewery #{brewery.name}", brewery %>Now the second parameter is directly the object, to whose page the link leads to. When the second parameter is an object, Rails replaces it automatically by generating the real path with the code brewery_path(brewery.id)
The controllers which are generated automatically on Rails have six methods. The list of all breweries – that is, the address /breweries – is managed by the method index; the address of a singular brewery – for instance, /breweries/3 – is managed by the show method of the controller. Later on, we will get to know other methods of the controller.
The controllers methods finish by rendering the template which shapes the HTML page which is returned to users. By default, the index method of the brewery controller renders the view template app/views/breweries/index.html.erb and the method show renders the view template app/views/breweries/show.html.erb.
This means that the controllers don't need to call the render method separately, if they render the default template. This means that the code
class BreweriesController < ApplicationController
  def index
    @breweries = Brewery.all
    render :index
  end
works exactly the same as the following
class BreweriesController < ApplicationController
  def index
    @breweries = Brewery.all
  end
The explicit render method is needed only when the controller renders a view different from the default one.
Let's revise a few things about partial templates. Let's consider a situation where a user navigates to the page of single beer e.g. beers/1. The application executes the BeerController method 'show', which by default renders the template views/beers/show.html.erb. The controller set the desired beer in variable @beer thanks to the before_action configuration.
class BeersController < ApplicationController
  before_action :set_beer, only: %i[ show edit update destroy ]

  # executed when navigating to the page of a single beer e.g. beers/1
  def show
  end

  private
    # executed before the method show
    def set_beer
      @beer = Beer.find(params[:id])
    end

end
In other words, the view template can access the beer through the @beer variable:
<%= render @beer %>

<div>
  <%= link_to "Edit this beer", edit_beer_path(@beer) %> |
  <%= link_to "Back to beers", beers_path %>

  <%= button_to "Destroy this beer", @beer, method: :delete %>
</div>
The view template doesn't take care of all the rendering, it takes care of rendering the beer's details through the partial views/beers/_beer.html.erb. The partial is rendered with method render:
<%= render @beer %>Because the type of the parameter of the method call is Beer, Rails knows that it is meant to render the partial _beer.html.erb. The partial sees the parameter variable beer. The variable is automatically appropriately named based on the name of the partial, thanks to Rails magic.
<div id="<%= dom_id beer %>">
  <p>
    <%= link_to beer.name, beer %>
  </p>

  <p>
    <strong>Style:</strong>
    <%= beer.style %>
  </p>

  <p>
    <strong>Brewery:</strong>
    <%= link_to beer.brewery.name, beer.brewery %>
  </p>

</div>Temporarily, make the following change to the
indexmethod of the brewery controller:def index @breweries = Brewery.all render :breweries endTry to see what happens when you go to the breweries page, at the address http://localhost:3000/breweries
Add the file breweries.html.erb to the directory app/views/breweries and add something like the following
breweries <%= @breweries.count %>Go to the breweries page
Return the method back to the original form.
By default, Rails applications use a SQLite database but in production some proper database, such as PostgreSQL, should be used. Libraries used in a Rails application, or gems, in Rails lingo, are defined in Gemfile, located in the root of the application. To implement PostgreSQL, we need to edit Gemfile.
Remove the line
gem 'sqlite3'and add somewhere in the file the following:
group :development, :test do
  gem 'sqlite3'
end

group :production do
   gem 'pg'
end
From command line, execute bundle install to realize the changes
$ ratebeer git:(master) ✗ bundle install
Fetching gem metadata from https://rubygems.org/..........
Resolving dependencies...
Using rake 13.0.6
Using concurrent-ruby 1.1.10
Using minitest 5.16.1
Using builder 3.2.4
...
Using rails 7.0.3
Installing pg 1.4.1 with native extensions
Bundle complete! 16 Gemfile dependencies, 75 gems now installed.
Use `bundle info [gemname]` to see where a bundled gem is installed.
If bundle install throws an error (most likely only happens on OS X) you can either:
- rerun the command with additional parameters
bundle install --without production- This is the recommended way unless you explicitly want to install a postgresql database to you computer (there's no need for that during this course as we won't use postgresql locally)
- Note that if you choose this option, you need to use this form of the command always in the future as well.
- alternatively, you can first install postgresql to your own computer and the rerun the command
Let's commit all the changes to version control:
git add -A
git commit -m "updated Gemfile for Internet"
There are countless solutions for hosting application, that is "putting them to the internet".
The easiest way to host applications nowadays are the PaaS (or Platform as a Service) services that handle setting up databases and runtime environments on behalf of the developer.
For ten years the best PaaS solution was Heroku. However, in August 2022 Heroku announced that starting 27.11.2022 all free services will be shut down. For that reason we will also introduce a promising competitor Fly.io. You can use either one as long as you remember that Heroku's free options have come to an end. For students Github Student Developer Pack offers $156 of credits.
Create credentials to Fly.io. You can also use your GitHub account.
Install Fly.io with these instructions. During installation, you might be asked to manually set some environmental variables, do as prompted.
Then proceed according to the Fly.io Rails guide.
Go to the application directory and create a Fly.io application with fly launch. A Postgres database will be initialized during this. Give "suitable" answers to the following questions. (The application name can contain only integers, lowercase letters and hyphens). Note that if you need to approve the creation of the database, by default this is set to 'No'.

Deploy your application to production with fly deploy. Use this command everytime you wish to push the current version of your application to the internet.
You can open your application in a browser with fly apps open.
Note that (currently) there is nothing at the root of the application, eg. in my case in https://ratebeer.fly.dev/. Our beers can be found at https://ratebeer.fly.dev/beers and breweries at https://ratebeer.fly.dev/breweries.
If something is not working, one should start by looking for the cause in the server logs. You can see them with fly logs.
You can also access the Rails console of your application on the server. To do this, first enter the Docker container running your application with fly ssh console. Then, in the console, run the command /app/bin/rails c.
Before the command you will most likely have to authenticate yourself with fly log.
You can also connect to the application postgres database with the command flyctl postgres connect -a name_of_database`. The name of the database is the name of the application with an additional '-db' at the end. My application is named ratebeer, so connecting to the database would be done as follows:
flyctl postgres connect -a ratebeer-db
Fly.io hasn't yet been used much on the department's courses, if you run into issues, ask for help in Discord.
There are all kinds of interesting things going on under the hood of Fly.io. The application is run inside a Docker container. A file for configuring the container set up, Dockerfile, has appeared into your directory. Docker is the modern, and future, solution for in production applications and several other scenarios. In this course, you will do fine without taking a deeper look under the hood of Docker but getting familiar with Docker is already basically a requirement for people in software industry. When you have the time, it is recommended to do the course DevOps with Docker.
You can deploy the application in Heroku very easily if the application folder is a git repository in itself.
If you haven't used Heroku before
- Make a Heroku ID.
- Create an ssh key and add it to Heroku at the page https://dashboard.heroku.com/account
- information on how to create an ssh key at https://github.com/mluukkai/otm-2018/blob/master/tehtavat/viikko1.md#julkinen-avain
- Install the Heroku command line interface, Heroku CLI, according to https://devcenter.heroku.com/articles/heroku-cli
Go to the root folder of your application and create a Heroku instance for it:
$ heroku create
Creating app... done, ⬢ young-escarpment-87255
https://young-escarpment-87255.herokuapp.com/ | https://git.heroku.com/young-escarpment-87255.git
Type your Heroku ID when it's required.
The application URL will in this case be https://young-escarpment-87255.herokuapp.com/. The beginning of the application URL can be edited by running heroku create url_beginning.
Note, that there is nothing in the application root so far, at the address https://young-escarpment-87255.herokuapp.com/. The beers of our application will be found at https://young-escarpment-87255.herokuapp.com/beers and the breweries at https://young-escarpment-87255.herokuapp.com/breweries
Now were are ready to launch our application to Heroku. The application is booted by executing the following from the command line: git push heroku main
$ git push heroku main
Counting objects: 136, done.
Delta compression using up to 4 threads.
Compressing objects: 100% (122/122), done.
Writing objects: 100% (136/136), 30.06 KiB | 615.00 KiB/s, done.
Total 136 (delta 14), reused 0 (delta 0)
remote: Compressing source files... done.
remote: Building source:
...
remote: -----> Discovering process types
remote:        Procfile declares types     -> (none)
remote:        Default types for buildpack -> console, rake, web, worker
remote:
remote: -----> Compressing...
remote:        Done: 47.7M
remote: -----> Launching...
remote:        Released v5
remote:        https://young-escarpment-87255.herokuapp.com/ deployed to Heroku
remote:
remote: Verifying deploy... done.
To https://git.heroku.com/young-escarpment-87255.git
 * [new branch]      main -> main
The application seems to have started without issues.
Now open the all breweries page in your browser, here https://young-escarpment-87255.herokuapp.com/breweries.
We are however greeted with an unfortunate error message "We're sorry, but something went wrong.".
We can troubleshoot by browsing heroku logs with heroku logs. The print out is quite long but after a short investigation we find the culprit:
2018-09-01T18:20:29.445705+00:00 app[web.1]: [ac5c97e8-2c40-4e97-9bf4-6d763bfd189f]
2018-09-01T18:20:29.453053+00:00 app[web.1]: [ac5c97e8-2c40-4e97-9bf4-6d763bfd189f] ActionView::Template::Error (PG::UndefinedTable: ERROR:  relation "breweries" does not exist
2018-09-01T18:20:29.453056+00:00 app[web.1]: LINE 8:                WHERE a.attrelid = '"breweries"'::regclass
2018-09-01T18:20:29.453058+00:00 app[web.1]: ^
2018-09-01T18:20:29.453060+00:00 app[web.1]: :               SELECT a.attname, format_type(a.atttypid, a.atttypmod),
2018-09-01T18:20:29.453064+00:00 app[web.1]: c.collname, col_description(a.attrelid, a.attnum) AS comment
2018-09-01T18:20:29.453065+00:00 app[web.1]: FROM pg_attribute a
2018-09-01T18:20:29.453062+00:00 app[web.1]: pg_get_expr(d.adbin, d.adrelid), a.attnotnull, a.atttypid, a.atttypmod,
The problem is that no database has been created PG::UndefinedTable: ERROR: relation "breweries" does not exist. We must perform migrations for applications deployed to Heroku. This can be done with heroku run rails db:migrate.
And now the applications works!
As you can see the beers and breweries have not been transferred to Heroku. If you want to add the objects defined in seed.rb to the database in Heroku you can run
heroku run rails db:seed
Do remember that you need to execute migrations everytime you deploy your application to Heroku.
We can also open the Rails console of the application deployed to Heroku with heroku run console:
$ heroku run console
irb(main):001:0> Brewery.all
=> #<ActiveRecord::Relation [#<Brewery id: 1, name: "Koff", year: 1897, created_at: "2022-08-09 14:57:30", updated_at: "2022-08-09 14:57:30">, #<Brewery id: 2, name: "Malmgard", year: 2001, created_at: "2022-08-09 14:57:30", updated_at: "2022-08-09 14:57:30">, #<Brewery id: 3, name: "Weihenstephaner", year: 1040, created_at: "2022-08-09
This is a normal Rails console session, so you can use it to e.g. check the state of the database of the application in Heroku.
As we mentioned in the previous section, the libraries used on Rails – the gems – are defined in the Gemfile which is located at the root of the application.
Before the changes we did in the previous section, the Gemfile used to look like the following (where the comments have been removed from the part on the top):
source "https://rubygems.org"
git_source(:github) { |repo| "https://github.com/#{repo}.git" }

ruby "3.1.2"

gem "rails", "~> 7.0.3"
gem "sprockets-rails"
gem "puma", "~> 5.0"
gem "importmap-rails"
gem "turbo-rails"
gem "stimulus-rails"
gem "jbuilder"
The Gemfile has got a list of gems, which are used by the application. As we see, Rails itself is a gem. In some cases, the version to use or the minimum suitable version number should be defined among the gems.
The associations are loaded at the address https://rubygems.org, using the program Bundler, see http://bundler.io/. You'll have to give the command bundle install from the command line. Bundler loads the gems and their associations from rubygem.org, and then the application is ready to use.
After bundle install is executed for the first time, the file Gemfile.lock is born, and it defines precisely what gem versions are set up. It doesn't necessarily define precise versions. After this, when you call bundle install, the versions which were defined in Gemfile.lock are installed. If you execute bundle update, you'll get the newer gem versions if needed and a new Gemfile.lock is created. You can see more information about Bundler at http://bundler.io/v1.5/rationale.html
By default, Rails provides us with three different execution environments
- development, the environment for the application development
- test, the environment to execute tests
- production, the environment which is used for in production use
In each execution environment there is their own database and Rails also works slightly differently in each environment.
Normally, the programmer works so that the application is executed in the development environment. In this case, Rails offers error messages which help the work of the application developer. The application code is also uploaded again when it's run. Because of this, the application does not need to be restarted when the code is modified. On the contrary, the added code is always available to use for the application, automatically.
The application that has been deployed to Heroku starts to work in the production environment, which contains various features which optimize its performance and are different than the development environment. The error messages of the application are also different: instead of reporting the reason and place of the error, they only tell that "Something went wrong...".
We'll get to know the test environment in the course week 4.
Different environments need different dependencies sometimes. For instance, when we execute the application in Heroku, the PostgreSQL database is used in the production environment. However, we use the sqlite3 database while we develop the applications. Same gems do not suit all the execution environments.
When we use different environments, gems can be defined with the group chunks in Gemfile. Below, our Gemfile after the changes required for Heroku:
source "https://rubygems.org"
git_source(:github) { |repo| "https://github.com/#{repo}.git" }

ruby "3.1.2"

gem "rails", "~> 7.0.3"
gem "sprockets-rails"
gem "puma", "~> 5.0"
gem "importmap-rails"
gem "turbo-rails"
gem "stimulus-rails"
gem "jbuilder"

group :development, :test do
  gem 'sqlite3'
end

group :production do
  gem 'pg'
end
sqlite3 gem is used only in the development and test environments. Only the development environment makes use of the gems pg and rails_12 factor.
Commit all the changes you have made and push the code in Github. Add a link in Github readme file to the Heroku or Fly.io instance of your application. The contents which are generated by default in the readme file of your Rails application might be best deleted.
Deploying your application to Heroku/Fly.io is not obligatory. However, it is highly recommended to do so as it is very educational.
If you use a private repository, add mluukkai as a collaborator.
Mark the exercises you have done at https://studies.cs.helsinki.fi/stats/courses/rails2023
Let's continue coding: week 2.