- install QGIS, Garmin MapTiler, and Google Earth
- get OSM data for your AOI
- can use a number of overpass queries, for example:
way[building]({{bbox}});out meta;>;out meta qt;way[highway]({{bbox}});out meta;>;out meta qt;- etc.
- can use a Geofabrik download
- can use a number of overpass queries, for example:
- create a file of polygons for your AOI
- in QGIS you can use Vector > Research Tools > Vector Grid...
- you can create a Field Papers atlas and export the bounding boxes data
- etc.
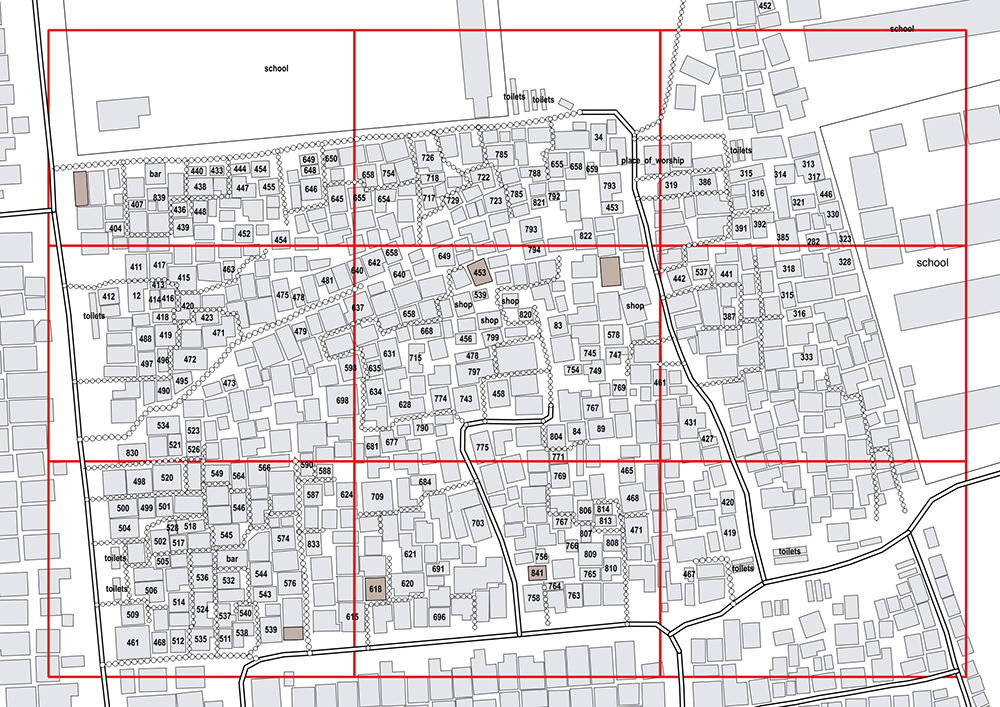
- open and style your data in QGIS
- use the Atlas generation functionality of QGIS print composer to make a page for each polygon
- have the extent controlled by atlas and add a margin around the features
- create another print composer
- note: I've found that A3 paper size and an export resolution of 120 dpi works well
- fit the entire AOI (all atlas polyons) to the page
- under Composition options, under Paper and quality, check the option for 'World file on'
- from the Project dropdown menu choose Save as Image... and save as type: TIF format (*.tif *.TIF)
- use Garmin MapTiler to convert the tif to a kml file
- use Google Earth to open the kml file and save it as a kmz
- connect your Garmin to the computer and add the kmz file to the /Garmin/CustomMaps folder

- install QGIS
- install QGIS plugins: GarminCustomMap, QuickMapsServices Plugin
- create the Field Papers atlas for your survey area
- after the atlas is generated from the overview/download page, from the Export Data options download a GeoJSON
- open QGIS,load the atlas GeoJSON with Add Vector Layer and style it with no fill and a wide stroke in a contrasting color
- add the OSM basemap through the QuickMapsServices Plugin (accessible through the Web dropdown menu)
- make sure the QGIS window and map pane are as large as possible
- right click the GeoJSON layer, Zoom to Layer and adjust map extent to fit the AOI
- under Composition options, under Paper and quality, check the option for 'World file on'
- from the Project dropdown menu choose Save as Image... and save as type: TIF format (*.tif *.TIF)
- add the TIF back into the map with Add Raster Layer
- when it prompts for a coordinate system select WGS 84 / Pseudo Mercator, EPSG:3857
- open the GarminCustomMap plugin from either the Plugins dropdown menu or the icon
- choose the save location and filename
- ignore the warning message about CRS
- set the JPG-Quality to max
- leave the Zoom-Factor at 1.0
- change the Draworder to 50 (map will display above the default Garmin world base data)
- hit okay and a Done message should display
- connect your Garmin to the computer and add the *.kmz file generated by GarminCustomMap to the /Garmin/CustomMaps folder
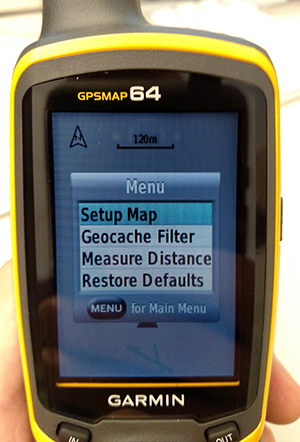
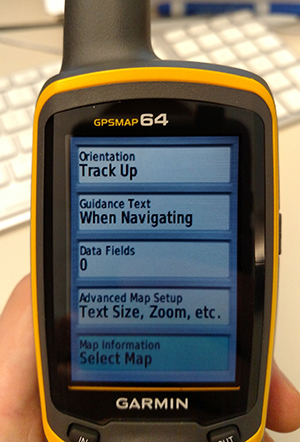
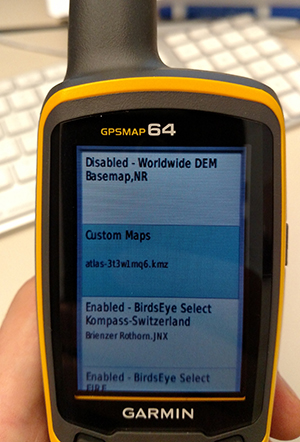
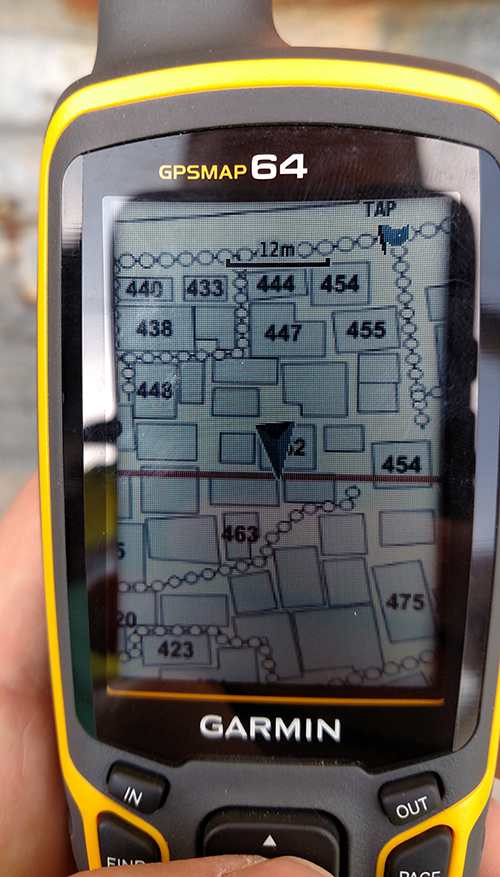
- on a Garmin GPSMAP64 go the map screen, press Menu, go to Setup Map, go to Map Information Select Map, find the Custom Maps entry in the list, press enter to see the file name and status (should be Enabled), press enter to preview the map, use the zoom buttons and arrow pad to take a closer look
export GeoJSON from Field Papers

ready to Save as Image...

icon to Add Raster Layer

menu for GarminCustomMap

icon for GarminCustomMap

options menu for exporting kmz using GarminCustomMap

done message

checking the map on a Garmin GPSMAP64