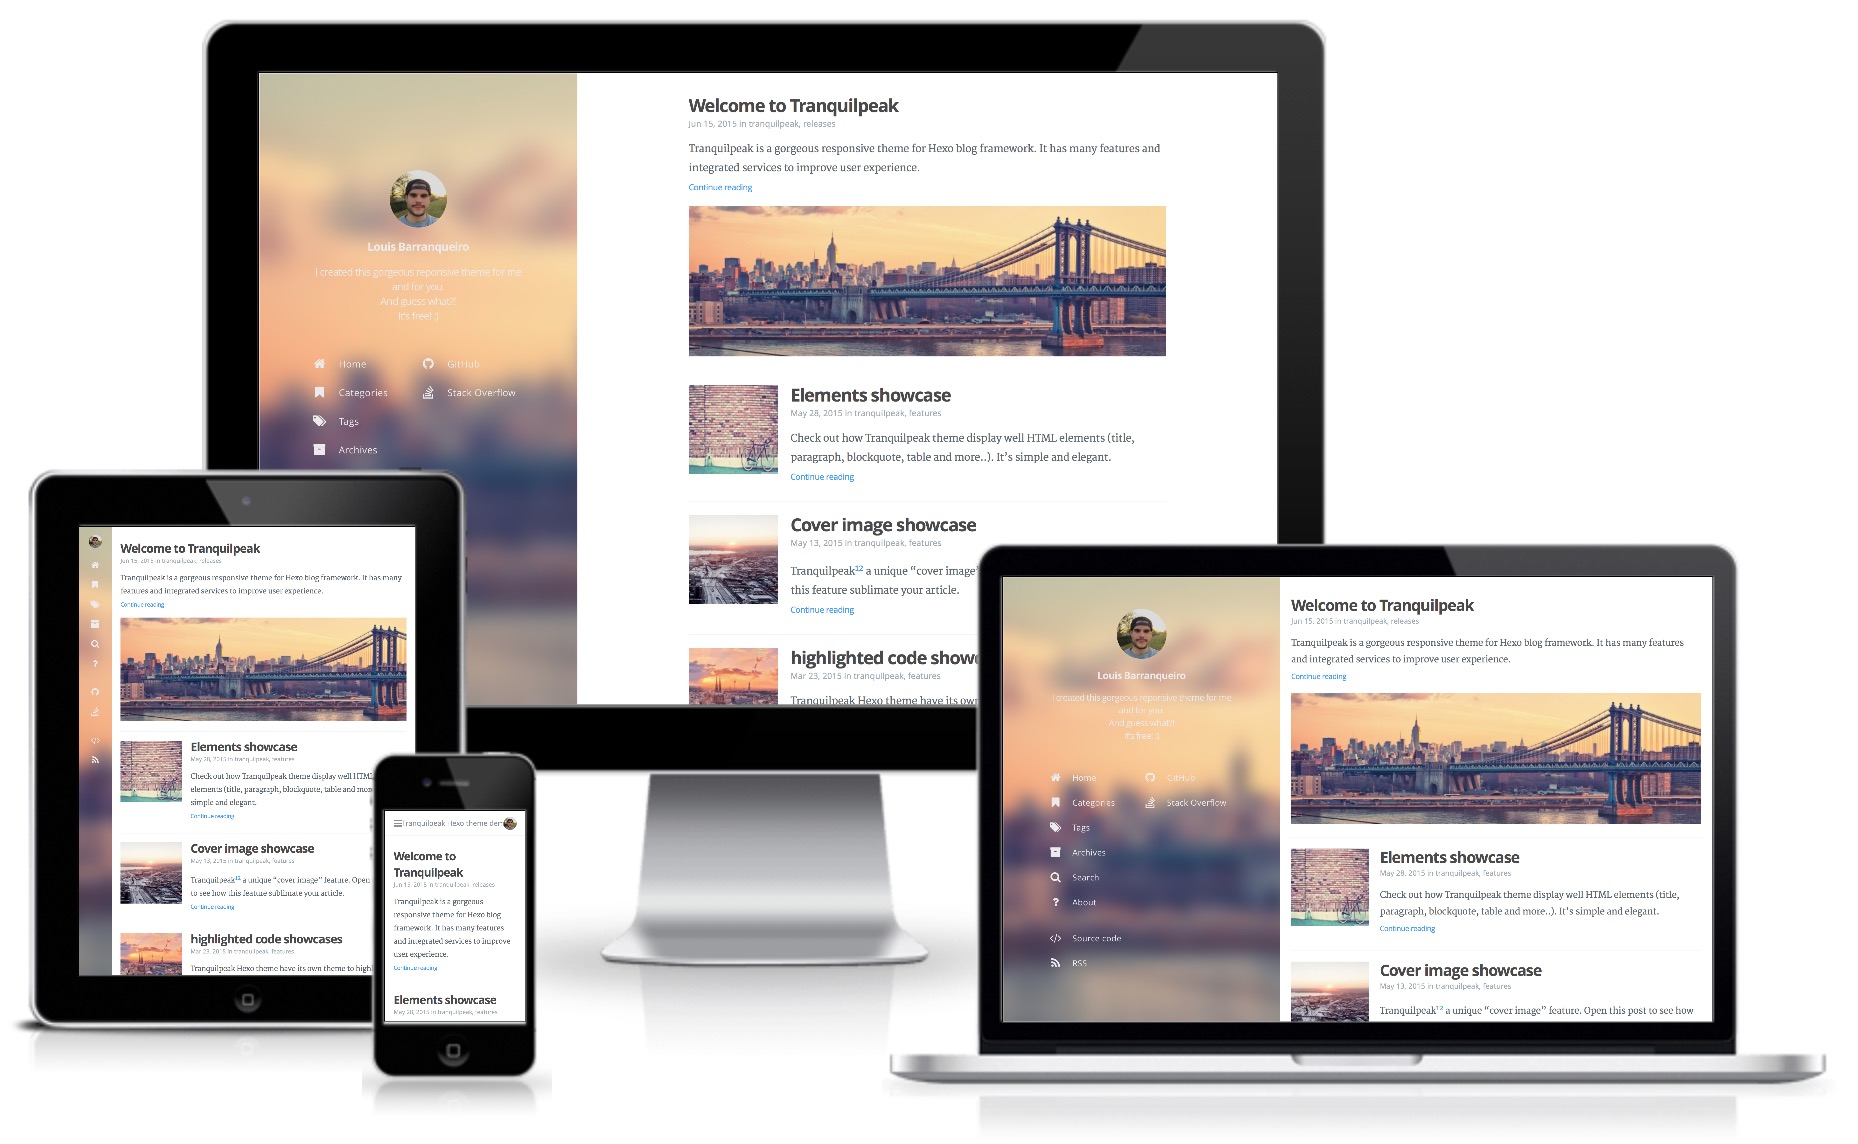
A gorgeous responsive theme for Hexo blog framework
Tranquilpeak theme is compatible with Hexo v3.0.x. The theme is compatible with higher versions of Hexo but these versions have some bugs with generation of relative urls so I recommend to use Hexo 3.0.x for the moment.
This documentation will help you to install tranquilpeak-hexo-theme and configure it to use all features which it provides.
If you want to report a bug or ask a question, create an issue.
- General
- Features
- Requirements
- Installation
- Hexo configuration
- Tranquilpeak configuration
- Integrated services configuration
- Quick & easy modifications
- Migrating posts
- Writing posts
- Running
- Author : Louis Barranqueiro
- Version : 2.0.0
- Compatibility : Node v4 or later, Hexo v3.0.0 or later
General features :
- Fully responsive
- Optimized for tablets & mobiles
- Configurable menu of the sidebar
- Pages to filter tags, categories and archives
- Background cover image
- Beautiful about page
- Support Open Graph protocol
- Support internationalization (i18
- Easily customizable (fonts, colors, layout elements, code coloration, etc..
Posts features :
- Thumbnail image
- Cover image
- Responsive videos & images
- Sharing options
- Navigation menu
- GitHub theme for code highlighting (customizable)
- Image gallery
- Tags for images (FancyBox), wide images, tabbed code blocks, highlighted text, alerts
- Table of contents
Integrated services :
- Disqus
- Duoshuo
- Google analytics
- Baidu analytics
- Gravatar
- Algolia
- Facebook Insights
- Gitment
- Node : v4 or higher. Download Node
- Hexo CLI : v0.1.4 or higher. Run
npm install hexo-cli -g
- Download the latest version built and ready for production here : hexo-theme-tranquilpeak-built-for-production-2.0.0
- Rename the folder in
tranquilpeakand place it inthemesfolder of your Hexo blog
Modify the theme in _config.yml by changing theme variable to tranquilpeak
If it's your first time using Hexo, please check Hexo official documentation
If you want to take advantage of cover image, thumbnail image, and image gallery features, you have to enable post assets folder by setting post_asset_folder to truein _config.yml.
You have to set relative_link to false otherwise if you enter your blog url without the end /, like this http://yourdomain.com/blog, all assets will not be loaded.
There is currently an issue on Hexo repository to fix this problem.
- Execute
npm install hexo-generator-feed --savein your Hexo blog folder - Add this lines in
_config.yml:
feed:
    type: atom
    path: atom.xml
limit: 20| Variable | Description |
|---|---|
| type | Feed type |
| path | Feed path (Default: atom.xml/rss2.xml) |
| limit | Maximum number of posts in the feed (Use 0 or false to show all posts) |
If you want more information on this plugin : hexo-generator-feed
You can define keywords for search engines. These keywords will be added on all pages.
keywords:
- hexo
- javascriptIf you are new to Hexo and internationalization (i18n), please read Hexo documentation - internationalization (i18n) section
Currently, the theme is delivered with :
- Chinese (zh-CN)
- Chinese Traditional (zh-TW)
- English (en)
- French (fr-FR)
- Japanase (ja)
- Portuguese (pt-BR)
- Russian (ru)
- Spanish (es)
If your language is not available, follow this guidelines (E.g : add russian language (ru) :
- Set
languagetoruin Hexo configuration file_config.yml - Create
ru.ymlfile intheme/tranquilpeak/languages/folder - Copy the content of
theme/tranquilpeak/languages/en.ymland paste it toru.ymlfile - Replace all strings in english by their translation in russian
- Complete your description and your job in russian and that's it!
Otherwise, complete your description and your job in the right language file(s) in theme/tranquilpeak/languages.
Tranquilpeak theme is currently not ready to support multi-languages. It will be in a next release.
Complete theme/tranquilpeak/_config.yml with your information. Read above sections to have more information.
The sidebar is powerful and easily configurable.
DON'T modify variables name sidebar, title, url and icon.
Others variables name which refer to the name of a menu or a link can be edited. Example : menu, home, categories, etc...
You can add groups of links and links much as you want
You just have to respect the indentation : groups of links -> link -> title, link, icon
sidebar:
    menu:
        home:
            title: Home
            url: /
            icon: home
        categories:
            title: Categories
            url: /all-categories
            icon: bookmark
        tags:
            title: Tags
            url: /all-tags
            icon: tags
        archives:
            title: Archives
            url: /all-archives
            icon: archive
        search:
            title: Search
            url: /#search
            icon: search
            # `open-algolia-search` classes are used to open algolia search window
            class: open-algolia-search
        about:
            title: About me
            url: /#about
            icon: question
    author_links:
        # github:
        #     title: GitHub
        #     url: https://github.com/
        #     icon: github
        # stack_overflow:
        #     title: Stack Overflow
        #     url: http://stackoverflow.com/users/
        #     icon: stack-overflow
        # twitter:
        #     title: Twitter
        #     url: https://twitter.com/
        #     icon: twitter
        # facebook:
        #     title: Facebook
        #     url: https://www.facebook.com/
        #     icon: facebook
        # google_plus:
        #     title: Google +
        #     url: https://plus.google.com/
        #     icon: google-plus
        # linked_in:
        #     title: Linked In
        #     url: https://www.linkedin.com/profile/
        #     icon: linkedin
        # mail:
        #     title: Mail
        #     url: mailto:
        #     icon: envelope-o
    rss:
        rss:
            title: RSS
            url: /atom.xml
icon: rss| Variable | Description |
|---|---|
| title | Title of the link |
| url | URL of the link. If the URL is internal, domain name is not necessary |
| icon | Name of the font awesome icon class without the fa- (Go to font-awesome icons to find class name of icon) |
| class (optional) | CSS Class added to the a link tag |
The right link of the header is customizable. You can add a link (as an icon) at the right of the header instead of the author's gravatar image or author's picture. By default, author's gravatar or author's picture is displayed if icon is empty DON'T edit header, right_link, url, icon and class variable name.
E.g to display a shortcut to open algolia search window :
header:
    right_link:
        url: /#search
        icon: search
class: open-algolia-search| Variable | Description |
|---|---|
| url | URL of the link. If the URL is internal, domain name is not necessary |
| icon | Name of the font awesome icon class without the fa- (Go to font-awesome icons to find class name of icon) |
| class | CSS Class added to the link |
# Author
author:
    email:
    location:
    picture:
    twitter:
    google_plus:
Your biography and your job is editable in each languages files in languages folder
| Variable | Description |
|---|---|
| Your mail address. This address will be used to get your gravatar image if you activate gravatar option | |
| location | Your location |
| picture | Your profile picture. Overwritten by your gravatar image if gravatar email is filled |
Your Twitter username without the @. E.g : tranquilpeak |
|
| google_plus | Your google plus profile id. E.g : +TranquilPeak or 123812884128439 |
# Customization
sidebar_behavior: 1
thumbnail_image: true
thumbnail_image_position: right
auto_thumbnail_image: true
cover_image: cover.jpg
favicon:
image_gallery: true
archive_pagination: true
category_pagination: true
tag_pagination: true| Variable | Description |
|---|---|
| sidebar_behavior | Define the behavior of the header and sidebar :
|
| clear_reading | Hide sidebar on all article page to let article take full width to improve reading, and enjoy wide images and cover images. Useless if sidebar_behavior is equal to 3 or 4. (true: enable, false: disable). Default behavior : theme.clear_reading value in theme configuration file. |
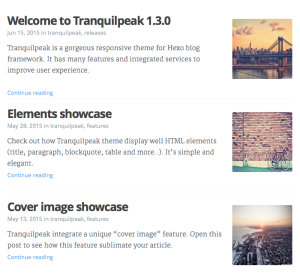
| thumbnail_image | Display thumbnail image of each post on index pages |
| thumbnail_image_position | Display thumbnail image at the right of title in index pages (right, left or bottom). Set this value to right if you have old posts to keep the old style on them and define thumbnailImagePosition on a post to overwrite this setting. (Default : right) |
| auto_thumbnail_image | Automatically select the cover image or the first photo from the gallery of a post if there is no thumbnail image as the thumbnail image. Set this value to true if you have old posts that use the cover image or the first photo as the thumbnail image and set autoThumbnailImage to false on a post to overwrite this setting. (Default : true) |
| read_more_message | Message displayed after the <!-- more --> comment or after 300 characters in post |
| go_to_message | Message displayed after the <!-- more --> comment or after 300 characters for post with link layout |
| cover_image | Your blog cover picture. I STRONGLY recommend you to use a CDN to speed up loading of pages. There is many free CDN like Cloudinary or you can also use indirectly by using services like Google Photos. Default image is on AWS S3 and delivered by AWS CloudFront. Otherwise put your image in folder source/assets/images/ and use relative url : your-image.png Change the default cover image to have an unique blog |
| favicon | Your favicon located in folder source/assets/images/ |
| image_gallery | Display an image gallery at the end of a post which have photos variables. (false: disabled, true: enabled) |
| archive_pagination | Displaying style of archive pages. (false: pagination disabled, true: pagination enabled) |
| category_pagination | Displaying style of category pages. (false: pagination disabled, true: pagination enabled) |
| tag_pagination | Displaying style of tag pages. (false: pagination disabled, true: pagination enabled) |
E.g :
A category page look like this with category_pagination: true :
The same page with category_pagination: false:
# Integrated services
disqus_shortname:
gravatar_email:
google_analytics_id:
fb_admin_ids:
fb_app_id:| Variable | Description |
|---|---|
| disqus_shortname | Your Disqus shortname. The theme use its own value for disqus shortname to reduce dependency with Hexo in case of this variable is deleted in a new Hexo version. |
| gravatar_email | Your gravatar email. Overwrite author.picture everywhere in the blog |
| google_analytics_id | Your Google analystics web property ID : UA-XXXXX-X |
| fb_admin_ids | Your Facebook user ids used to connect your blog with your facebook user accounts (Facebook Insights). Separate ids with comma. E.g : 9830047,1003342. Visit Facebook docs for more information. |
| fb_app_id | Your Facebook app id used to connect your blog with your facebook app account (Facebook Insights). E.g : 9841307. Visit Facebook docs for more information. |
# Sharing options
sharing_options:
    facebook:
        icon: "fa-facebook-official"
        url: "https://www.facebook.com/sharer/sharer.php?u={{post.permalink}}"
    twitter:
        icon: "fa-twitter"
        url: "https://twitter.com/intent/tweet?text={{post.permalink}}"
    google_plus:
        icon: "fa-google-plus"
        url: "https://plus.google.com/share?url={{post.permalink}}"
You can comment and uncomment to enable or disable sharing options. If your own sharing options, follow these steps. E.g with foo_bar social network:
- Add a new option based on the other.
sharing_options:
    foo_bar:
        icon: "fa-foo_bar"
url: "https://www.foo_bar.com/sharer/sharer.php?u={{post.permalink}}"- Add a line in the language file that you use (location:
themes/tranquilpeak/languages/)
global:
share_on_foo_bar: "Share on Foo Bar"| Variable | Description |
|---|---|
| icon | Name of the font awesome icon class without the fa- (Go to font-awesome icons to find class name of icon) |
| url | URL of the link. use {{ }} to insert post variable. Eg: {{post.date}} |
Tranquilpeak provides you 3 pages to display all posts title and date by tags, by categories, by date and an about page. To enable one of this pages, read following step.
To enable all-categories page :
- Run
hexo new page "all-categories". A new folder namedall-categorieswill be created insource/ - Replace
source/all-categories/index.mdcontent with :
---
title: "all-categories"
layout: "all-categories"
comments: false
---
New page will be reach at : /all-categories. On this page, users will be able to search and filter categories.
To enable all-tags page :
- Run
hexo new page "all-tags". A new folder namedall-tagswill be created insource/ - Replace
source/all-tags/index.mdcontent with :
---
title: "all-tags"
layout: "all-tags"
comments: false
---
New page will be reach at : /all-tags. On this page, users will be able to search and filter tags.
To enable all-archives page :
- Run
hexo new page "all-archives". A new folder namedall-archiveswill be created insource/ - Replace
source/all-archives/index.mdcontent with :
---
title: "all-archives"
layout: "all-archives"
comments: false
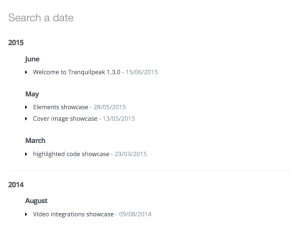
---New page will be reach at : /all-archives.
On this page, users will be able to search and filter posts.
Search pattern : YYYY/MMM/DD
The search modal of the theme use Algolia API to search in your posts. Of course, you have to create an account on Algolia to use it. Follow these steps to enable search modal :
- Install hexo-algoliaseach at the root of your blog folder with
npm install hexo-algoliasearch --save - Configure the plugin by following hexo-algoliaseach - Configuration. Some fields are required to use it with this theme
- Run
hexo algoliato index your posts on Algolia. - Configure the search on your Algolia dashboard.
Each time you want to deploy your blog, run hexo algolia before deploying it. Currently, the plugin clear the existing index on Algolia and re-index all your posts.
Required fields
fields:
  - title
  - date
  - excerpt
  - excerpt:strip
  - permalink
  - thumbnailImageUrl
Standard configuration
algolia:
  appId: "Z7A3XW4R2I"
  apiKey: "12db1ad54372045549ef465881c17e743"
  adminApiKey: "40321c7c207e7f73b63a19aa24c4761b"
  chunkSize: 5000
  indexName: "tranquilpeak"
  fields:
    - title
    - date
    - permalink
    - thumbnailImageUrl
    - tags
    - categories
    - excerpt
- excerpt:stripWhile you are writing articles, you need to check the result a lot of times before deploying your site. If you have enable Google analytics service, Google will include all requests done, even when hostname is localhost and this can greatly skew the results. To overcome this, you have to add a filter on Google Analytics website.
Follow these steps, to add new filter :
- Sign in to your Google Analytics account
- Select the Admin tab and navigate to the property in which you want to create the filter (Account > Property > View)
- In View column, click on Filters button
- Click on + NEW FILTER button
- Enter a name for the filter
- Select Custom filter, Filter Field :
Hostname, Filter Pattern :(.*?localhost.*?) - Click on Save button
Since you are going to edit the theme, you have to install all the necessary to build it after changes : Installation
Run command in theme folder : hexo-blog/themes/tranquilpeak
If you want to change font families, font size, sidebar color, things like that, take a look at source/_css/utils/_variables.scss file. This file contains global variables used in this theme. Build the theme after changes to see changes.
Tranquilpeak integrate its own highlight.js theme inspired by GitHub. Of course, you can replace it with an other theme found on highlight.js repository. Since Hexo use different CSS class names, all theme are not ready out of the box, but it is very easy to make them compatible.
Follow these steps :
- Get your theme here : Highlight.js theme or create yours
- Follow guidelines in
source/_css/themes/hljs-custom.scssfile - Build the theme with
npm run prodorgrunt buildProd. Learn more about Grunt tasks : Grunt tasks
When a user requests a page that the server cannot find, a standard 404 error page will be displayed. To create a custom 404 page that fits the theme first create a 404.md file in your Hexo source folder.
Hide post meta, actions and comments using front-matter settings:
title: Page not found
meta: false
actions: false
comments: false
Now you can customize your 404 error page just like any other blog post.
Finally, you need to tell your server to use /404.html (which Hexo generates out of 404.md) as your default 404 error page. Here are tutorials for some common web servers/providers:
Since you are going to edit the theme, you have to install all the necessary to build it after changes : Installation
If you used Tranquilpeak v1.3.0 or lower, you used maybe the auto excerpt feature : If there is no tag <!-- more --> in your post, so the excerpt is defined by cut the content after 250 characters.
Auto excerpt feature doesn't exist anymore since Tranquilpeak v1.4.0. And now, when there is no tag <-- more --> and <!-- excerpt --> in your post, the post is not cut and it will be displayed entirely on index page.
Maybe, you don't want to display entirely all of your old posts. So If you have a lot of posts to edit and you don't want to do to define the excerpt manually, use our script to automate this task.
With the migration script, the <!-- excerpt --> tag will be inserted at the end of the line of each posts which don't have an excerpt tag (more and excerpt).
- Run
hexo migrate 1.4.0in your blog directory. - It will ask you :
- The name of the directory that contains all of your post (default: _posts)
- The date of your last post written with a version of Tranquil anterior to 1.4.0
- Your old posts will be put in _1.4.0_old_posts directory and the new posts in _posts
We don't know if it come from Node.js (from specific version or not) or permissions of the directory which contains posts but follow these steps to fix this issue :
- Rename your posts directory
- Create a directory : _posts
- Move all of your posts in _posts directory
- Re-run migration script
To write articles, you have to use Markdown language. Here you can find the main basics of Markdown syntax.
Please note, there are many different versions of Markdown and some of them are not supported by Hexo.
To use tags plugins to highlight code or add Fancybox image, please read Hexo docs
I STRONGLY recommend you to use a CDN to speed up loading of pages. There is many free CDN like Cloudinary or you can also use indirectly by using services like Google Photos.
Tranquilpeak introduces new variables to give you a lot of possibilities.
Since Tranquilpeak 1.7, if you declare some photos in photos variable with a caption or an thumbnail url, please use gallery variable name instead of photos otherwise Hexo will generate wrong url for these images in open graph meta tag.
Example :
disqusIdentifier: fdsF34ff34
keywords:
- javascript
- hexo
clearReading: true
thumbnailImage: image-1.png
thumbnailImagePosition: bottom
autoThumbnailImage: yes
metaAlignment: center
coverImage: image-2.png
coverCaption: "A beautiful sunrise"
coverMeta: out
coverSize: full
coverImage: image-2.png
gallery:
    - image-3.jpg "New York"
    - image-4.png "Paris"
    - http://i.imgur.com/o9r19kD.jpg "Dubai"
    - https://example.com/orignal.jpg https://example.com/thumbnail.jpg "Sidney"
comments: false
meta: false
actions: false| Variable | Description |
|---|---|
| disqusIdentifier | Define a unique string which is used to look up a page's thread in the Disqus system. |
| keywords | Define keywords for search engines. you can also define global keywords in Hexo configuration file. |
| clearReading | Hide sidebar on all article page to let article take full width to improve reading, and enjoy wide images and cover images. Useless if theme.sidebar_behavior is equal to 3 or 4. (true: enable, false: disable). Default behavior : theme.clear_reading value in theme configuration file. |
| autoThumbnailImage | Automatically select the cover image or the first photo from the gallery of a post if there is no thumbnail image as the thumbnail image. autoThumbnailImage overwrite the setting auto_thumbnail_image in the theme configuration file |
| thumbnailImage | Image displayed in index view. |
| thumbnailImagePosition | Display thumbnail image at the right of title in index pages (right, left or bottom). thumbnailImagePosition overwrite the setting thumbnail_image_position in the theme configuration file |
| metaAlignment | Meta (title, date and categories) alignment (right, left or center). Default behavior : left |
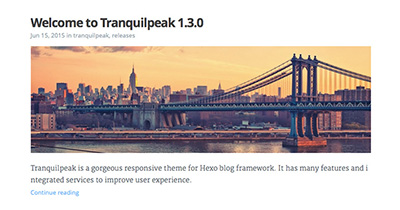
| coverImage | Image displayed in full size at the top of your post in post view. If thumbnail image is not configured, cover image is also used as thumbnail image. Check the beautiful demo here : Cover image demo |
| coverSize | partial: cover image take a part of the screen height (60%), full: cover image take the entire screen height. |
| coverCaption | Add a caption under the cover image : Cover caption demo |
| coverMeta | in: display post meta (title, date and categories) on cover image, out: display meta (title, date and categories) under cover image as usual. Default behavior : in |
| gallery | Formerly photos. Images displayed in an image gallery (with fancybox) at the end of the post. If thumbnail image is not configured and cover image too, the first photo is used as thumbnail image. format: original url [thumbnail url] [caption], E.g : https://example.com/original.jpg https://example.com/thumbnail.jpg "New York" |
| comments | Disable the comment of the post. |
| meta | Disable post meta (date, categories). |
| actions | Disable post actions (navigation, share links). |
Example:
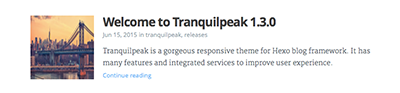
A post on index page will look like this with :thumbnailImagePosition set to bottom:
The same with : thumbnailImagePosition set to right:
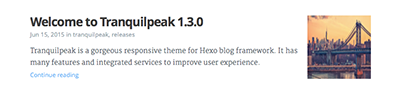
The same with : thumbnailImagePosition set to left:
The relative path of images entered is : source/_posts/{YOUR_POST_TITLE}/, you just have to enter the name of the image without domain name and path like written just above.
Of course, you can set external url.
Tranquilpeak v1.4.0 introduce a new way to define post excerpt with <!-- excerpt --> comment. Use
<!-- more -->to define post excerpt and keep the post excerpt in the post content<!-- excerpt -->to define post excerpt and remove the post excerpt of the post content
To display all post content on index page, don't put <!-- more --> and <!-- excerpt --> comment in your post content.
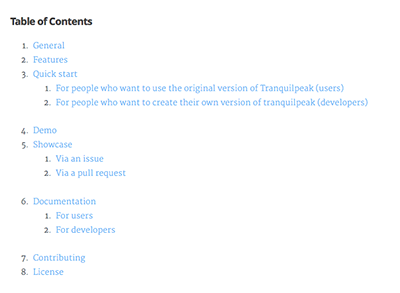
As post excerpt feature enable with <!-- more --> comment, you can display the table of contents of a post with <!-- toc -->. Place this comment where you want to display the table of content. You can also edit the title displayed at the top of the table of contents in the _config.yml file
Here is what looks like the table of contents generated:
Tranquilpeak introduce new tags to display alert messages, images in full width and create beautiful galleries.
DON'T use anymore fancybox tag. Please use image tag with fancybox class to generate them. More information here : Image tag
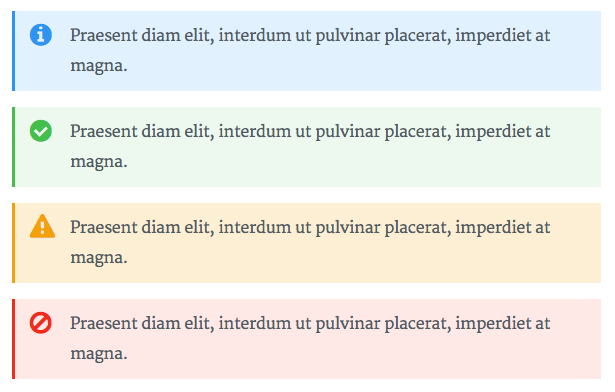
Alert tag is useful to highlight a content like a tips or a warning. Check it live here : Alert tag demo
Syntax :
{% alert [classes] %}
content
{% endalert %}
E.g :
{% alert danger no-icon %}
Here is a danger alert without icon
{% endalert %}
| Argument | Description |
|---|---|
| Classes |
|
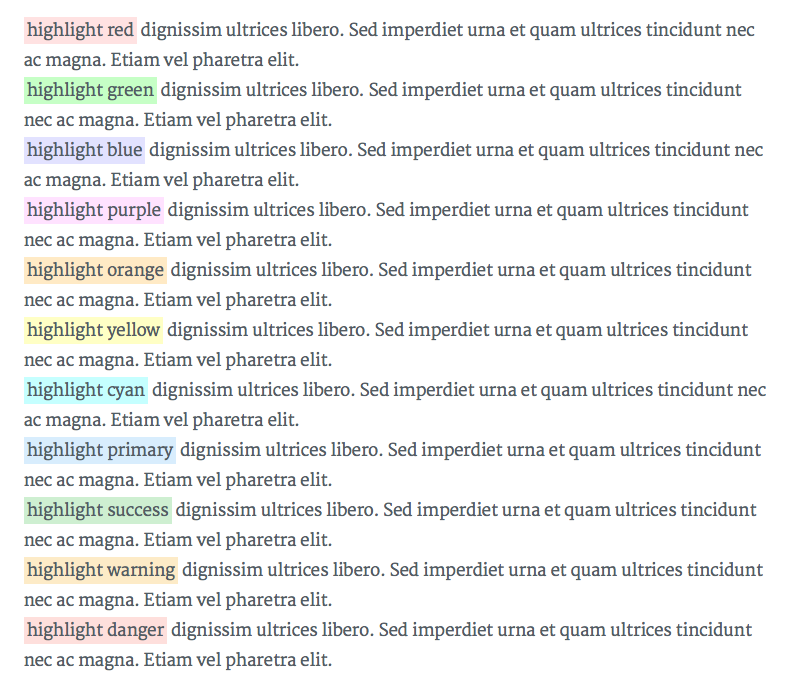
Highlight text tag is useful to highlight an interesting part in a text. Check it live here : Highlight text tag demo
Syntax :
{% hl_text [(classes | hexa code | rgb color | rgba color)] %}
content
{% endhl_text %}
E.g :
{% hl_text danger %}
your highlighted text
{% endhl_text %}
| Argument | Description |
|---|---|
| Classes | classes :
|
You can also use hexa color, rgb color, rgba color.
It's important to put the paragraph that contains highlight text tag inside <p>...</p>
otherwise the following content may not be rendered.
E.g (hexa color) :
<p>Sed imperdiet urna et quam ultrices {% hl_text #00FFFF %}your highlighted text{% endhl_text %} dignissim ultrices libero.</p>
E.g (rgba color) :
<p>Sed imperdiet urna et quam ultrices {% hl_text rgba(12, 12, 12, 0.4) %}your highlighted text{% endhl_text %} dignissim ultrices libero.</p>
Image tag is useful to add images and create beautiful galleries. Check what are the possibilities here : Image tag demo
Syntax : {% image [classes] group:group-name /path/to/image [/path/to/thumbnail] [width of thumbnail] [height of thumbnail] [title text] %}
E.g : {% image fancybox right clear group:travel image2.png http://google.fr/images/image125.png 150px 300px "A beautiful sunrise" %}
| Argument | Description |
|---|---|
| Classes (optional) | You can add css classes to stylize the image. Separate class with whitespace. Tranquilpeak integrate many css class to create nice effects :
|
| Group (optional) | Name of a group, used to create a gallery. Only for image with fancybox css class |
| Orignal image | Path to the original image. |
| Thumbnail image (optional) | Path to the thumbnail image. If empty, the orignal image will be displayed. |
| Width of thumbnail image (optional) | Width to the thumbnail image. If the thumbnail image is empty, width will be attached to thumbnail image created from original image. E.g : 150px or 85%. |
| Height of thumbnail image (optional) | Height to the thumbnail image. If the thumbnail image is empty, height will be attached to thumbnail image created from original image. E.g : 300px or 20%. |
| Title (optional) | Title of image displayed in a caption under image. Alt HTML attribute will use this title. E.g : "A beautiful sunrise". |
Tabbed code blocks are useful to group multiple code blocks related. For example, the source code of a web component (html, css and js). Or compare a source code in different languages.
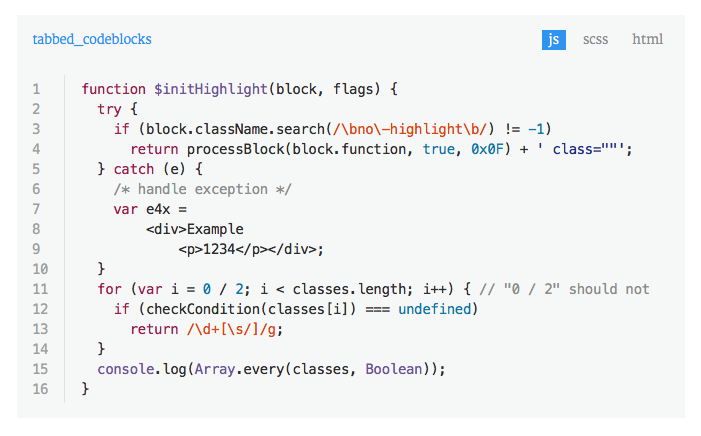
Check it live : tabbed code block demo
Syntax :
  {% tabbed_codeblock [name] [link] %}
      <!-- tab [lang] -->
          source code
      <!-- endtab -->
  {% endtabbed_codeblock %}
E.g :
  {% tabbed_codeblock example http://example.com %}
      <!-- tab js -->
          var test = 'test';
      <!-- endtab -->
      <!-- tab css -->
          .btn {
              color: red;
          }
      <!-- endtab -->
{% endtabbed_codeblock %}| Argument | Description |
|---|---|
| Name (optional) | Name of the code block, or of the file |
| Link (optional) | Link to a demo, or a file |
| Lang (optional) | Programming language use for the current tab |
Wide image tag is useful to display wide images in full width. It take the entire window width. Check the the result : Wide image tag demo
Syntax : {% wide_image /path/to/image [title text] %}
E.g : {% wide_image http://google.fr/images/image125.png "A beautiful sunrise" %}
| Argument | Description |
|---|---|
| Image | Path to the original image. |
| Title (optional) | Title of image displayed in a caption under image. Alt HTML attribute will use this title. E.g : "A beautiful sunrise". |
fancybox tag is deprecated since Tranquilpeak 1.3. Please use image tag with fancybox class to generate them. More information here : Image tag
Run hexo server and start writing! :)