As we have looked at Cognitive Search so far and saw how we can enrich our search service with the Azure Cognitive Services, we will now go into detail of some of those services. Yesterday we trained and registered a model and deployed it as an endpoint. Microsoft offers these services for developers to be able to make your applications smarter by enriching them with intelligence.

Today will be an overview of Azure Cognitive Services, as you will learn:
- Use the Cloud Shell as launch point for PowerShell and Bash scripts.
- Use Cloud Shell to automate Azure resource creation and configuration.
- How to deploy Cognitive Services from the areas Language, Speech, Vision and Decision with UI and Azure CLI
- How to use those Cognitive Services using Python
- How to train and use custom models (e.g. Custom Vision) yourself
We will cover the following topics in several sections:
| Pillar | API Service (section) | Documentation |
|---|---|---|
| Cloud Shell | - | Documentation |
| Language | Translator | Documentation |
| Language | Language Service: Language Detection, Sentiment Analyis, Key Phrase Extraction, Entity Linking | Documentation |
| Speech | Text-to-Speech, Speech-to-Text | Documentation |
| Vision | Computer Vision | Documentation |
| Vision | Custom Vision | Documentation |
We want to give you the greatest possible insight into the AI world on Azure. Therefore, we will first deploy the Cognitive Service "Translator" via the UI. After that, all other Cognitive Services will be deployed via the Azure CLI, which is why you will find a short introduction in the following text.
Ok - quite impressive what the Azure portal as a single page application allows us to do, isn't it?
However sometimes a shell is faster and better for repetitive tasks. But you may not want to install software nor tools for this in your machine.
The Azure Cloud Shell is a shell | console hosted in your browser window, ready to execute commands to create, delete, modify Azure resources in your subscription.
While it is also possible to use PowerShell on your local PC to administer Azure, using the Cloud Shell brings some advantages compared to using your PC.
Using the Cloud Shell saves you time as:
- you do not need to explicitly code the Azure logon within the script - you are already authenticated to Azure via the browser
- you do not need anything to be installed on your PC. So no more asking which version of PowerShell and what modules are necessary
[Azure Portal]
-> Click the 'Cloud Shell' symbol close to your login details on the right upper corner.
 )
)
-
The Azure Cloud Shell is an in-browser-accessible shell for managing Azure resources.
-
It already has the required SDKs and tools installed to interact with Azure.
-
The Azure Cloud Shell comes in 2 flavors: PowerShell or Bash. When being asked choose PowerShell this time.

-
The first time you use the 'Cloud Shell' you will be asked to setup a storage account e.g. to store files you have uploaded persistently. See

[Azure Portal] -> Click 'Show advanced settings'

| Name | Value |
|---|---|
| Subscription | %your subscription% |
| Cloud Shell Region | e.g. West Europe |
| Resource Group | e.g. rg-cloudshell |
| Storage Account | %some unique value% |
| File Share | cloudshell |
[Azure Portal] -> Create storage
-
Once successful your shell should appear at the bottom of the page:


Azure Cognitive Services:
- are APIs, SDKs and services available to help developers build intelligent applications without having direct Artificial Intelligence (AI), Machine Learning expert skills.
- enable developers to easily add cognitive features into their applications.
- help developers create applications that can see, hear, speak, understand and even begin to reason.
- can be categorized into five main pillars - Language, Speech, Vision and Decision.
You can solve the tasks in a programming language of your choice. For sake of convenience, we are providing hints in Python, which you can easily run on the Compute Instance (VM) from the Azure Machine Learning Service or in Visual Studio Code. SDK Support for C#, Node.js or .NET Core is available for most challenges. You can find code examples in the Azure documentation for the associated services.
For this entire challenge we will create a Resource Group called CognitiveServices as previously shown and described in the Azure Portal. All Cognitive Services can be added and deployed in this Resource Group.
In the upcoming tasks, we will reuse the Compute Instance (VM) from the Azure Machine Learning Service and create a new Notebook. We can click the New button and create a new Notebook of type: Python 3.8 - AzureML. A new browser tab should open up and we can click the name Untitled and rename it to CognitiveServices.ipynb.
Let's look at the first pillar of Cognitive Services - Language.
The world is getting more and more connected and therefore, translation services are gaining more significance. The Azure Translator Cognitive Service is a cloud-based machine translation service. It is easy to integrate into your applications, websites, tools, and solutions. It allows you to add multi-language user experiences in various languages and can be used on any hardware platform with any operating system for text translation.
🚩 Goal: Translation of multiple sentences, detection of one or more input languages to one or several output languages concurrently.
Let's get started with using the translator service!
Note: This is our first Cognitive Service that we are deploying. As mentioned at the beginning, the Translator will be the first and only Cognitive Service we deploy using the UI. All other Cognitive Services will be deployed via the Azure CLI.
First, create a Translator API Key in the Azure Portal:


The Translator API allows to directly access the service by specifying the API key. As with other services, you can find the key under "Keys and Endpoint".
Use the CognitiveServices.ipynb Notebook which you just created and copy the following code in a cell. We will conduct a REST Call by sending data to the Translate Cognitive Service and receiving a response from the pre-trained Machine Learning model behind the scenes. In this case, we are translating text from English to German.
Replace YOUR_SUBSCRIPTION_KEY and YOUR_RESOURCE_LOCATION with the information from your Azure Translator Service as described above and run the cell.
import requests, uuid, json

subscription_key = "YOUR_SUBSCRIPTION_KEY"
location = "YOUR_RESOURCE_LOCATION"
endpoint = "https://api.cognitive.microsofttranslator.com"
path = '/translate'
url = endpoint + path

headers = {
  'Ocp-Apim-Subscription-Key': subscription_key,
  'Ocp-Apim-Subscription-Region': location,
  'Content-type': 'application/json',
  'X-ClientTraceId': str(uuid.uuid4())
}

params = {
  'api-version': '3.0',
  'from': 'en',
  'to': ['de', 'it']
}

body = [
  {'text' : 'I want to order 4 pizza Magarita and 8 beer!'},
  {'text' : 'Please add 42 salads to the order!'}
]

response = requests.post(url, headers=headers, params=params, json=body)
print(json.dumps(response.json(), indent=2))
Example Result:
[
  {
    "translations": [
      {
        "text": "Ich m\u00f6chte 4 Pizza Magarita und 8 Bier bestellen!",
        "to": "de"
      },
      {
        "text": "Voglio ordinare 4 pizza Magarita e 8 birre!",
        "to": "it"
      }
    ]
  },
  {
    "translations": [
      {
        "text": "Bitte f\u00fcgen Sie der Bestellung 42 Salate hinzu!",
        "to": "de"
      },
      {
        "text": "Si prega di aggiungere 42 insalate all'ordine!",
        "to": "it"
      }
    ]
  }
]
As we can see, we can translate multiple sentences to multiple languages within one API call. The service also automatically detects the input language. (Optional: Try deleting the 'from': 'en' from the params section of the code and see how the json response changes.) It is possible to add optional parameters such as a profanity filter and more.
The Translator Service does not only translate text, but also has the capability of transliterating text from one type of script to another (and much more). You can try it out with the code below:
path = '/transliterate'
url = endpoint + path

params = {
    'api-version': '3.0',
    'language': 'ja',
    'fromScript': 'jpan',
    'toScript': 'latn'
}

body = [
  {'text' : 'こんにちは'}
]

response = requests.post(url, headers=headers, params=params, json=body)
print(json.dumps(response.json(), indent=2))
This should be the result:
[
  {
    "text": "Kon'nichiwa",
    "script": "latn"
  }
]Postman is an API platform for building and using APIs. Postman simplifies each step of the API lifecycle and streamlines collaboration. Since the Azure Cloud Platform consists out of many APIs this tool is perfect to get a deeper understanding of its functionalities.
Download and install Postman.
Here you will find 2 Postman collections we have created for you for the Translator API and Text Analytics API. These collections cover all API requests for the services. Download them.
After you have installed Postman open it. On the left side you will find the tab Collections. Navigate there and hit the Import button to upload the Translation collection.
Now go to the Environments tab again on the left side and create an environment for the Translator API by selecting the +. Name it Translator Environment.
- Create a variable called "api_key", select "secret" as a type, and paste your API key from the portal.
- Create a variable called "location" with the location you chose for the Translator service (e.g., westeurope)

Finally, assign the environment created to the Translator collection.
 .
.
Now, you can play around with the APIs! You can select the different services from the collections tab and click on "Send" to send a request. At the bottom, you should receive a response. You can also change the Parameters to check out different languages, or you can change the body to try out other texts.

| Azure Cognitive Services | Information |
|---|---|
| Cognitive Service for Language | https://docs.microsoft.com/en-us/azure/cognitive-services/language-service/overview |
🚩 Goal: Leverage the Cognitive Service for Language for extracting language, sentiment, key phrases, and entities from text
Now let's continue with some of the remaining Cognitive Services for Language. They are deployed using one service called Language Service. It provides Natural Language Processing (NLP) features for understanding and analyzing text.
Since we first deployed the Translator service via the UI, we now create the Language service via the Azure CLI.
To create and subscribe to a new Cognitive Services resource, use the az cognitiveservices account create command. This command adds a new billable resource to the resource group you created earlier. When you create your new resource, you'll need to know the "kind" of service you want to use, along with its pricing tier (or SKU) and an Azure location. You can either get an overview of the different "kinds" of Cognitive Services here, or use the following command:
az cognitiveservices account list-kindsLet us now create a free tier Language service with the following command in Azure CLI:
az cognitiveservices account create --name aidevcollegeLanguage --resource-group <your resource group> --kind TextAnalytics --sku F0 --location westeurope --yesHint: If you have already created a Language service with SKU F0, please use SKU S0!
This time we will use the Python SDK to use this service. Let's start with installing the text analytics package. Switch to your VM (or whatever you are using) and copy the following snippet into a new cell in your CognitiveServices.ipynb notebook. You might need to restart the kernel.
pip install azure-ai-textanalytics
There are two approaches to get the key and the region of your Cognitive Service ressource.
- under the section Keys and Endpoint from the Azure portal:

- Use the Azure CLI with the follwing code:
- Get the key:
az cognitiveservices account keys list --name <your resource-name> --resource-group <your resource-group-name>
- Get the endpoint:
az cognitiveservices account show --name <your resource-name> --resource-group <your resource-group-name> --query "properties.endpoint"In a next step, we need to create a client object (TextAnalyticsClient). Copy the code with the filled in key and region into a new cell in your notebook. We will reuse the client object for all following tasks concerning the language service.
from azure.core.credentials import AzureKeyCredential
from azure.ai.textanalytics import TextAnalyticsClient

key = "YOUR_SUBSCRIPTION_KEY"
region = "YOUR_SUBSCRIPTION_REGION"

credential = AzureKeyCredential(key)
endpoint = f"https://{region}.api.cognitive.microsoft.com/"

text_analytics_client = TextAnalyticsClient(endpoint, credential)
Azure Cognitive Service for Language provides several features. In the following, we will try out only a few of the available features:
- Language Detection (documentation)
- Sentiment Analysis (documentation)
- Key Phrase Extraction (documentation)
- Entity Linking (documentation)
In general, we will conduct REST calls using the Python SDK to the Cognitive Service by sending some data to the service and letting the pre-trained Machine Learning Model behind the scenes give responses regarding the data.
For each of the following features, copy the code blocks into new cells of your Jupyter Notebook.
Firstly, we can extract the language from text. Run this in a new cell in your CognitiveServices.ipynb notebook:
documents = [
    """
    This whole document is written in English. In order for the whole document to be written
    in English, every sentence also has to be written in English, which it is.
    """,
    "Il documento scritto in italiano.",
    "Dies ist in deutsche Sprache verfasst.",
    "这是一个用中文写的文件",
    "Este es un document escrito en Español.",
    "আমি প্রতি সপ্তাহে বিএমডাব্লিউ-এর বোর্ড অফ ম্যানেজমেন্টের সাথে ফোনে কথা বলি।"
]

response = text_analytics_client.detect_language(documents)
result = [doc for doc in response if not doc.is_error]

for doc in result:
    print("Language detected: {}".format(doc.primary_language.name))
    print("ISO6391 name: {}".format(doc.primary_language.iso6391_name))
    print("Confidence score: {}\n".format(doc.primary_language.confidence_score))
Your result should look like this:
Language detected: English
ISO6391 name: en
Confidence score: 1.0

Language detected: Italian
ISO6391 name: it
Confidence score: 0.87

Language detected: German
ISO6391 name: de
Confidence score: 1.0

Language detected: Chinese_Simplified
ISO6391 name: zh_chs
Confidence score: 1.0

Language detected: English
ISO6391 name: en
Confidence score: 1.0

Language detected: Bengali
ISO6391 name: bn
Confidence score: 1.0
As you can see, the client can detect a wide range of languages, variants, dialects and some regional languages. If the service cannot detect a language, you will receive the response unknown. Here you can find a list of all supported languages.
Secondly, we can analyse the sentiment of a given phrase. Go ahead and copy the code into your CognitiveServices.ipynb notebook:
documents = [
    "I did not like the restaurant. The food was somehow both too spicy and underseasoned. Additionally, I thought the location was too far away from the playhouse.",
    "The restaurant was decorated beautifully. The atmosphere was unlike any other restaurant I've been to.",
    "The food was yummy. :)",
    "I had a wonderful experience! The rooms were wonderful and the staff was helpful.",
    "I had not a great time at the hotel. The staff was rude and the food was awful.",
    "Los caminos que llevan hasta Monte Rainier son espectaculares y hermosos.",
    "La carretera estaba atascada. Había mucho tráfico el día de ayer."
]

response = text_analytics_client.analyze_sentiment(documents, language="en")
result = [doc for doc in response if not doc.is_error]

for doc in result:
    print("Overall sentiment of sentence {}: {}".format(int(doc.id)+1, doc.sentiment))
    print("Scores: positive={}; neutral={}; negative={} \n".format(
        doc.confidence_scores.positive,
        doc.confidence_scores.neutral,
        doc.confidence_scores.negative,
    ))
Your result should look like this:
Overall sentiment of sentence 1: negative
Scores: positive=0.01; neutral=0.02; negative=0.98

Overall sentiment of sentence 2: positive
Scores: positive=0.81; neutral=0.03; negative=0.16

Overall sentiment of sentence 3: positive
Scores: positive=0.99; neutral=0.0; negative=0.01

Overall sentiment of sentence 4: positive
Scores: positive=1.0; neutral=0.0; negative=0.0

Overall sentiment of sentence 5: negative
Scores: positive=0.01; neutral=0.0; negative=0.99

Overall sentiment of sentence 6: positive
Scores: positive=0.99; neutral=0.01; negative=0.01

Overall sentiment of sentence 7: negative
Scores: positive=0.07; neutral=0.15; negative=0.78
Thirdly, we can extract key phrases from text. In order to do so, copy the following code into your CognitiveServices.ipynb notebook:
documents = [
    "Redmond is a city in King County, Washington, United States, located 15 miles east of Seattle.",
    """
    I need to take my cat to the veterinarian. He has been sick recently, and I need to take him
    before I travel to South America for the summer.
    """,
    "I had a wonderful experience! The rooms were wonderful and the staff was helpful."
]

response = text_analytics_client.extract_key_phrases(documents, language="en")
result = [doc for doc in response if not doc.is_error]

for doc in result:
    print("Key phrases of sentence {}: {}".format(int(doc.id)+1, ', '.join(doc.key_phrases)))
Example Result:
Key phrases of sentence 1: King County, United States, Redmond, city, Washington, Seattle
Key phrases of sentence 2: South America, cat, veterinarian, summer
Key phrases of sentence 3: wonderful experience, rooms, staff
And last but not least, we can detect and link entities in text. Entity linking identifies and disambiguates the identity of entities found in text. For example, in the sentence "We went to Seattle last week.", the word "Seattle" would be identified, with a link to more information on Wikipedia. In order to try it out, copy the code into your CognitiveServices.ipynb notebook:
documents = [
    "Microsoft was founded by Bill Gates and Paul Allen. Its headquarters are located in Redmond.",
    "Easter Island, a Chilean territory, is a remote volcanic island in Polynesia.",
    "Angela Merkel war bis 2021 die deutsche Bundeskanzlerin und hatte im Deutschen Reichstagsgebäude ihren Sitz."
]

response = text_analytics_client.recognize_linked_entities(documents, language="en")
result = [doc for doc in response if not doc.is_error]

for doc in result:
    for entity in doc.entities:
        print("Entity: {}".format(entity.name))
        print("\tURL: {}".format(entity.url))
        print("\tData Source: {}".format(entity.data_source))
        print("\tEntity matches:")
        for match in entity.matches:
            print("\t\tEntity match text: {}".format(match.text))
            print("\t\tConfidence Score: {}".format(match.confidence_score))
            print("\t\tOffset: {}".format(match.offset))
Example result:
Entity: Microsoft
	URL: https://en.wikipedia.org/wiki/Microsoft
	Data Source: Wikipedia
	Entity matches:
		Entity match text: Microsoft
		Confidence Score: 0.49
		Offset: 0
Entity: Bill Gates
	URL: https://en.wikipedia.org/wiki/Bill_Gates
	Data Source: Wikipedia
	Entity matches:
		Entity match text: Bill Gates
		Confidence Score: 0.52
		Offset: 25
Entity: Paul Allen
	URL: https://en.wikipedia.org/wiki/Paul_Allen
	Data Source: Wikipedia
	Entity matches:
		Entity match text: Paul Allen
		Confidence Score: 0.54
		Offset: 40
Entity: Redmond, Washington
	URL: https://en.wikipedia.org/wiki/Redmond,_Washington
	Data Source: Wikipedia
	Entity matches:
		Entity match text: Redmond
		Confidence Score: 0.2
		Offset: 84
Entity: Easter Island
	URL: https://en.wikipedia.org/wiki/Easter_Island
	Data Source: Wikipedia
	Entity matches:
		Entity match text: Easter Island
		Confidence Score: 0.41
		Offset: 0
Entity: Chile
	URL: https://en.wikipedia.org/wiki/Chile
	Data Source: Wikipedia
	Entity matches:
		Entity match text: Chilean
		Confidence Score: 0.25
		Offset: 17
Entity: Polynesia
	URL: https://en.wikipedia.org/wiki/Polynesia
	Data Source: Wikipedia
	Entity matches:
		Entity match text: Polynesia
		Confidence Score: 0.25
		Offset: 67
Entity: Angela Merkel
	URL: https://en.wikipedia.org/wiki/Angela_Merkel
	Data Source: Wikipedia
	Entity matches:
		Entity match text: Angela Merkel
		Confidence Score: 0.83
		Offset: 0
Entity: Reichstag building
	URL: https://en.wikipedia.org/wiki/Reichstag_building
	Data Source: Wikipedia
	Entity matches:
		Entity match text: Reichstagsgebäude
		Confidence Score: 0.81
		Offset: 79
If you want to directly create a dashboard within Power BI from the derived results, have a look at this tutorial.
Language Studio is a set of UI-based tools that lets you explore, build, and integrate features from Azure Cognitive Service for Language into your applications. Using the Studio, you can get started without needing to write code, and then use the available client libraries and REST APIs in your application.
Each of the features of the Cognitive Service for Language has a demo-like experience inside Language Studio that lets you input text, and presents the response both visually, and in JSON. These demos help you quickly test these prebuilt features without using code.
Since we looked at Entity Linking in the last paragraph, let's check out the Studio's capabilities for this feature.
- Go to the Language Studio
- Log in using your Azure account.
- A window will pop up prompting you to choose a language resource. Choose the one you created previously.
- Choose the feature Find linked entities.
- Paste the same text as before (Microsoft was founded by Bill Gates and Paul Allen on April 4, 1975, to develop and sell BASIC interpreters for the Altair 8800.) into the box and hit Run.
- Examine the results.
Feel free to try out the Language Studio for some of the other features.
We can repeat the previous steps to do the same for the Text Analytics API in Postman.
Here you will find the Postman collections we have created for you for the Translation and Text Analytics API.
- Download the Text Analytics file and Import it to your Postman.
- Create an Environment for the Text Analytics API.
- Add only the api_key variable. Set it as "secret" and paste the key for that service as found in the portal.
- Finally, assign the environment created to the respective collection.
 .
.
Try the different APIs!
Note: the Text Analytics API has several optional parameters. You can untick those boxes in order to try out the API.
So far, we have covered the Language pillar of the Cognitive Services such as Translation. In a next step, we will look at the pillar Speech.
| Azure Cognitive Services | Information |
|---|---|
| Speech API | https://docs.microsoft.com/en-us/azure/cognitive-services/speech-service/ |
🚩 Goal: Leverage Speech-to-Text and Text-to-Speech
In this section, you will learn about the benefits and capabilities of the Text-to-speech Cognitive Service, which enables your applications, tools, or devices to convert text into human-like synthesized speech and the Speech-to-text Cognitive Service which enables your application, tools, or devices to convert real-time transcription of audio streams into text. These are two among many more capabilities of the Speech service.
In the language of your choice write two small scripts or apps that:
- Convert written text into speech (German or English)
- Convert speech into written text (German or English)
This time, we will use the Python SDK for using the service.
First, we need to deploy a Speech service with Azure CLI:
az cognitiveservices account create --name aidevcollegespeech --resource-group <your resource group> --kind SpeechServices --sku F0 --location westeurope --yesHint: If you have already created a Speech service with SKU F0, please use SKU S0!
You can find your API key under the service, then Keys, or get it via Azure CLI:
- Get the key:
az cognitiveservices account keys list --name <your resource-name> --resource-group <your resource-group-name>
- Get the endpoint:
az cognitiveservices account show --name <your resource-name> --resource-group <your resource-group-name> --query "properties.endpoint"To use any SDK, you need to first install it. In this case we will install the Python Speech SDK. Paste the following code in your jupyter notebook:
pip install azure-cognitiveservices-speechIf you are using a Mac, you might need to run this first:
python3 -m pip install --upgrade pipOnce the SDK is installed, please restart the kernel. After that we can write our code.
Firstly, import the necessary libraries.
import azure.cognitiveservices.speech as speechsdk # import the speech sdk
import IPython.display as ipd # import IPython.display to display the audio output
Next, create a speech configuration instance and add the api key and region of your resource in the below code. Then paste it into a new cell.
# Set the api key and location/region of your resource
speech_config = speechsdk.SpeechConfig(subscription="YOUR_API_KEY", region="YOUR_RESOURCE_LOCATION")
Now, define the language and voice. We have already selected them for your. Feel free to change them up a little.
# Choose the language and voice the text should be spoken
speech_config.speech_synthesis_language = "en-US"
speech_config.speech_synthesis_voice_name ="en-GB-SoniaNeural"
In the next cell you will create a welcome.wav file where the synthesized text will be saved to.
audio_config = speechsdk.audio.AudioOutputConfig(filename="welcome.wav")In the following cell you will create a SpeechSynthesizer object which executes the text-to-speech service.
synthesizer = speechsdk.SpeechSynthesizer(speech_config=speech_config, audio_config=audio_config)Now, call the text to speech service.
synthesizer.speak_text_async("Hello welcome to the AI developer college")The text should now have been saved as spoken output to the welcome.wav file. Run the following cell to here the spoken output.
ipd.Audio('welcome.wav')As mentioned earlier, there are many different voices available to choose from. By updating speech_config.speech_synthesis_voice_name we can easily specify a different language or voice. From here on, it should be easy to generate German speech. Try it out!
Let's take the generated or provided welcome.wav from the example before and convert it back to text.
Paste the following code in the notebook you used before.
# Define where to receive the speech input from
audio_input = speechsdk.AudioConfig(filename="welcome.wav")

# Create SpeechRecognizer object which executes speech-to-text
speech_recognizer = speechsdk.SpeechRecognizer(speech_config=speech_config, audio_config=audio_input)

# Call the speech to text service and print the result
result = speech_recognizer.recognize_once_async().get()
print(result.text)
For recognizing longer text with multiple sentences, you can follow the following tutorial.
Note:
Compressed audio is also supported (e.g., MP3s), see here,
Besides that, the speech-to-text API expects audio with the following specifics:
- 16-bit WAV format with PCM or OGG format with OPUS
- Single channel (mono) at 8 or 16 KHz
More details, see here.
Speech Studio is a set of UI-based tools for building and integrating features from Azure Cognitive Services Speech service in your applications. You create projects in Speech Studio by using a no-code approach, and then reference those assets in your applications by using the Speech SDK, the Speech CLI, or the REST APIs. This is especially useful if you want to run quick tests.
Try performing text-to-speech and speech-to-text with the Speech Studio.
- Go to the Speech Studio
- Click on Real-time Speech-to-text
- Try out the different features
- Click on Audio Content Creation
- Create a new text file or upload one
- Try out different voices
- Export the audio file
So far we have focused on the two pillars Language and Speech. Now we want to jump to the pillar Vision by analysing images.
| Azure Cognitive Services | Information |
|---|---|
| Computer Vision API | https://docs.microsoft.com/en-us/azure/cognitive-services/computer-vision/home |
In the language of your choice (Python solution is provided), write two small scripts that
- Convert hand-written text from an image into text - Test data: 1, 2
- Convert printed text from an image into text - Test data: 1, 2
Once again we will conduct REST Calls to the Computer Vision Cognitive Service and get a JSON in response.
The Computer Vision API offers several services for processing images:
- Optical Character Recognition (OCR)
- Image Analysis
- Spatial Analysis
In this section, we will concentrate on the service's OCR capabilities. It can extract information from printed text (in several languages), handwritten text (English only + Chinese, French, German and Italian in preview), digits, and currency symbols from images and multi-page PDF documents. It's optimized to extract text from text-heavy images and multi-page PDF documents with mixed languages. It supports detecting both printed and handwritten text in the same image or document. You can get more details here.
🚩 Goal: Leverage OCR to make a hand-written text document in images machine-readable
First, create a Computer Vision API Key with Azure CLI:
az cognitiveservices account create --name aidevcollege-CV --resource-group <your resource group> --kind ComputerVision --sku F0 --location westeurope --yesHint: If you already created a Computer Vision API Key with SKU F0, please use SKU S0!
As we're dealing with images, we need a few Python packages to help with this. Go ahead and copy the code into a new Cell in your CognitiveServices.ipynb Notebook.
import requests, json, time
import matplotlib.pyplot as plt
from matplotlib.patches import Rectangle
from matplotlib.patches import Polygon
from PIL import Image
from io import BytesIO
Ok, now we can start recognizing some text. With the Computer Vision API, this is a two-step process:
- Submit the image (Post-request)
- Query if the image has been processed (Get-request)
subscription_key = "YOUR_SUBSCRIPTION_KEY"
location = "YOUR_RESOURCE_REGION"

url = "https://" + location + ".api.cognitive.microsoft.com/vision/v3.2/read/analyze"
image_url = "https://bootcamps.blob.core.windows.net/ml-test-images/ocr_handwritten_1.jpg"

headers = {'Ocp-Apim-Subscription-Key': subscription_key, 'Content-type': 'application/json'}
data    = {'url': image_url}

# Post image URL to the API
response = requests.post(url, headers=headers, json=data)

# Return query URL for getting the status
operation_url = response.headers["Operation-Location"]

# Poll until we get a result (...or something failed)
recognition = {}
poll = True
while (poll):
    response_final = requests.get(operation_url, headers=headers)
    recognition = response_final.json()
    time.sleep(1)
    if ("analyzeResult" in recognition):
        poll = False
    if ("status" in recognition and recognition['status'] == 'failed'):
        poll = False

print(json.dumps(recognition, indent=2))
The result should look like this (just a snippet):
{
  "status": "succeeded",
  "createdDateTime": "2022-02-22T10:47:47Z",
  "lastUpdatedDateTime": "2022-02-22T10:47:48Z",
  "analyzeResult": {
    "version": "3.2.0",
    "modelVersion": "2021-04-12",
    "readResults": [
      {
        "page": 1,
        "angle": 4.7589,
        "width": 1000,
        "height": 978,
        "unit": "pixel",
        "lines": [
          {
            "boundingBox": [
              272,
              260,
              858,
              286,
              856,
              389,
              266,
              366
            ],
            "text": "Shopping list :",
            "appearance": {
              "style": {
                "name": "handwriting",
                "confidence": 0.785
              }
            },
            "words": [
              {
                "boundingBox": [
                  279,
                  260,
                  653,
                  284,
                  649,
                  389,
                  267,
                  348
                ],
                "text": "Shopping",
                "confidence": 0.994
              },
              {
                "boundingBox": [
                  676,
                  285,
                  803,
                  286,
                  803,
                  388,
                  673,
                  389
                ],
                "text": "list",
                "confidence": 0.92
              }
Ok, looks like it recognized something. Let's visualize it:
polygons = []

# Get bounding boxes of the text
if ("analyzeResult" in recognition):
    analyzeResult = recognition["analyzeResult"]
    readResults = analyzeResult["readResults"]
   # print(json.dumps(r, indent=2))
    for line in readResults[0]["lines"]:
        polygons += [(line["boundingBox"], line["text"])]

# Display image and overlay text
plt.figure(figsize=(15, 15))
image = Image.open(BytesIO(requests.get(image_url).content))
ax = plt.imshow(image)
for polygon in polygons:
    vertices = [(polygon[0][i], polygon[0][i+1])
        for i in range(0, len(polygon[0]), 2)]
    text = polygon[1]
    patch = Polygon(vertices, closed=True, fill=False, linewidth=2, color='y')
    ax.axes.add_patch(patch)
    plt.text(vertices[0][0], vertices[0][1], text, fontsize=20, va="top")
_ = plt.axis("off")
plt.show()
Visualization:

Here is another image we can test with:
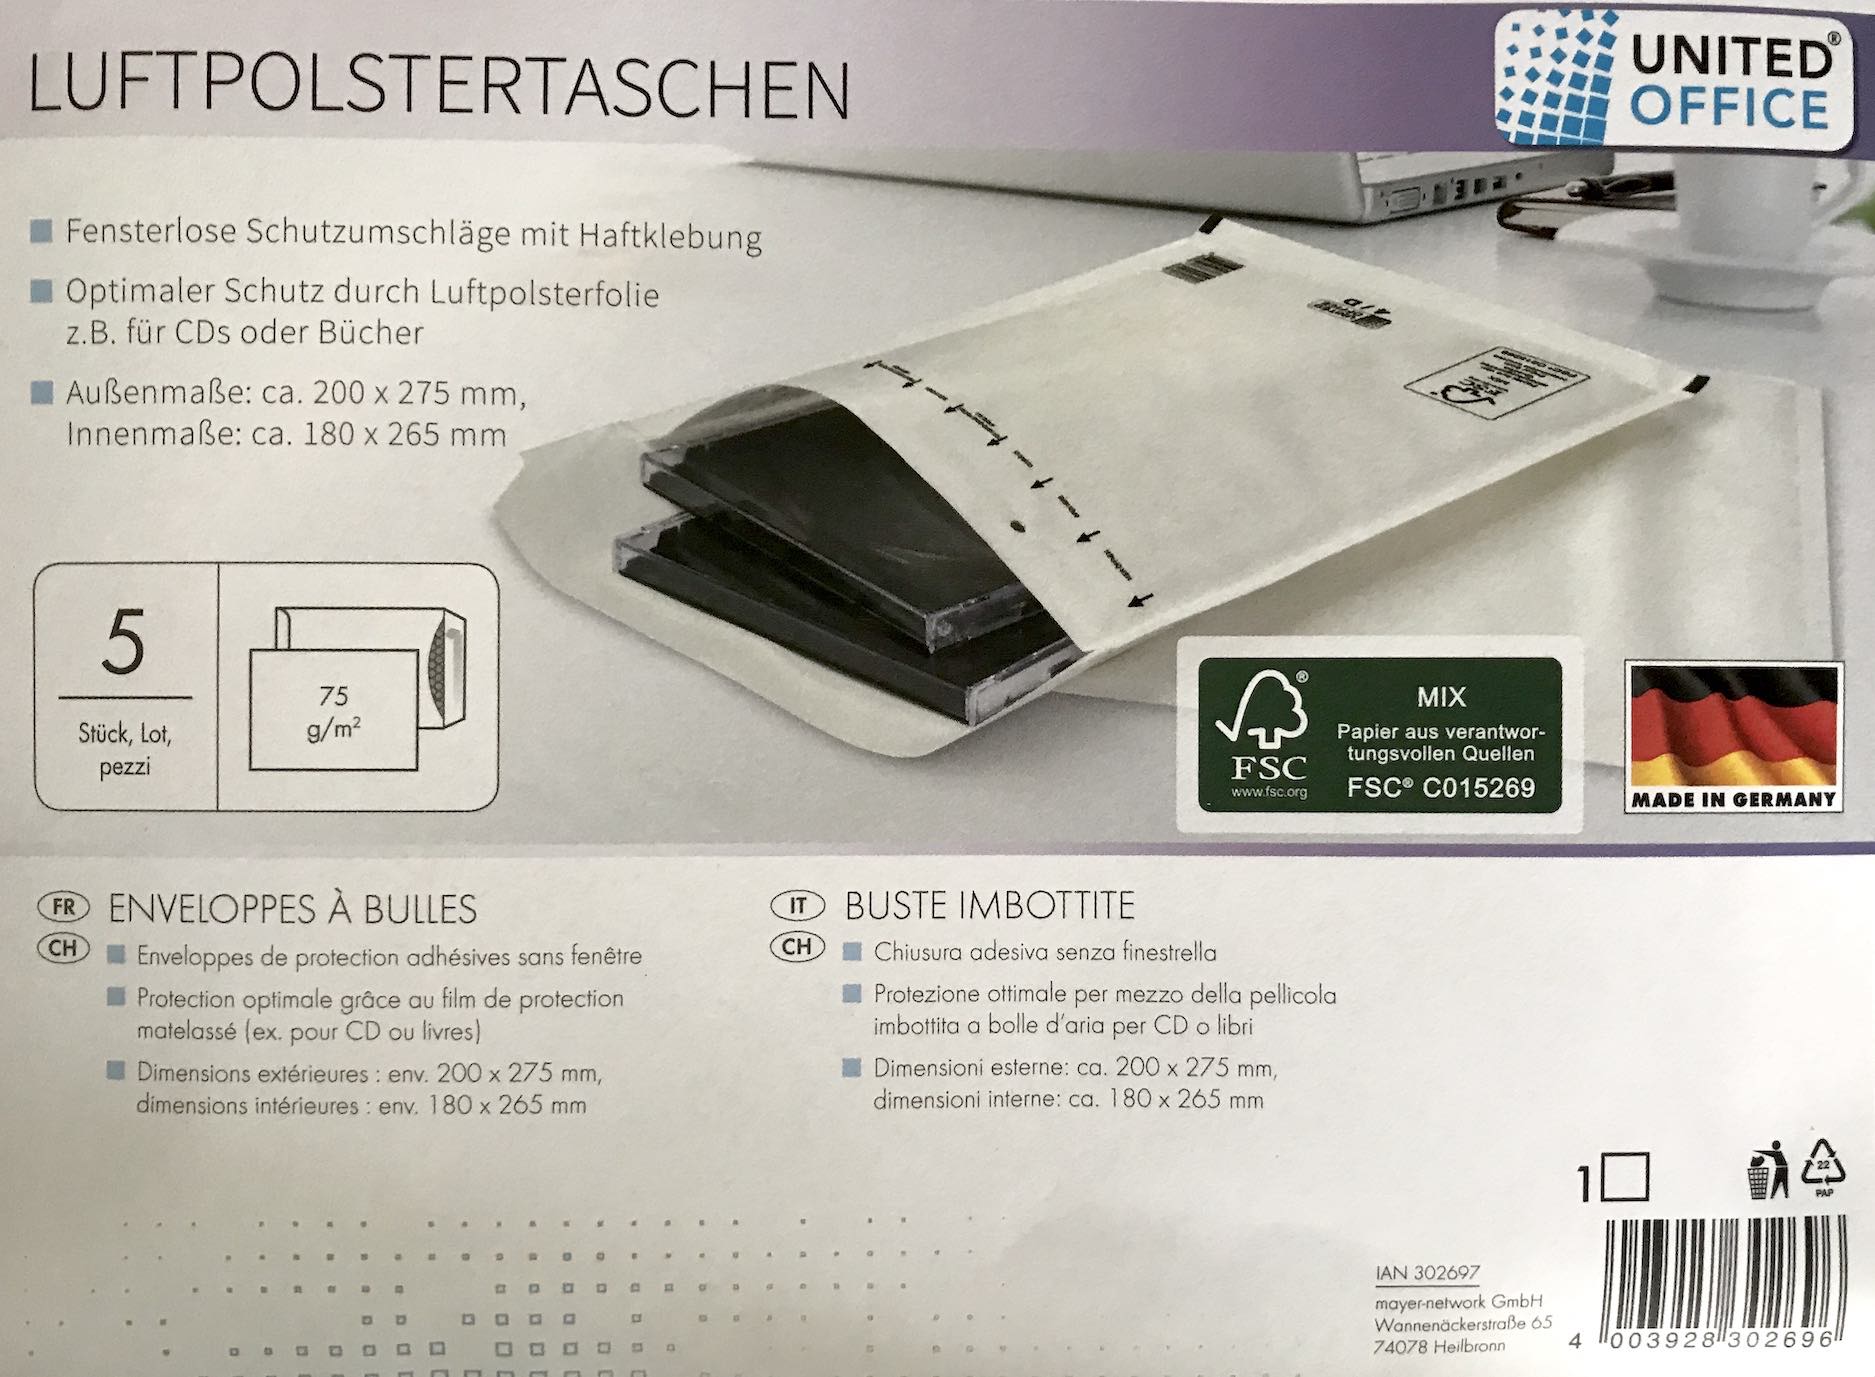
In a next step, we will use the same service by just extracting text from printed text in images.
🚩 Goal: Leverage OCR to make a printed text document in images machine-readable
It is very similar as the previous example- except that is a synchronous call, hence we directly get back the recognition result. Go ahead and copy the Code into a new Cell into your CognitiveServices.ipynb Notebook:
url = "https://" + location + ".api.cognitive.microsoft.com/vision/v3.2/ocr"
image_url = "https://bootcamps.blob.core.windows.net/ml-test-images/ocr_printed_1.jpg"

headers = {'Ocp-Apim-Subscription-Key': subscription_key}
params  = {'language': 'unk', 'detectOrientation': 'true'}
data    = {'url': image_url}

response = requests.post(url, headers=headers, params=params, json=data)
recognition_result = response.json()

# Extract the word bounding boxes and text
line_infos = [region["lines"] for region in recognition_result["regions"]]
word_infos = []
for line in line_infos:
    for word_metadata in line:
        for word_info in word_metadata["words"]:
            word_infos.append(word_info)
word_infos
Example JSON response (just a snippet):
[
  { "boundingBox": "31,50,817,70", "text": "LUFTPOLSTERTASCHEN" },
  { "boundingBox": "30,219,23,24", "text": "u" },
  { "boundingBox": "68,216,168,27", "text": "Fensterlose" },
  { "boundingBox": "247,216,263,37", "text": "Schutzumschläge" },
  { "boundingBox": "522,221,47,26", "text": "mit" },
  { "boundingBox": "580,221,182,37", "text": "Haftklebung" },
  { "boundingBox": "66,276,149,34", "text": "Optimaler" },
  { "boundingBox": "225,276,99,27", "text": "Schutz" },
  { "boundingBox": "334,277,84,26", "text": "durch" },
  { "boundingBox": "432,277,227,35", "text": "Luftpolsterfolie" }
]
Visualization:
# Display the image and overlay it with the extracted text
plt.figure(figsize=(15, 15))
image = Image.open(BytesIO(requests.get(image_url).content))
ax = plt.imshow(image, alpha=0.5)
for word in word_infos:
    bbox = [int(num) for num in word["boundingBox"].split(",")]
    text = word["text"]
    origin = (bbox[0], bbox[1])
    patch  = Rectangle(origin, bbox[2], bbox[3], fill=False, linewidth=2, color='y')
    ax.axes.add_patch(patch)
    plt.text(origin[0], origin[1], text, fontsize=11, va="top")
_ = plt.axis("off")
plt.show()
Example Result:

Here is one more image we can test with!
From recognizing text on images we will now detect objects on images for this we will introduce the Custom Vision Cognitive Service.
Azure Custom Vision is an image recognition service that lets you build, deploy, and improve your own image identifiers. An image identifier applies labels (which represent classes or objects) to images, according to their visual characteristics. Unlike the Computer Vision service, Custom Vision allows you to specify the labels and train custom models to detect them.
| Azure Cognitive Services | Information |
|---|---|
| Custom Vision API | https://docs.microsoft.com/en-us/azure/cognitive-services/custom-vision-service/ |
🚩 Goal: Detect beer glasses in images
What it does? The Custom Vision service uses a machine learning algorithm to analyze images. You, the developer, submits groups of images that feature and lack the characteristics in question. You label the images yourself at the time of submission. Then, the algorithm trains with this data and calculates its own accuracy by testing itself on those same images. Once the algorithm is trained, you can test, retrain, and eventually use it in your image recognition app to classify new images. You can also export the model itself for offline use.
In this chapter, we will use Custom Vision to build a flower image classifier.
First we deploy the Azure Custom Vision Service in the Azure Portal:

The Custom Vision Service has 2 types of endpoints. One for training the model and one for running predictions against the model. For this example, we will use both. Therfore, select both. Fill in the name and the region as well as the pricing tier (F0) for the training and the prediction resource. Then hit create.

Then, log in to Custom Vision with your Azure credentials.
Create a new project of type Classification, classification type Multiclass and Domain General:

Next, create tags for the different flower types our image classifier will be able to detect - daisy, rose, tulip, water lily and negative (none of the 4 flower types). Then upload minimum 15 training images per tag and tag them accordingly. Feel free to develop an image classifier with different images than flowers if this is what you prefer.

Once we've tagged all images, we can hit the Train button. For this challenge choose Quick Training. After 1-2 minutes, we'll see the training statistics:

Let's briefly look at the results and make sure we understand them:
- Precision indicates the fraction of identified classifications that were correct. For example, if the classifier detects 10 images as tulips and only 5 images are actual tulips, the precision would be 50%.
- Recall indicates the fraction of actual classifications that were correctly identified. For example, if the classifier detects 10 images as roses and 10 are actual roses, the recall would be 50%.
- ** - Average Precision** summarises the precision and recall at different thresholds.
Under Quick Test, we can briefly test images and see what the service will detect. Look for the different flower types online and paste the image URLs in the Quick Test section. We only added a few training images (50 per tag are recommended) with a lot of variance, the results are not great yet. By adding more images, we could most likely improve the performance significantly.
If we go to the Performance tab, we can get the Prediction URL and the Prediction-Key. We can use this endpoint to programmatically access the service. We will do this in a later challenge.
Hint: Using Custom Vision is also possible with Python SDK (see here Custom Vision with Python SDK)
- We deployed several Cognitive Services using the Azure Portal and the Azure CLI.
- We called those Cognitive Service REST APIs by using Python.
- We trained custom machine learning models (e.g. Custom Vision) using a UI.
In a next step, we will try out the Azure Form Recognizer, which helps you extract text, tables, structure, and key-value pairs from documents.
⚡ Let's go to AI Developer College Day2 - Form Recognizer!
Remove the sample resource group at the end of the day. Don't remove it for now as you will be reusing the resources in the next challenge.
$ az group delete -n <yourResourceGroupName>