Getting Started
This document will walk through the process of adding Hovercast to your project. The integration process is summarized by the following steps:
- Attach Hovercast to the scene.
- Create the menu hierarchy, items, and actions.
- Add optional customizations for the entire menu and individual items.
- Link your navigation, customization, and input providers to Hovercast.
These instructions and examples are based on the "LeapVR" demo scene. This particular scene (in Unity 3D) uses Oculus Rift cameras and Leap Motion input. See the other demo scenes for variations.
Hovercast's main script is called HovercastSetup. This script is responsible for generating and updating the menu. The first step is to attach it to the scene correctly.
When using Leap Motion input, HovercastSetup must be attached as a child of Leap Motion's "HandController" object. In general, HovercastSetup needs to be in the same coordinate system as the 3D input. This keeps Hovercast anchored in the correct position and orientation, allowing the menu's graphics to stay aligned with the 3D input.
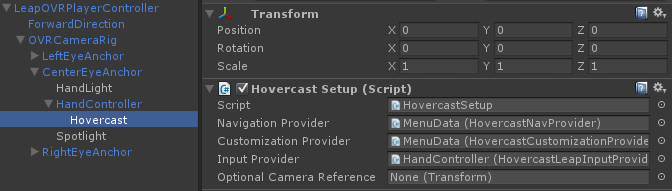
The "Hovercast" object is a child of "HandController", and contains a
HovercastSetupscript.
Hovercast supports a nested hierarchy of menu items, which you can create directly within the Unity editor. Starting with one object as the menu's "root", add one child object for each menu item. Each of these items can also have child objects.
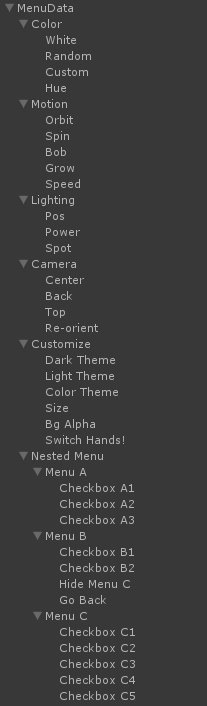
The full demo menu hierarchy, as seen in the demo video.
Add Details
Each object in this hierarchy must have a HovercastNavItem script attached to it. This script provides several editor fields, where you can enter the menu item's details. See "Types of Menu Items" for more >
Add Listeners
To handle an item's events and actions, you'll need to create a custom script. This script must inherit from HovercastNavItemListener, which provides the structure required to create the listener. See "Menu Item Listeners" for more >
Hovercast comes with a set of default renderers, which are responsible for drawing various aspects of the menu. These renderers offer a variety of settings for customization. Hovercast also provides interaction-related settings.
As a starting point, every Hovercast integration must include an object with the HovercastCustomizationProvider script attached. When used on its own, this script will use Hovercast's default renderers and settings.
There are four customization scripts available:
-
HovercastCustomSegmentcontrols the appearance of the menu item "segments". -
HovercastCustomPalmcontrols the appearance of the menu's palm "segment", where the title is displayed. -
HovercastCustomCursorcontrols the appearance of the shape that follows the cursor's fingertip position. -
HovercastCustomInteractioncontrols settings related to menu interaction and usage, like distances and timings.
These customization scripts must be attached to the same object that contains the HovercastCustomizationProvider script. The values provided in these scripts will override Hovercast's default settings.
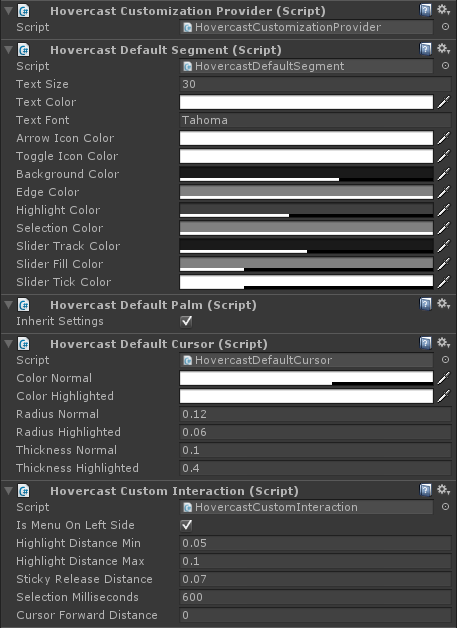
The settings used by the demo.
...